Custom Domains in Netlify
Now that we have our first deployment, let’s configure a custom domain for our app through Netlify.
A Note to Readers from Part I
The following section is assuming that you completed Part I independently and that the custom domains below are being set up from scratch. However, if you’ve just completed Part I, then you have a couple of options:
-
Configure a new custom domain
Let’s say your domain from Part I is something like
https://notes-app.my-domain.com. Then for the following section you can configure something likehttps://notes-app-2.my-domain.com. This is the preferred option since it does not interfere with what you had configured previously. This is what we do for the tutorial demo app as well. You can see the Part I version here and the Part II version here. The downside is that you’ll have two different versions of the frontend React app. -
Replace the old domain
You might be working through this guide to build an app as opposed to learning how to build one. If that’s the case, it doesn’t make sense that you have two versions of the frontend floating around. You’ll need to disconnect the domain from Part I. To do that, remove the Route 53 records sets that we created for the apex domain and the www domain in Part I.
If you are not sure about the two above options or have any questions, post a comment in the discussion thread that we link to at the bottom of the chapter.
Let’s get started!
Pick a Netlify Site Name
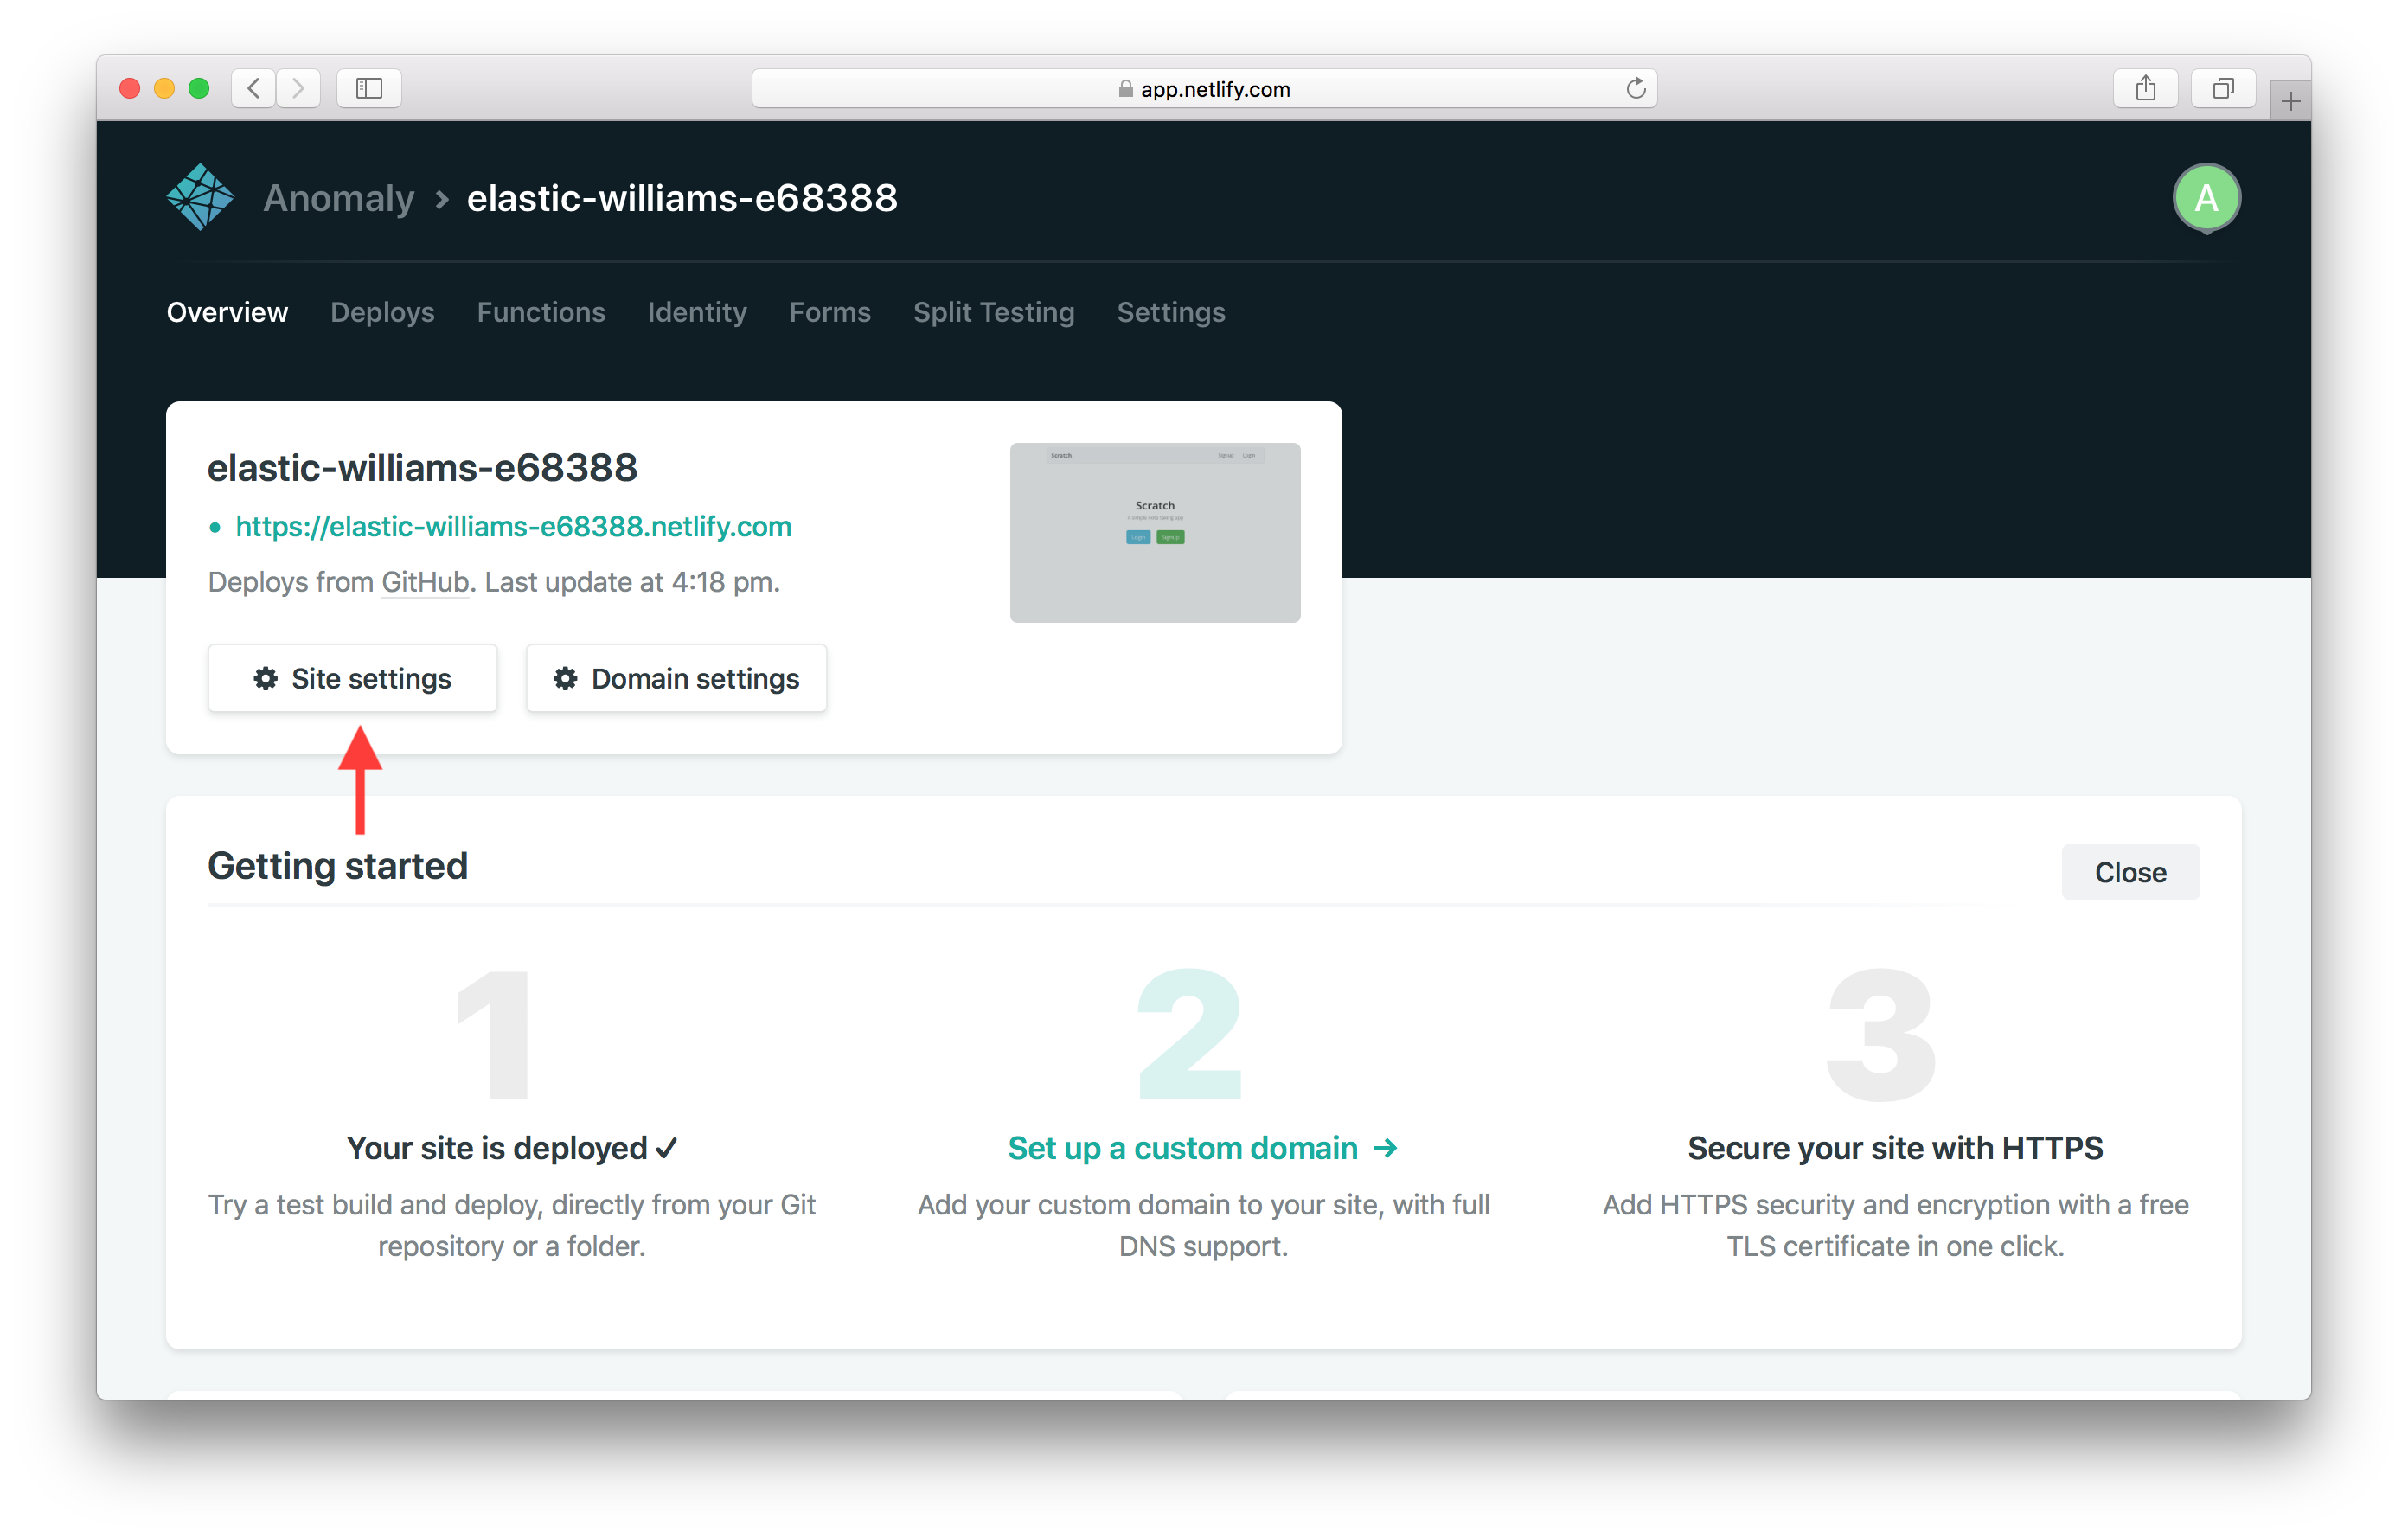
From the project page in Netlify, hit Site settings.
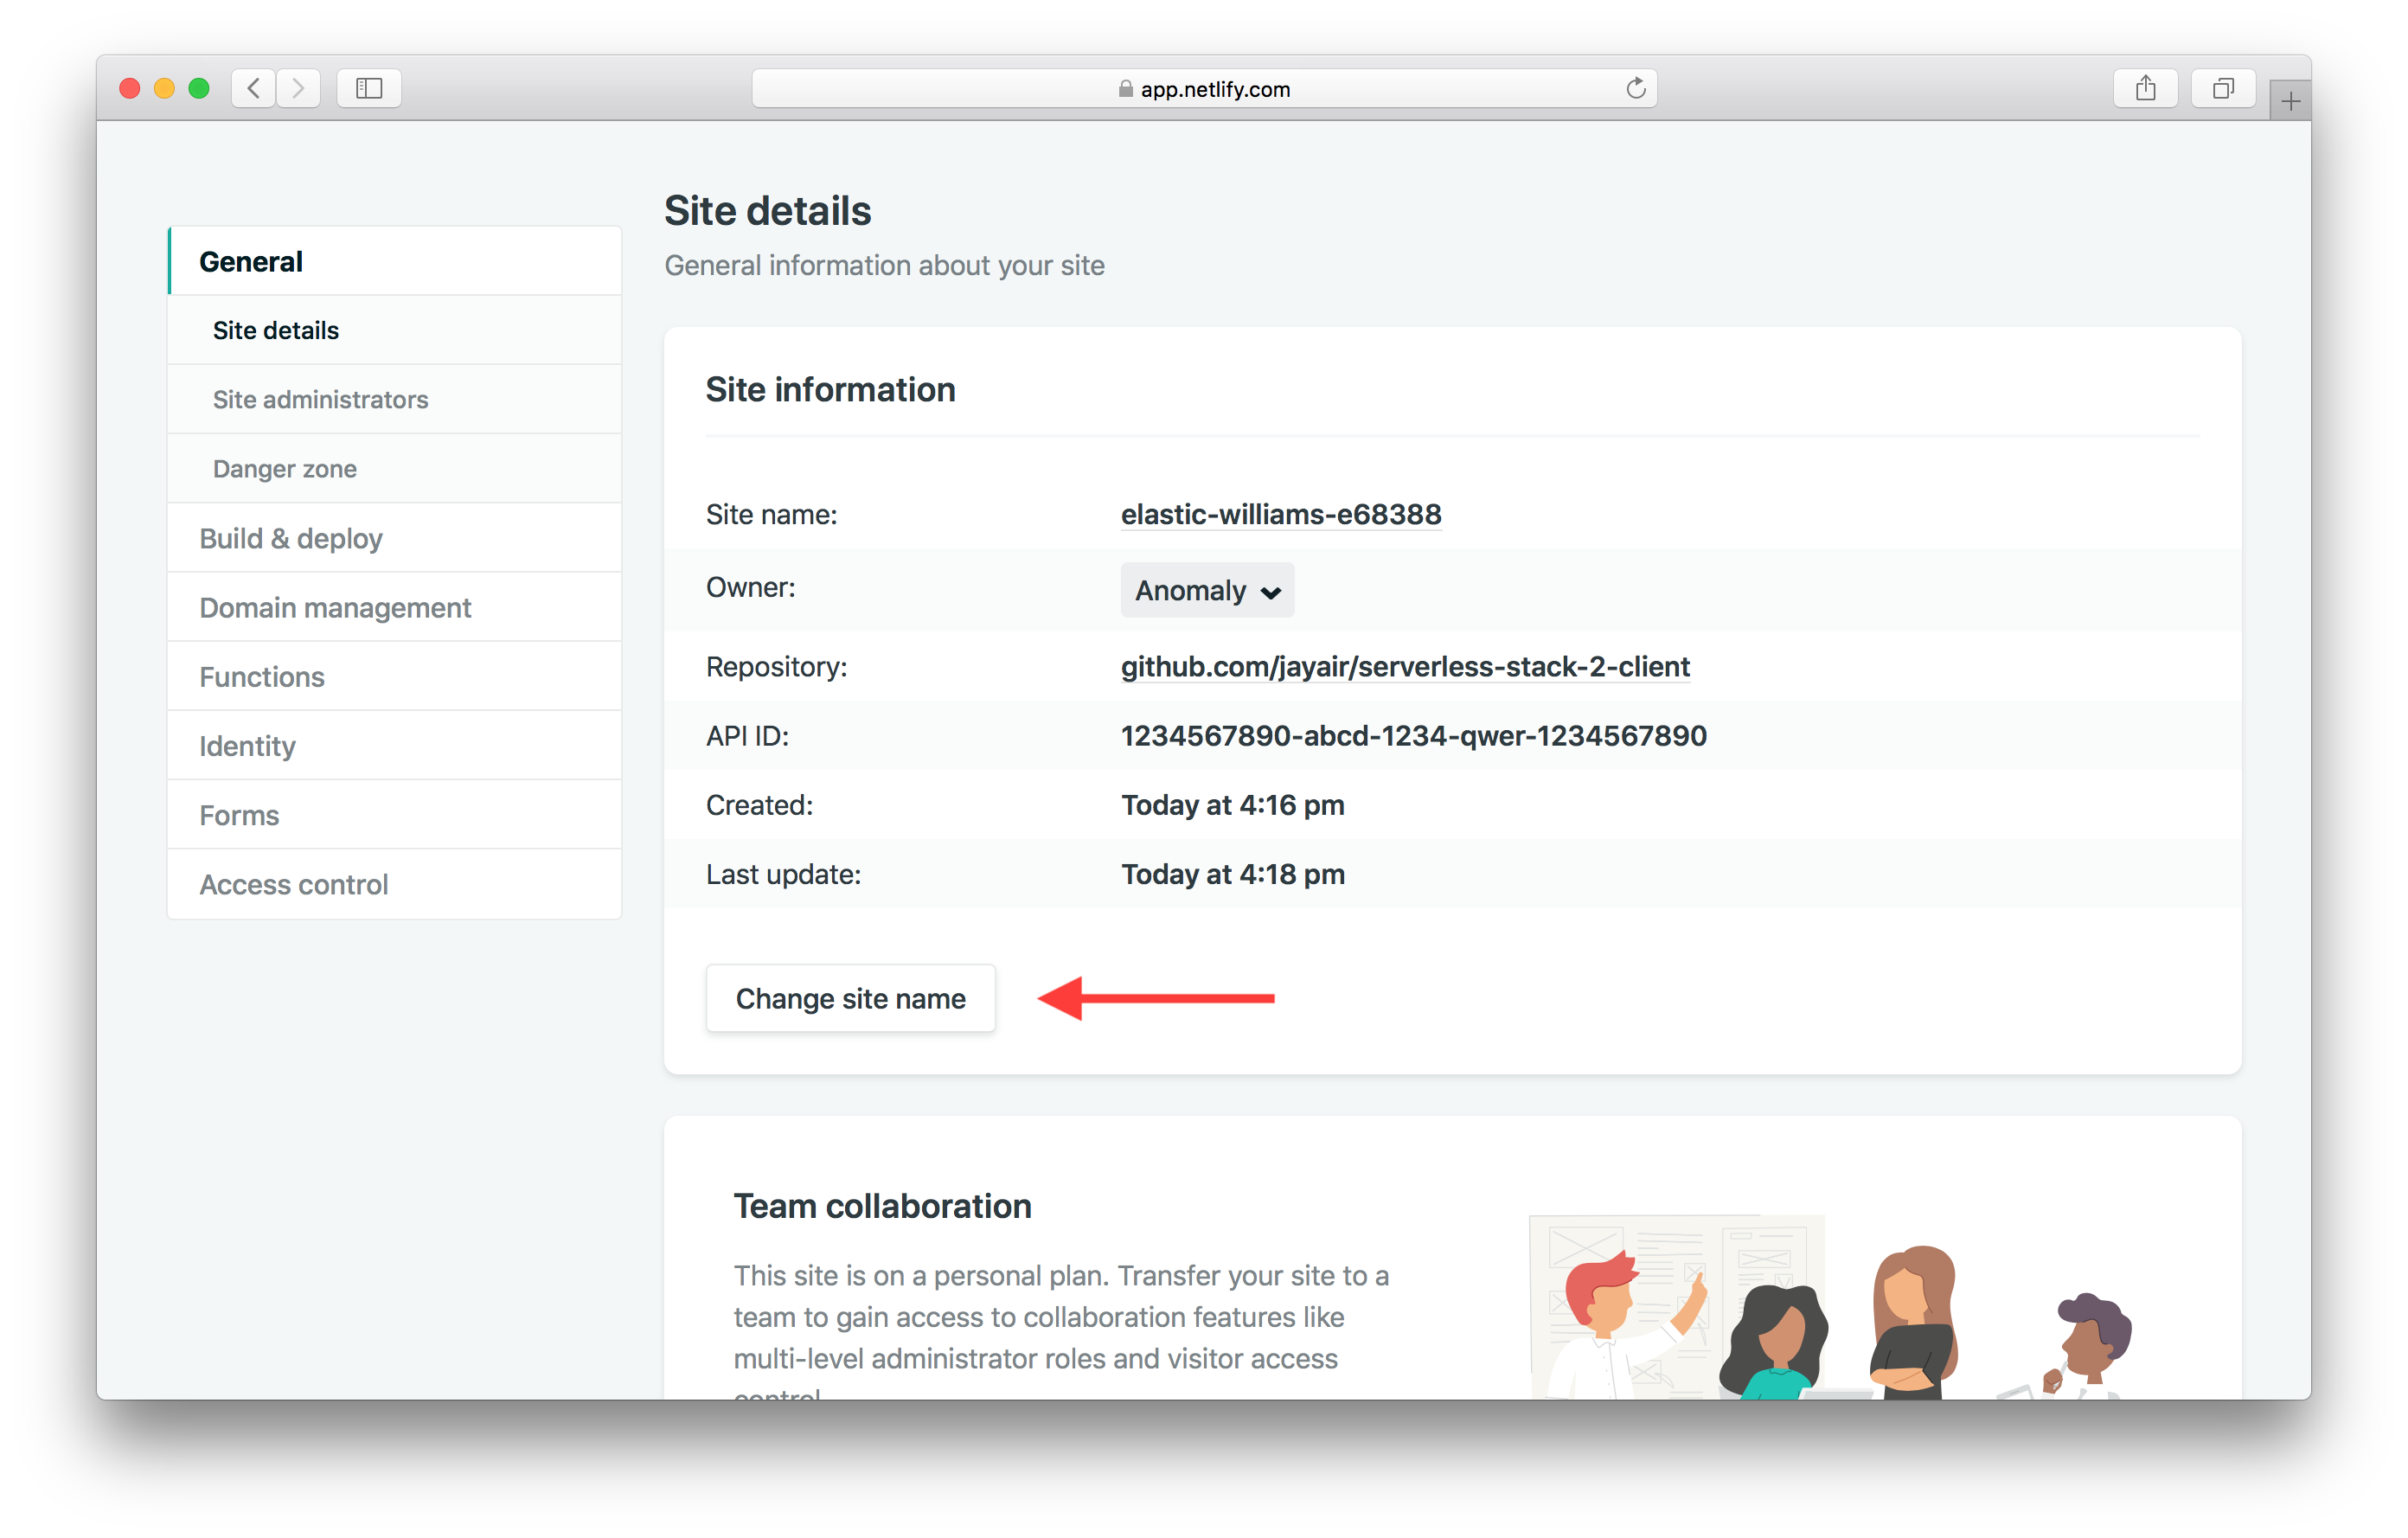
Under Site information hit Change site name.
The site names are global, so pick a unique one. In our case we are using serverless-stack-2-client. And hit Save.
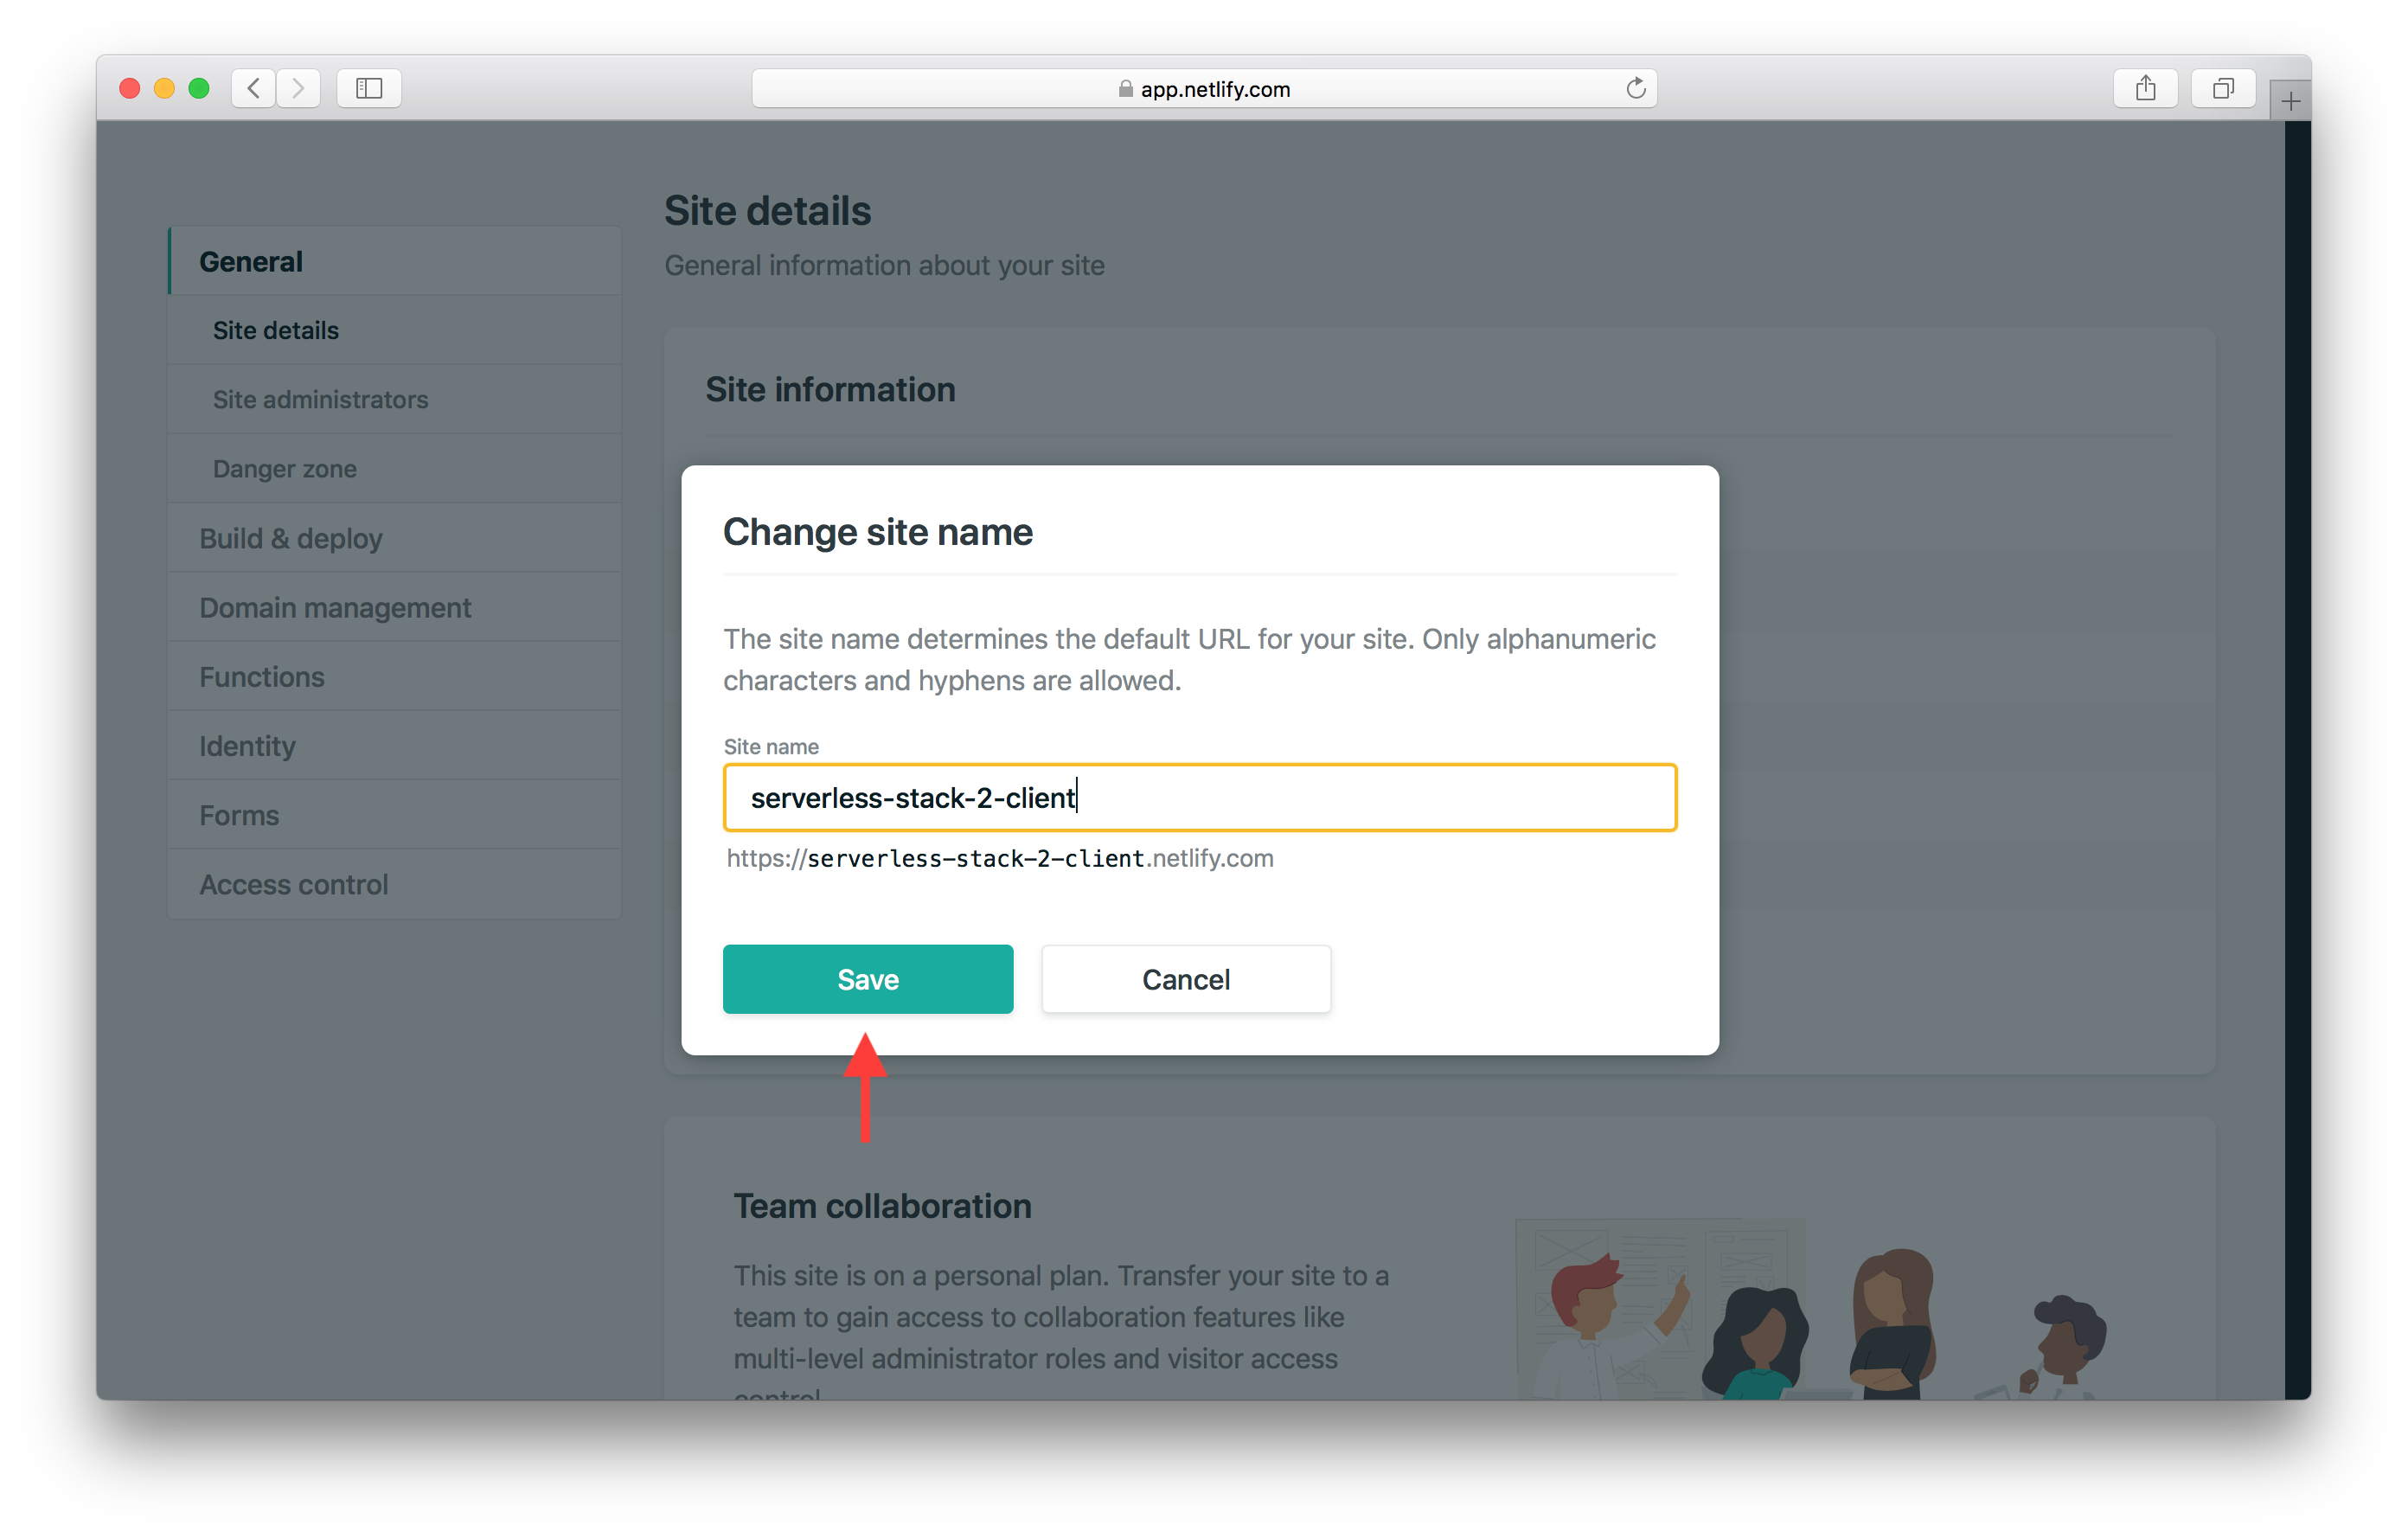
This means that our Netlify site URL is now going to be https://serverless-stack-2-client.netlify.com. Make a note of this as we will use this later in this chapter.
Domain Settings in Netlify
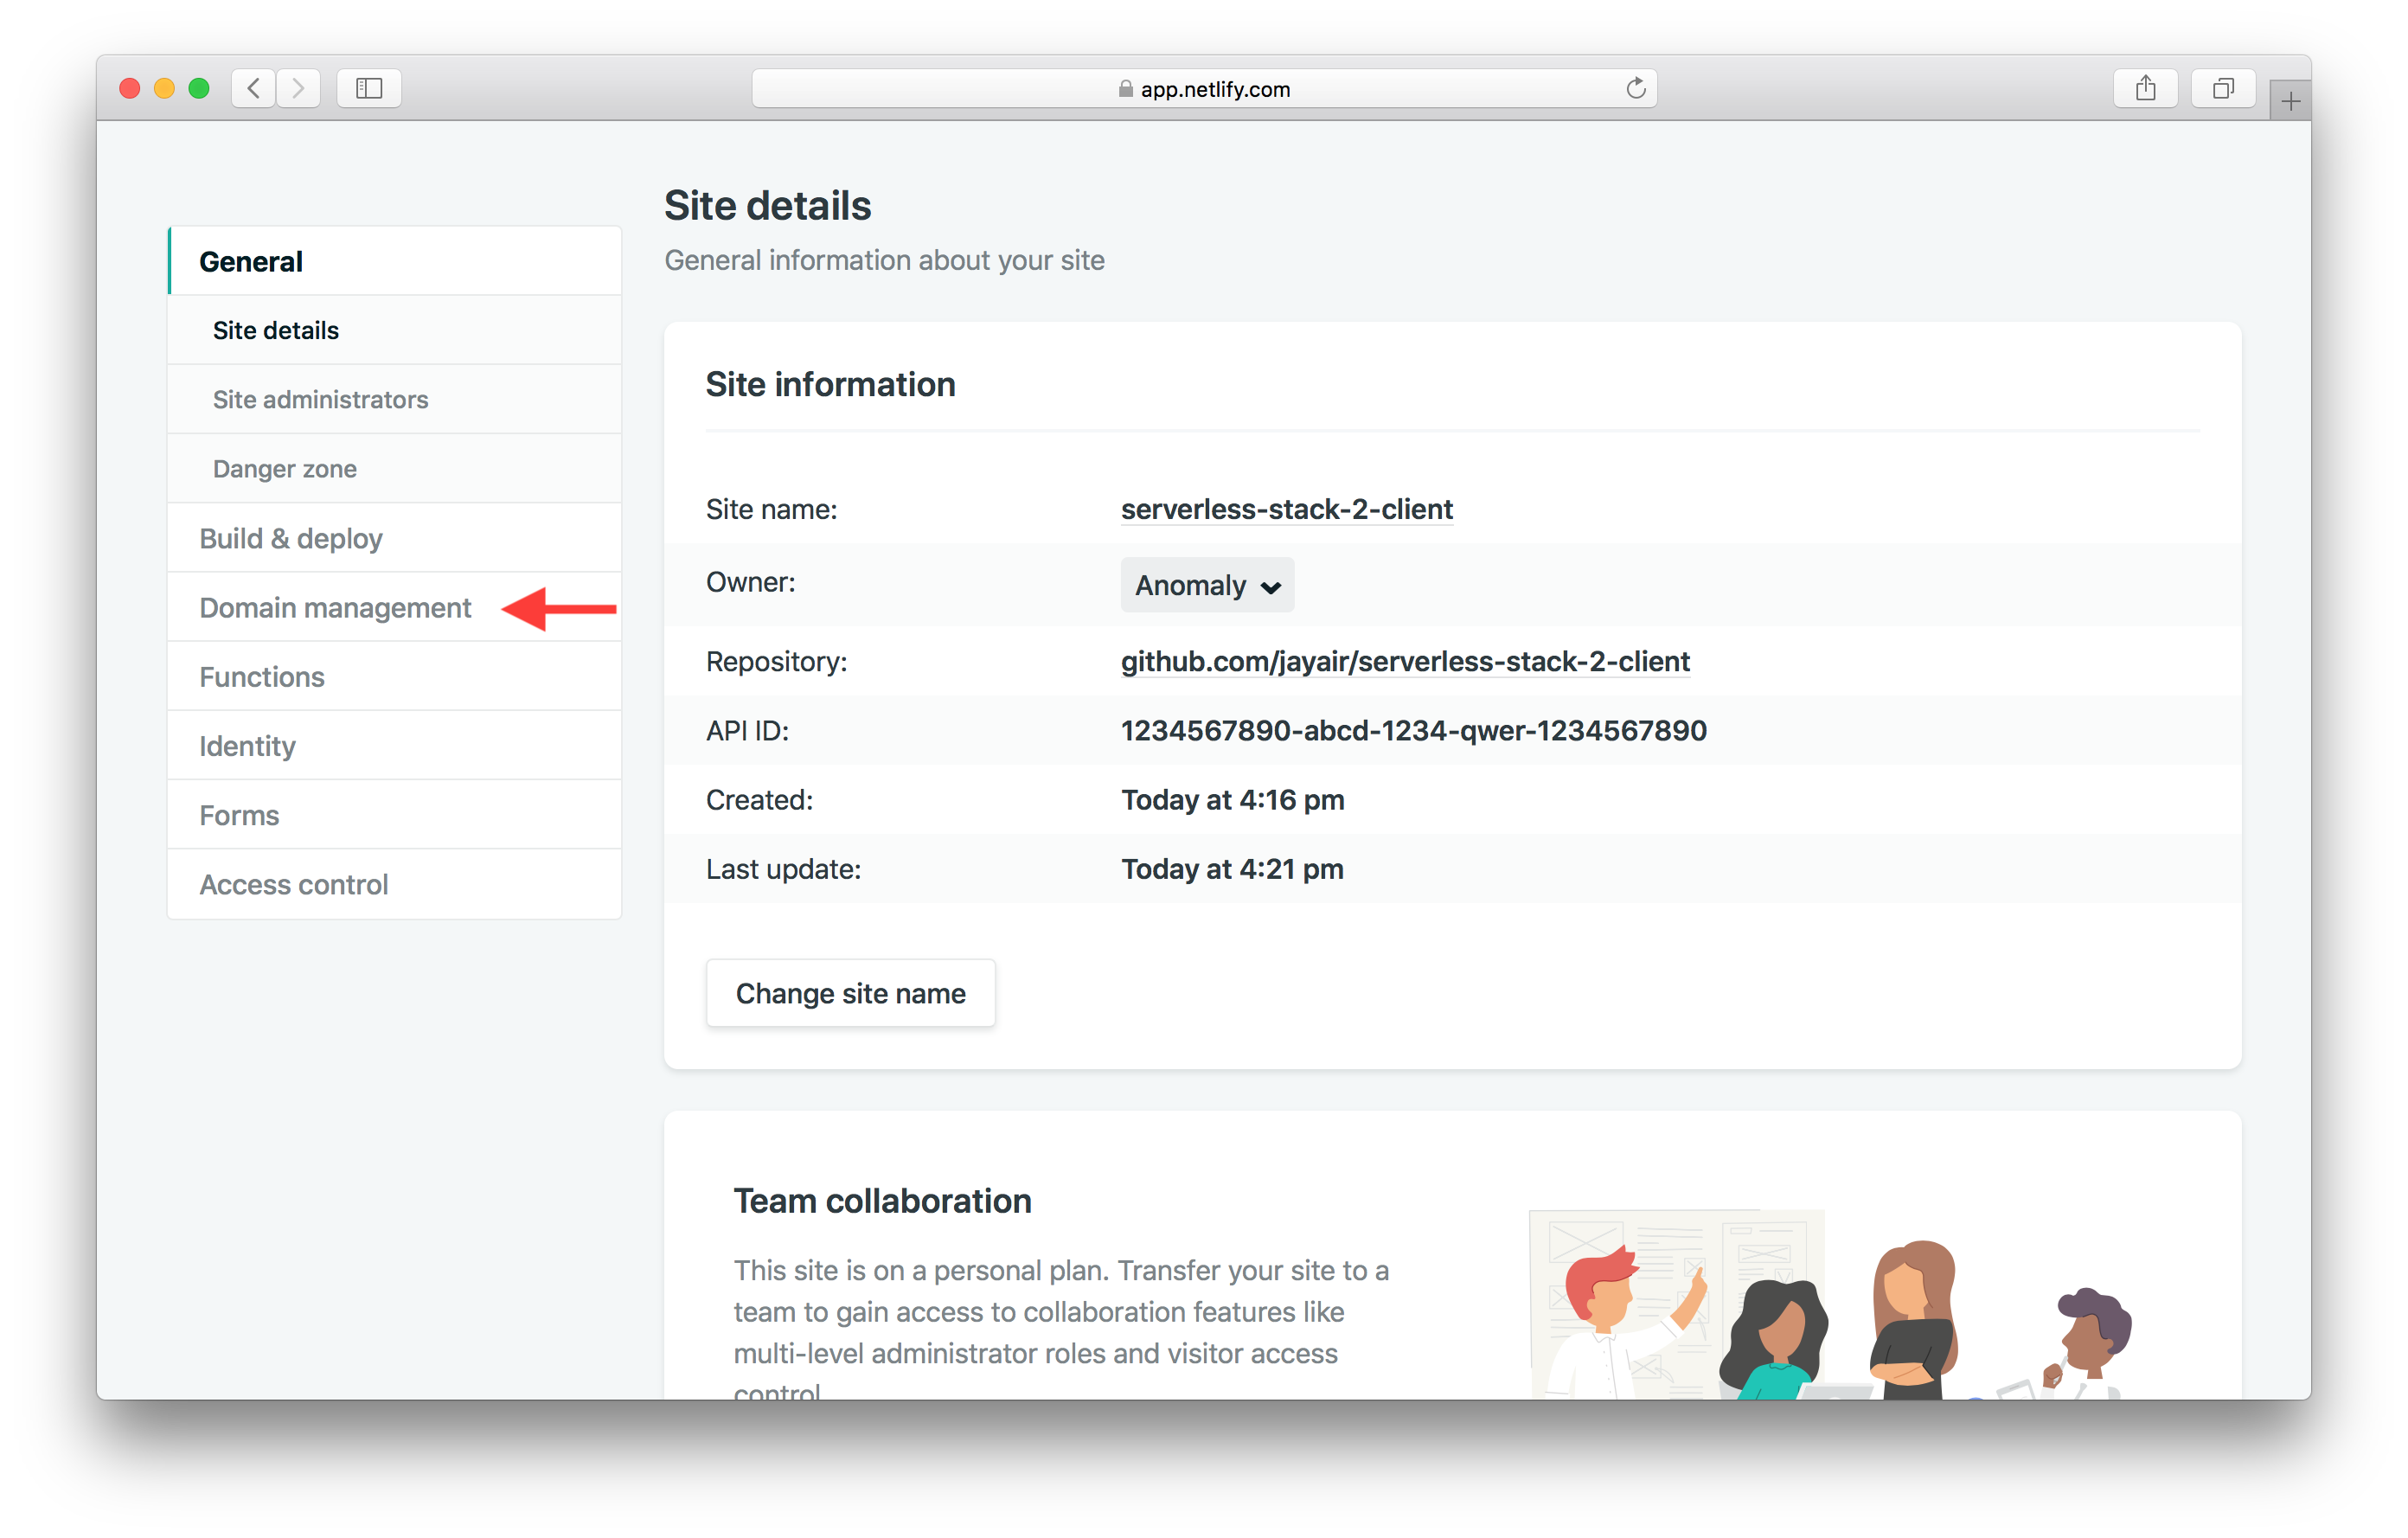
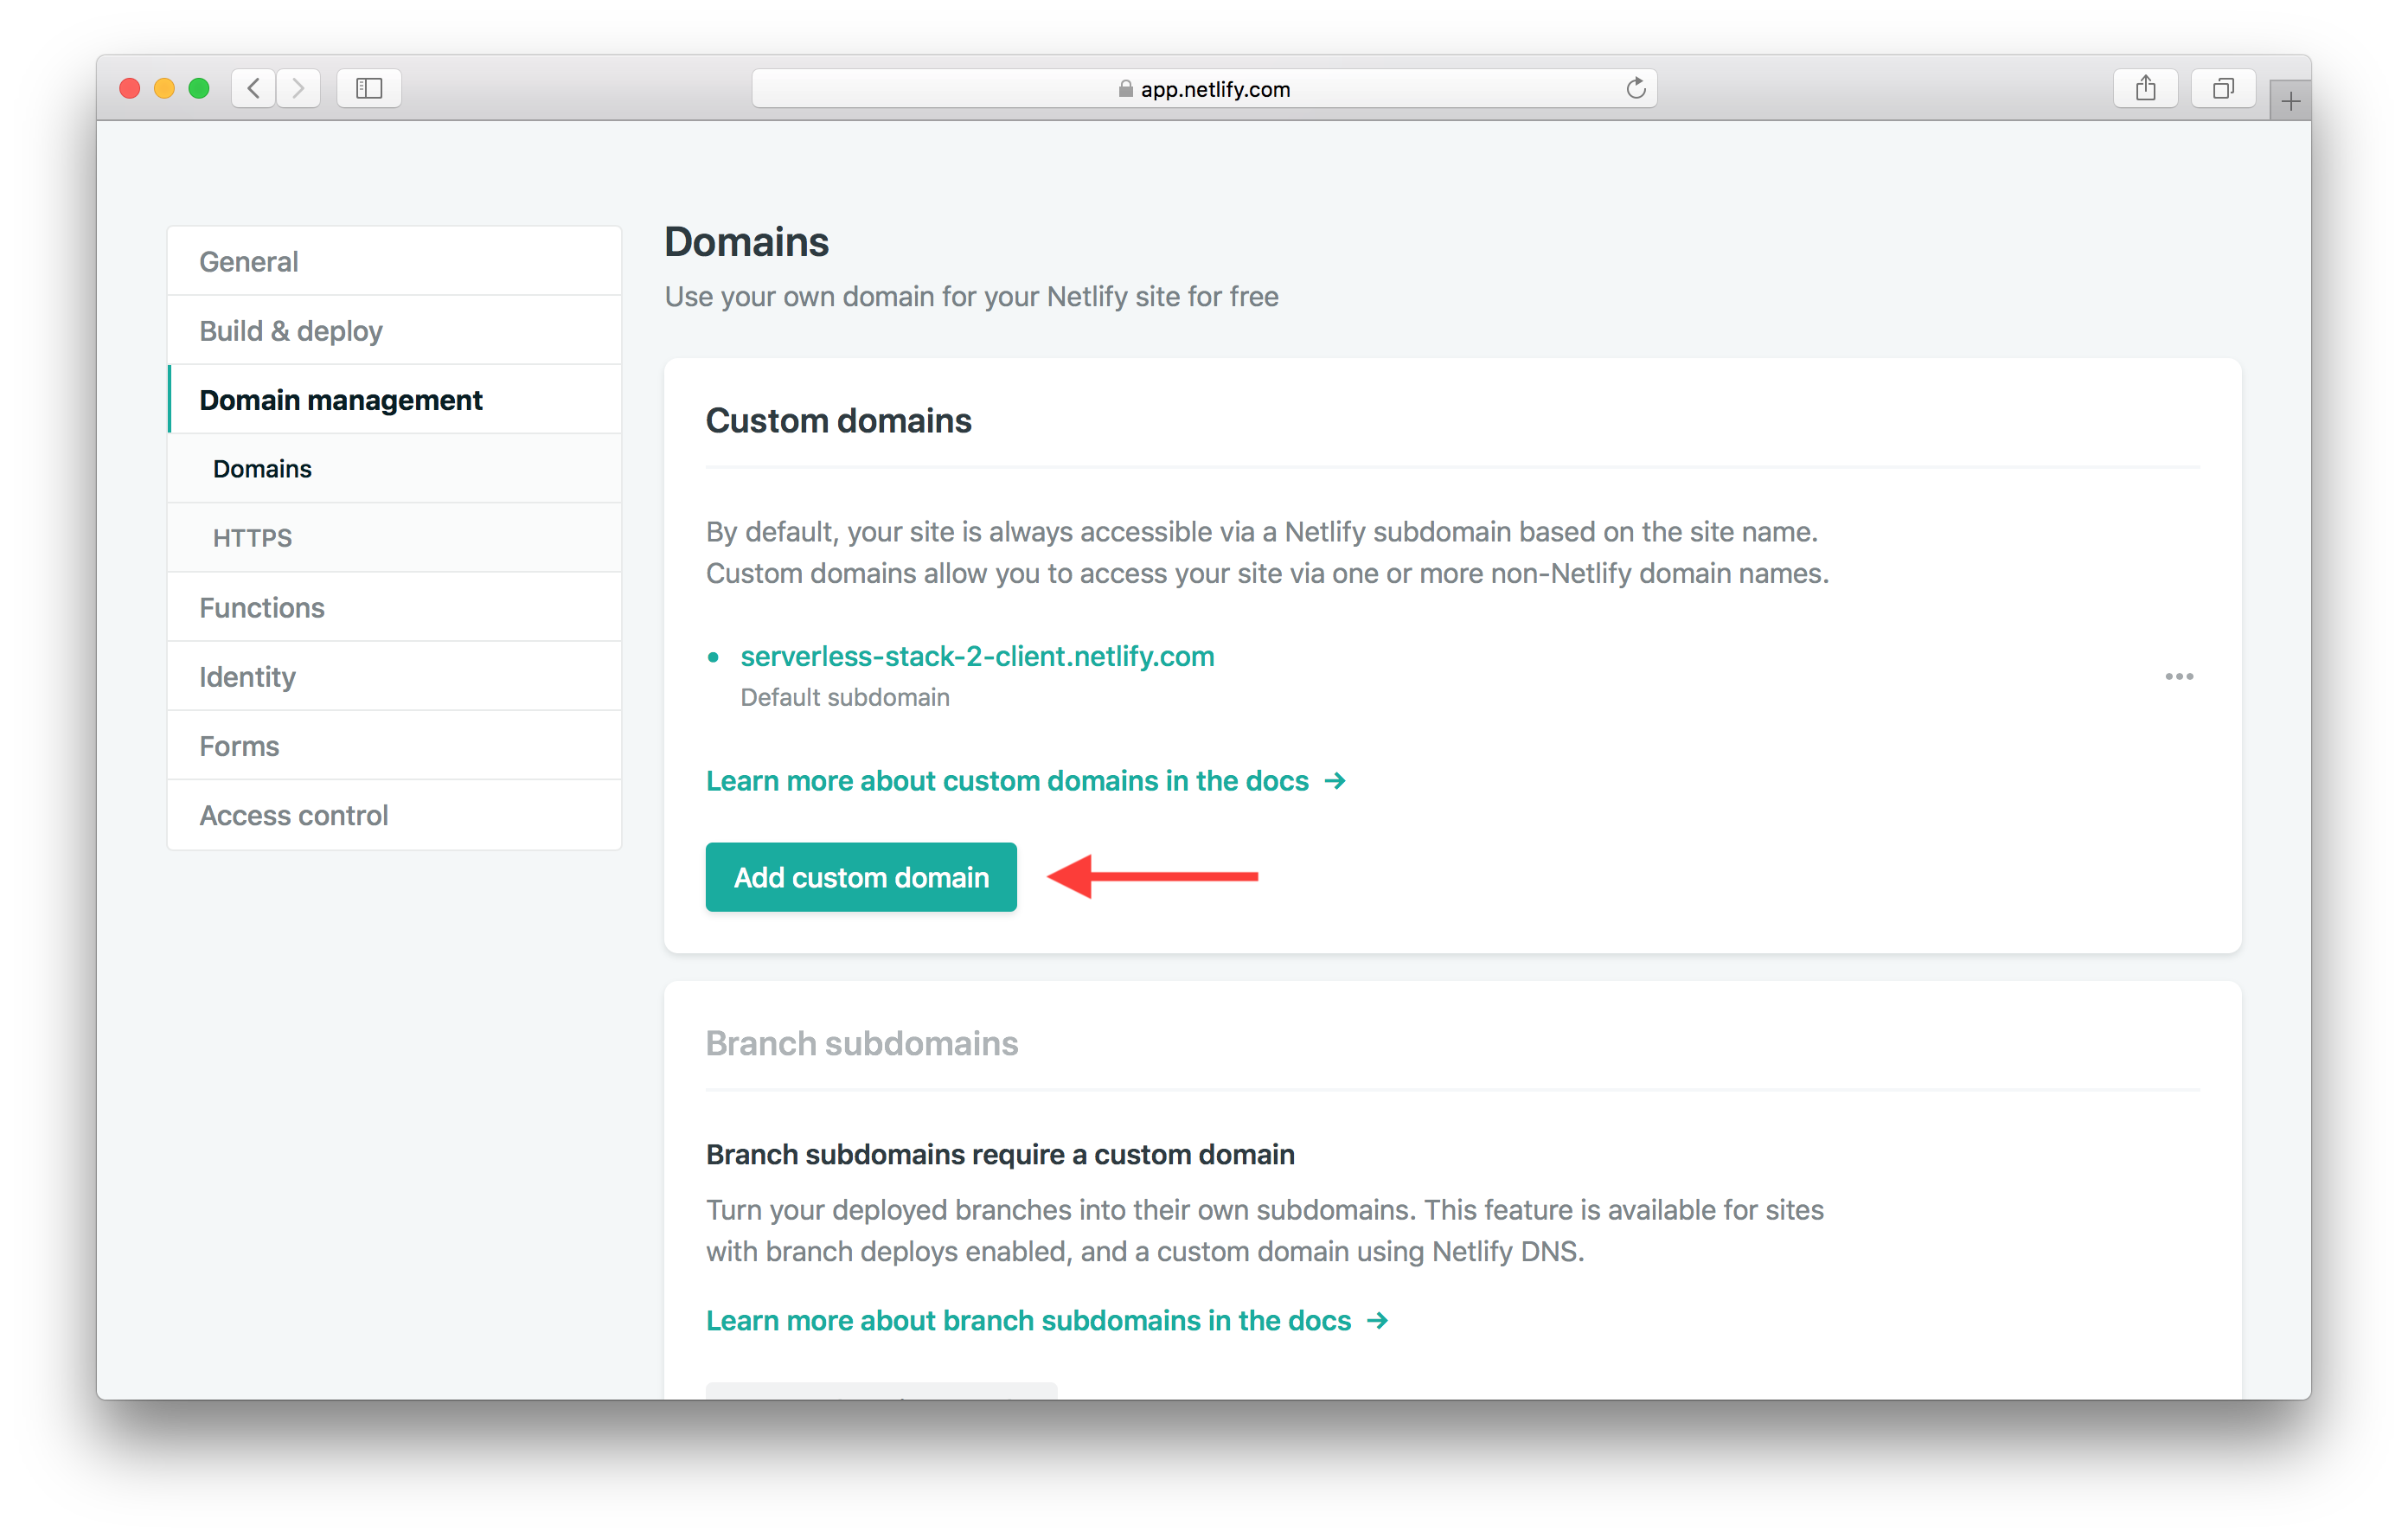
Next hit Domain management from the side panel.
And hit Add custom domain.
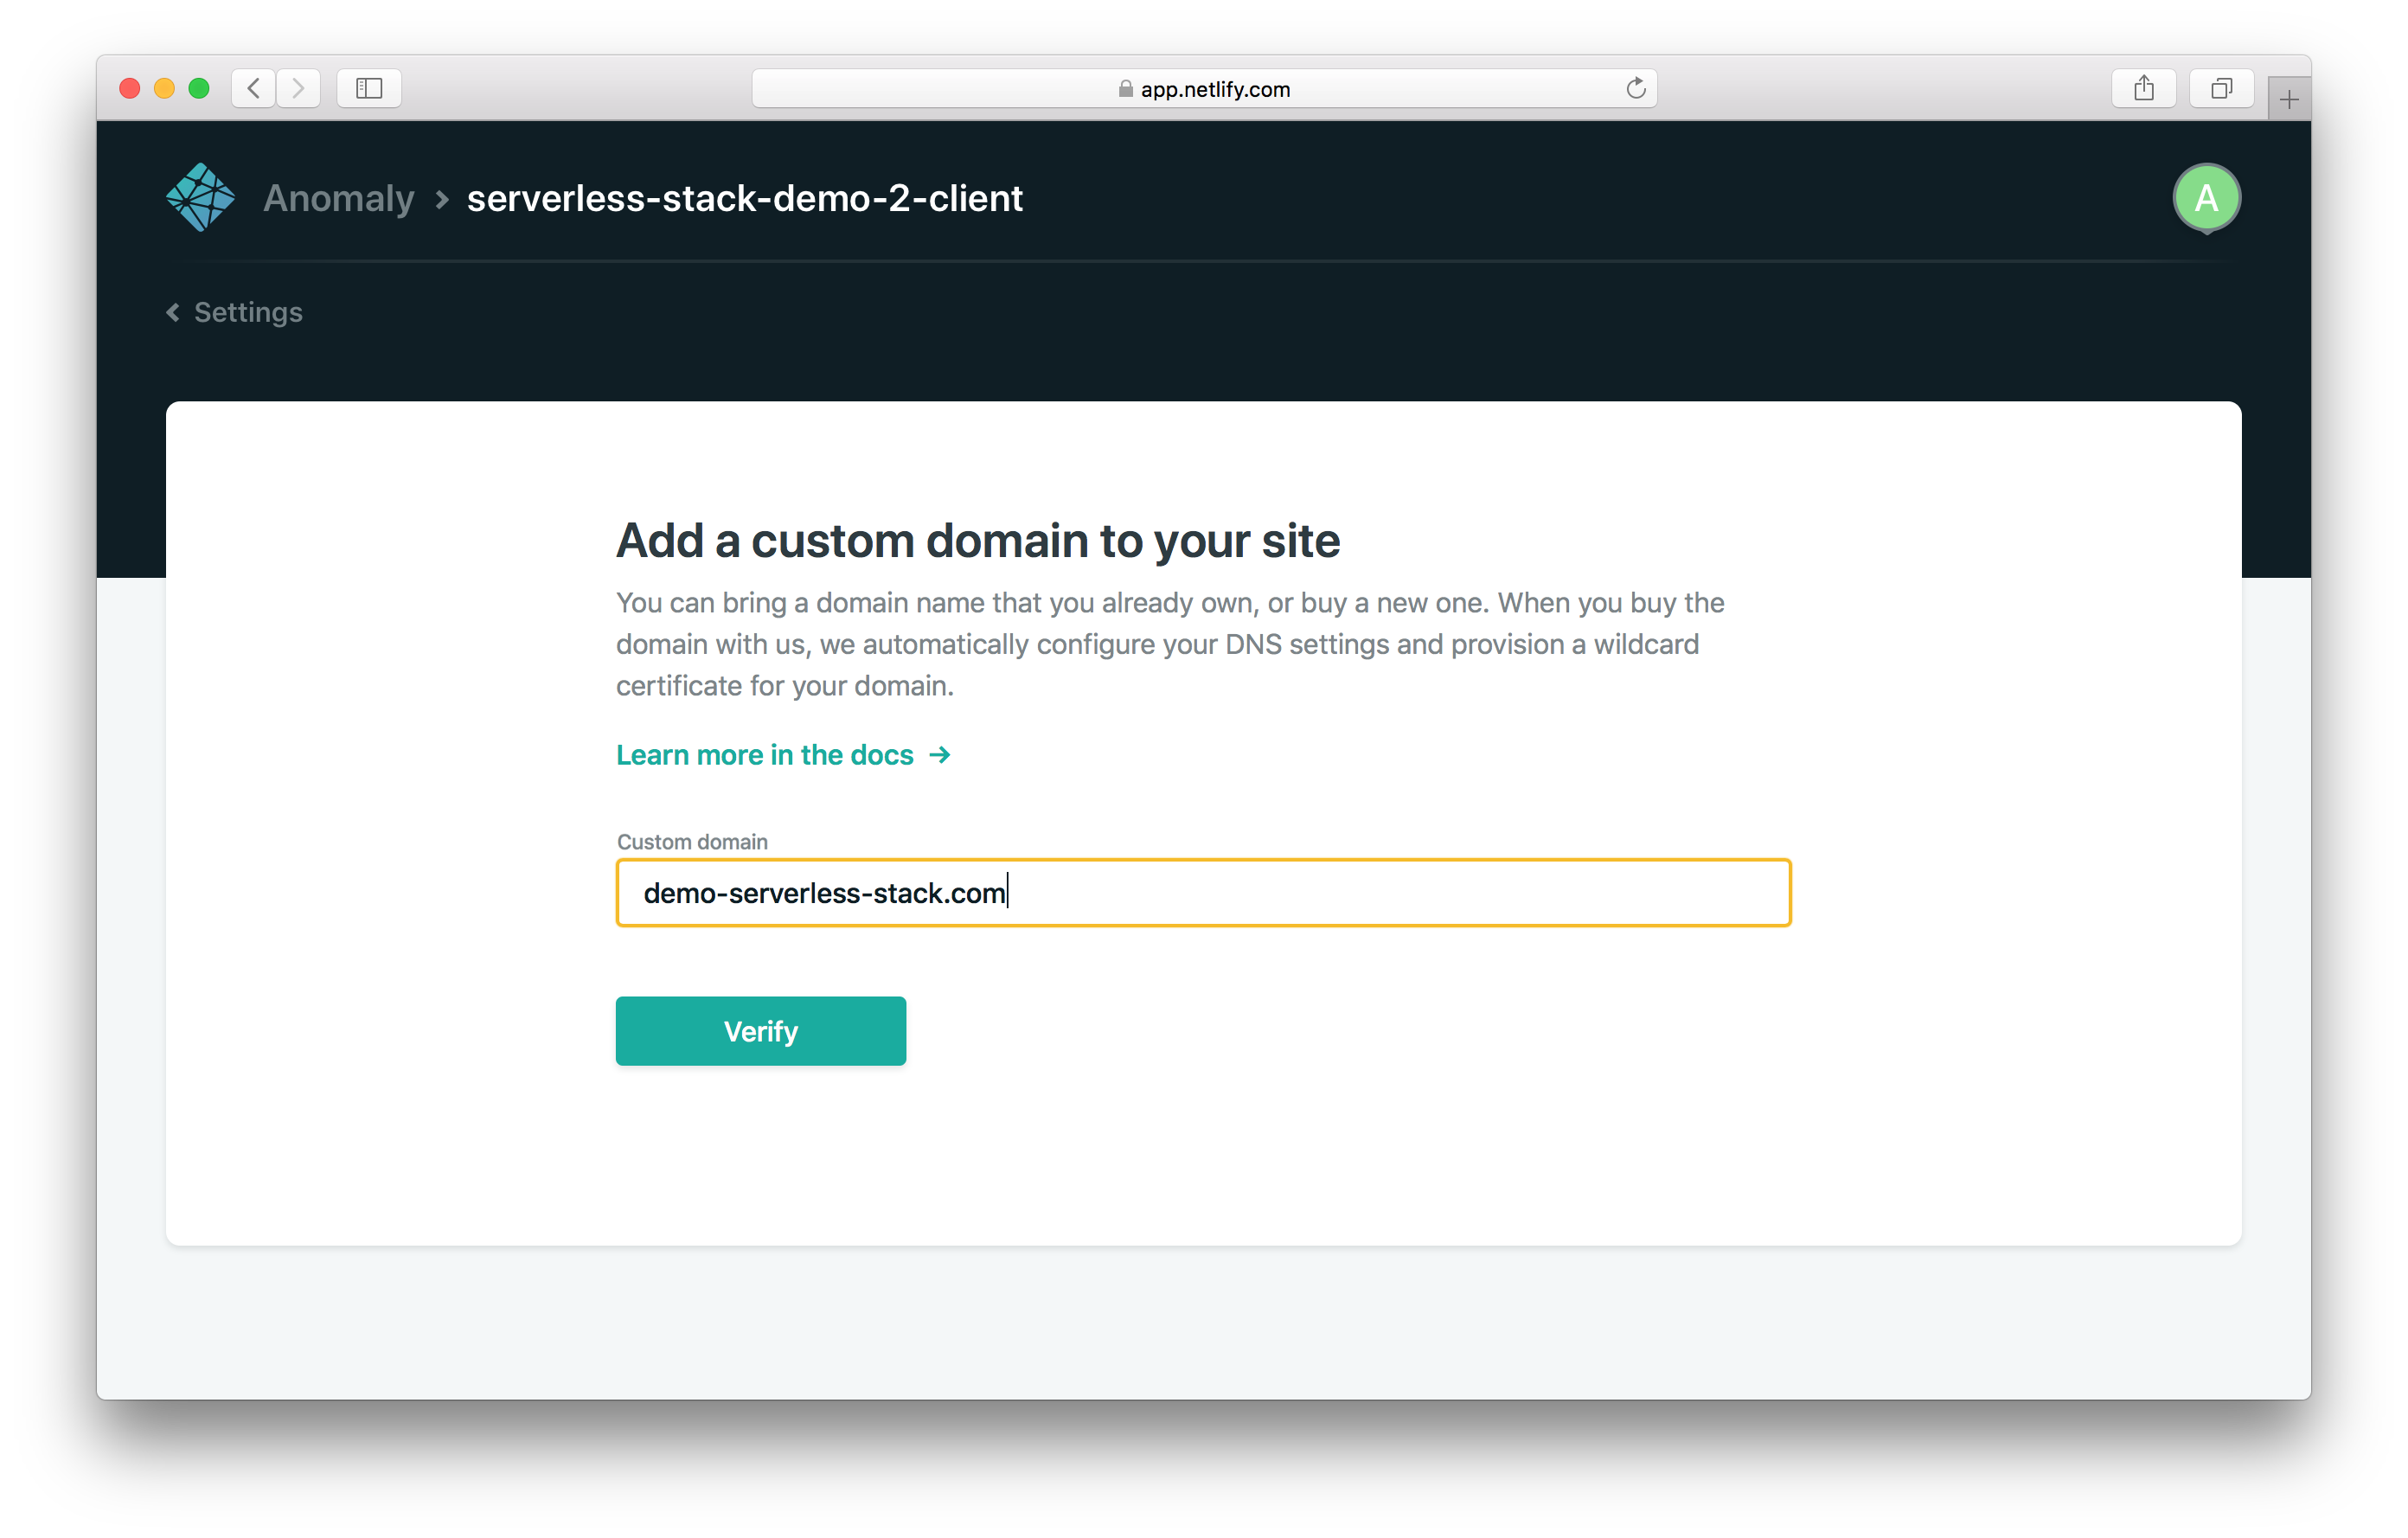
Type in the name of our domain, for example it might be demo-serverless-stack.com. And hit Save.
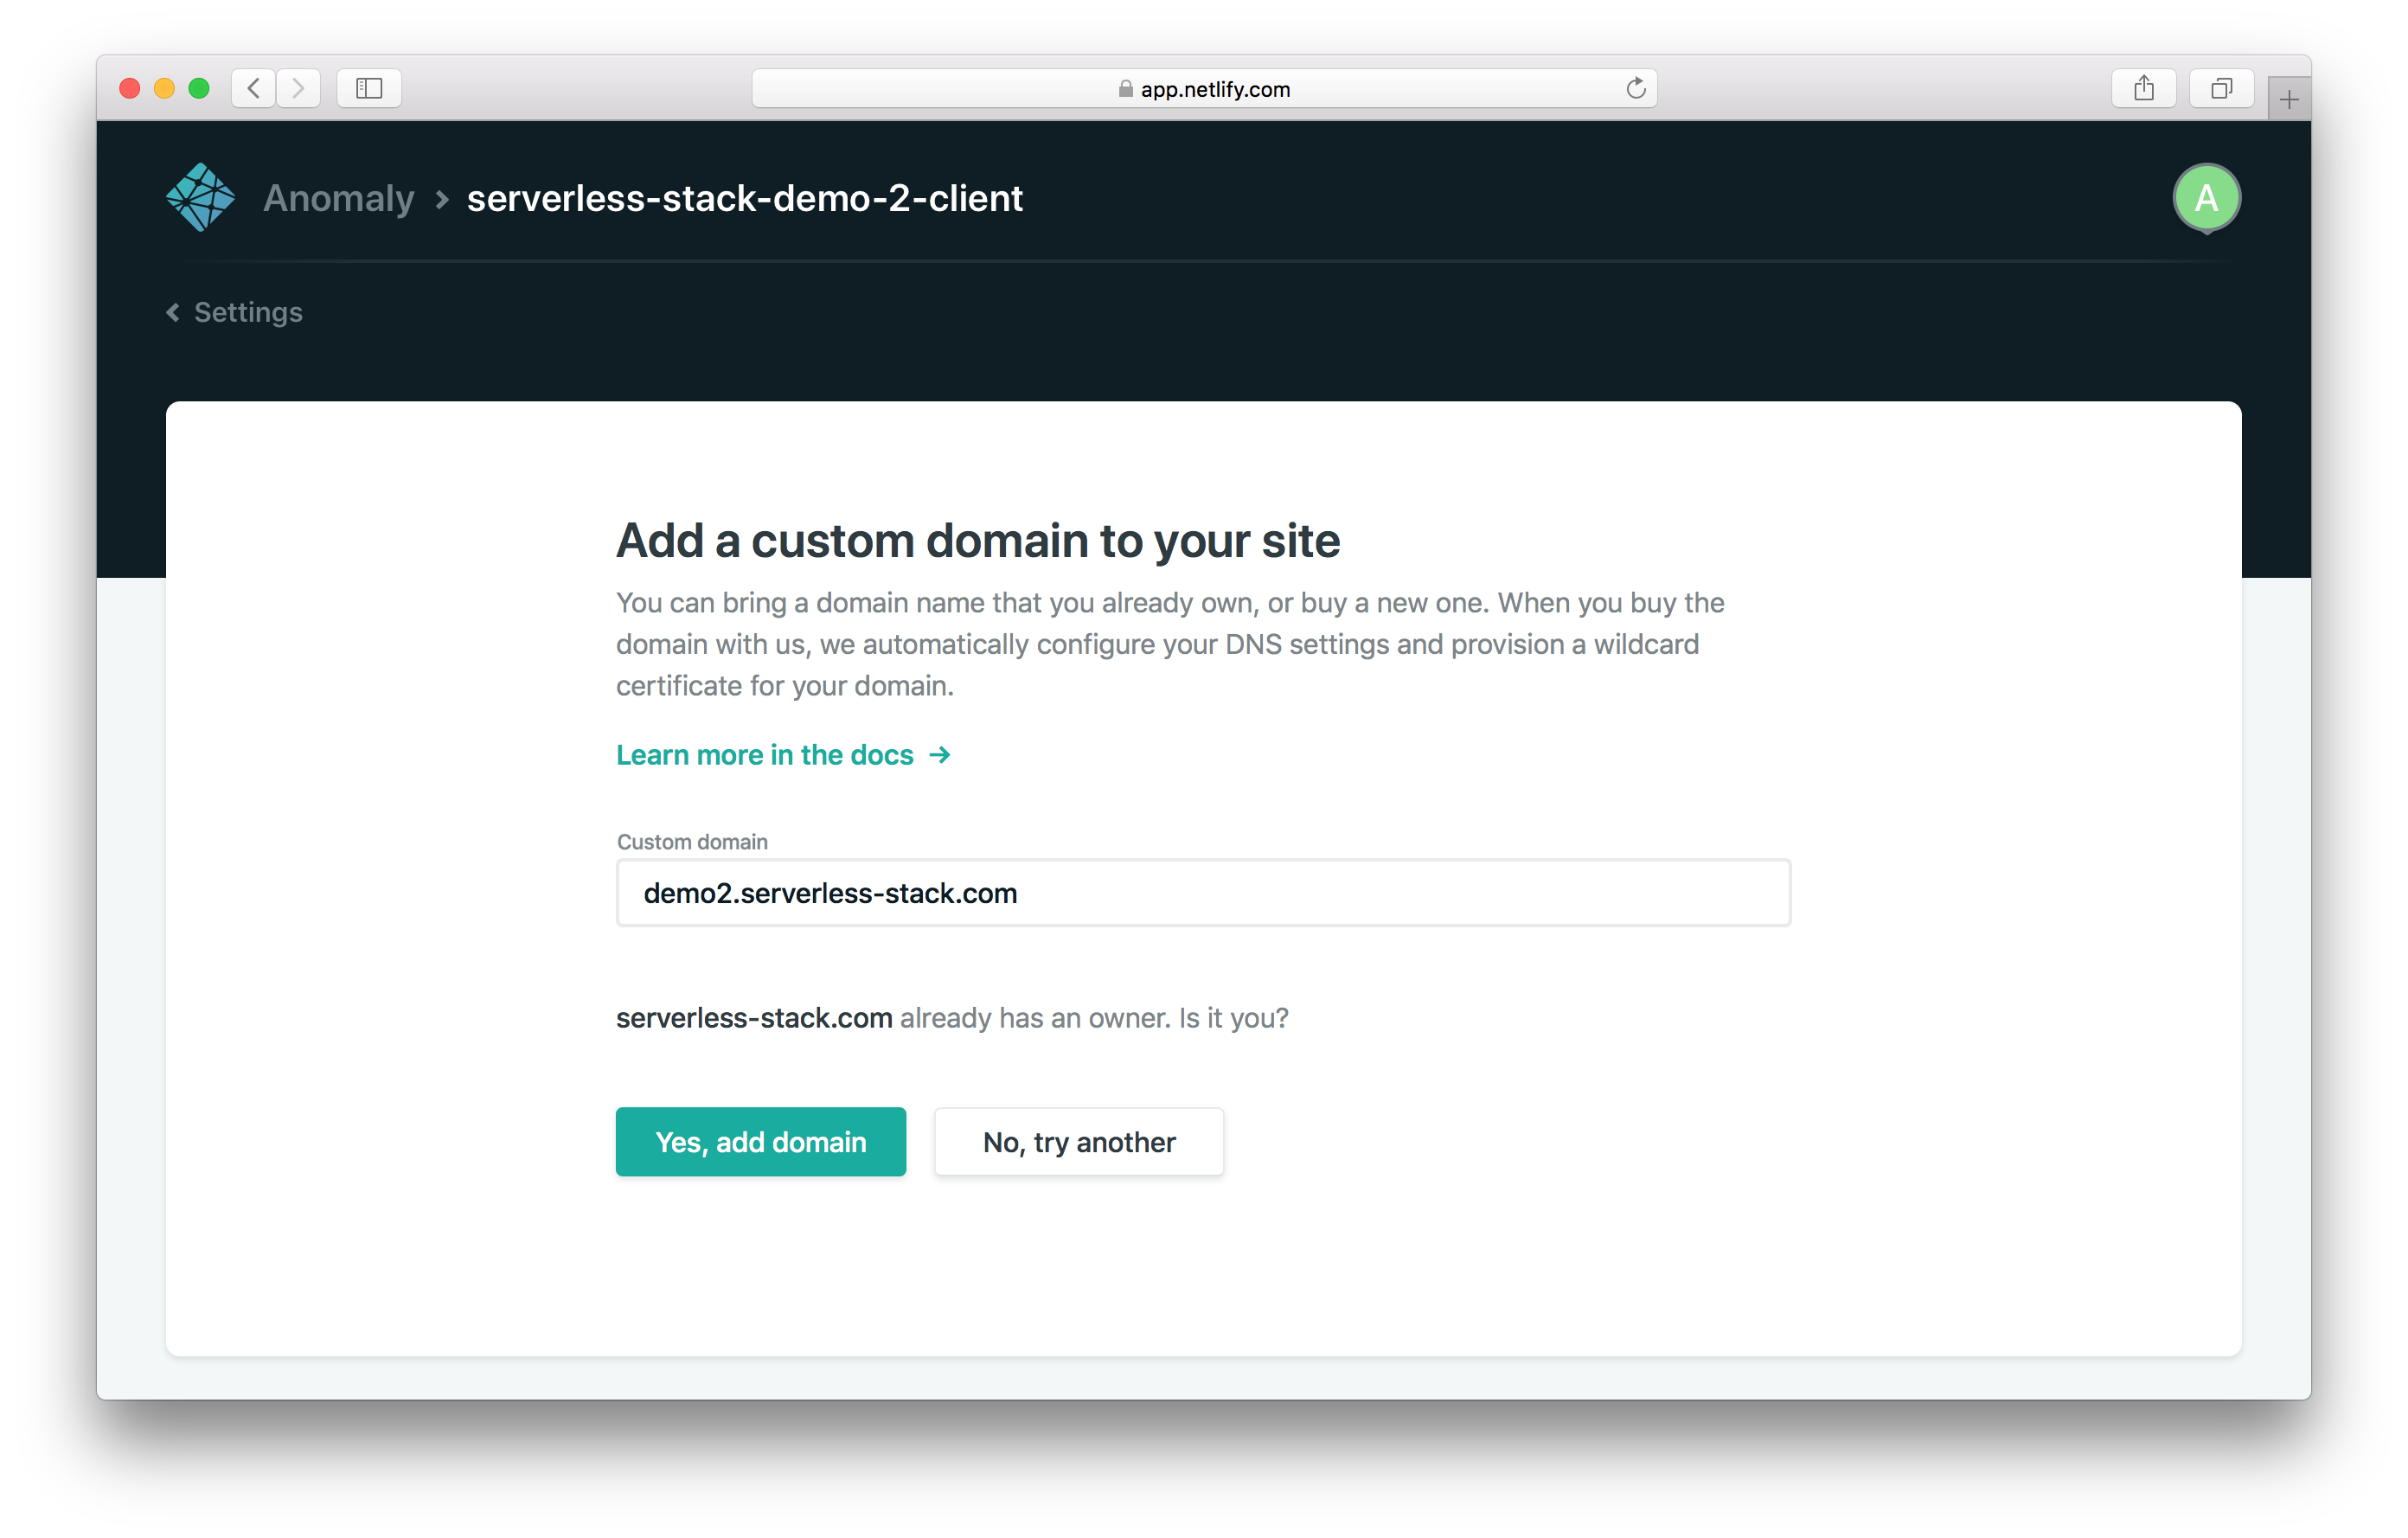
This will ask you to verify that you are the owner of this domain and to add it. Click Yes, add domain.
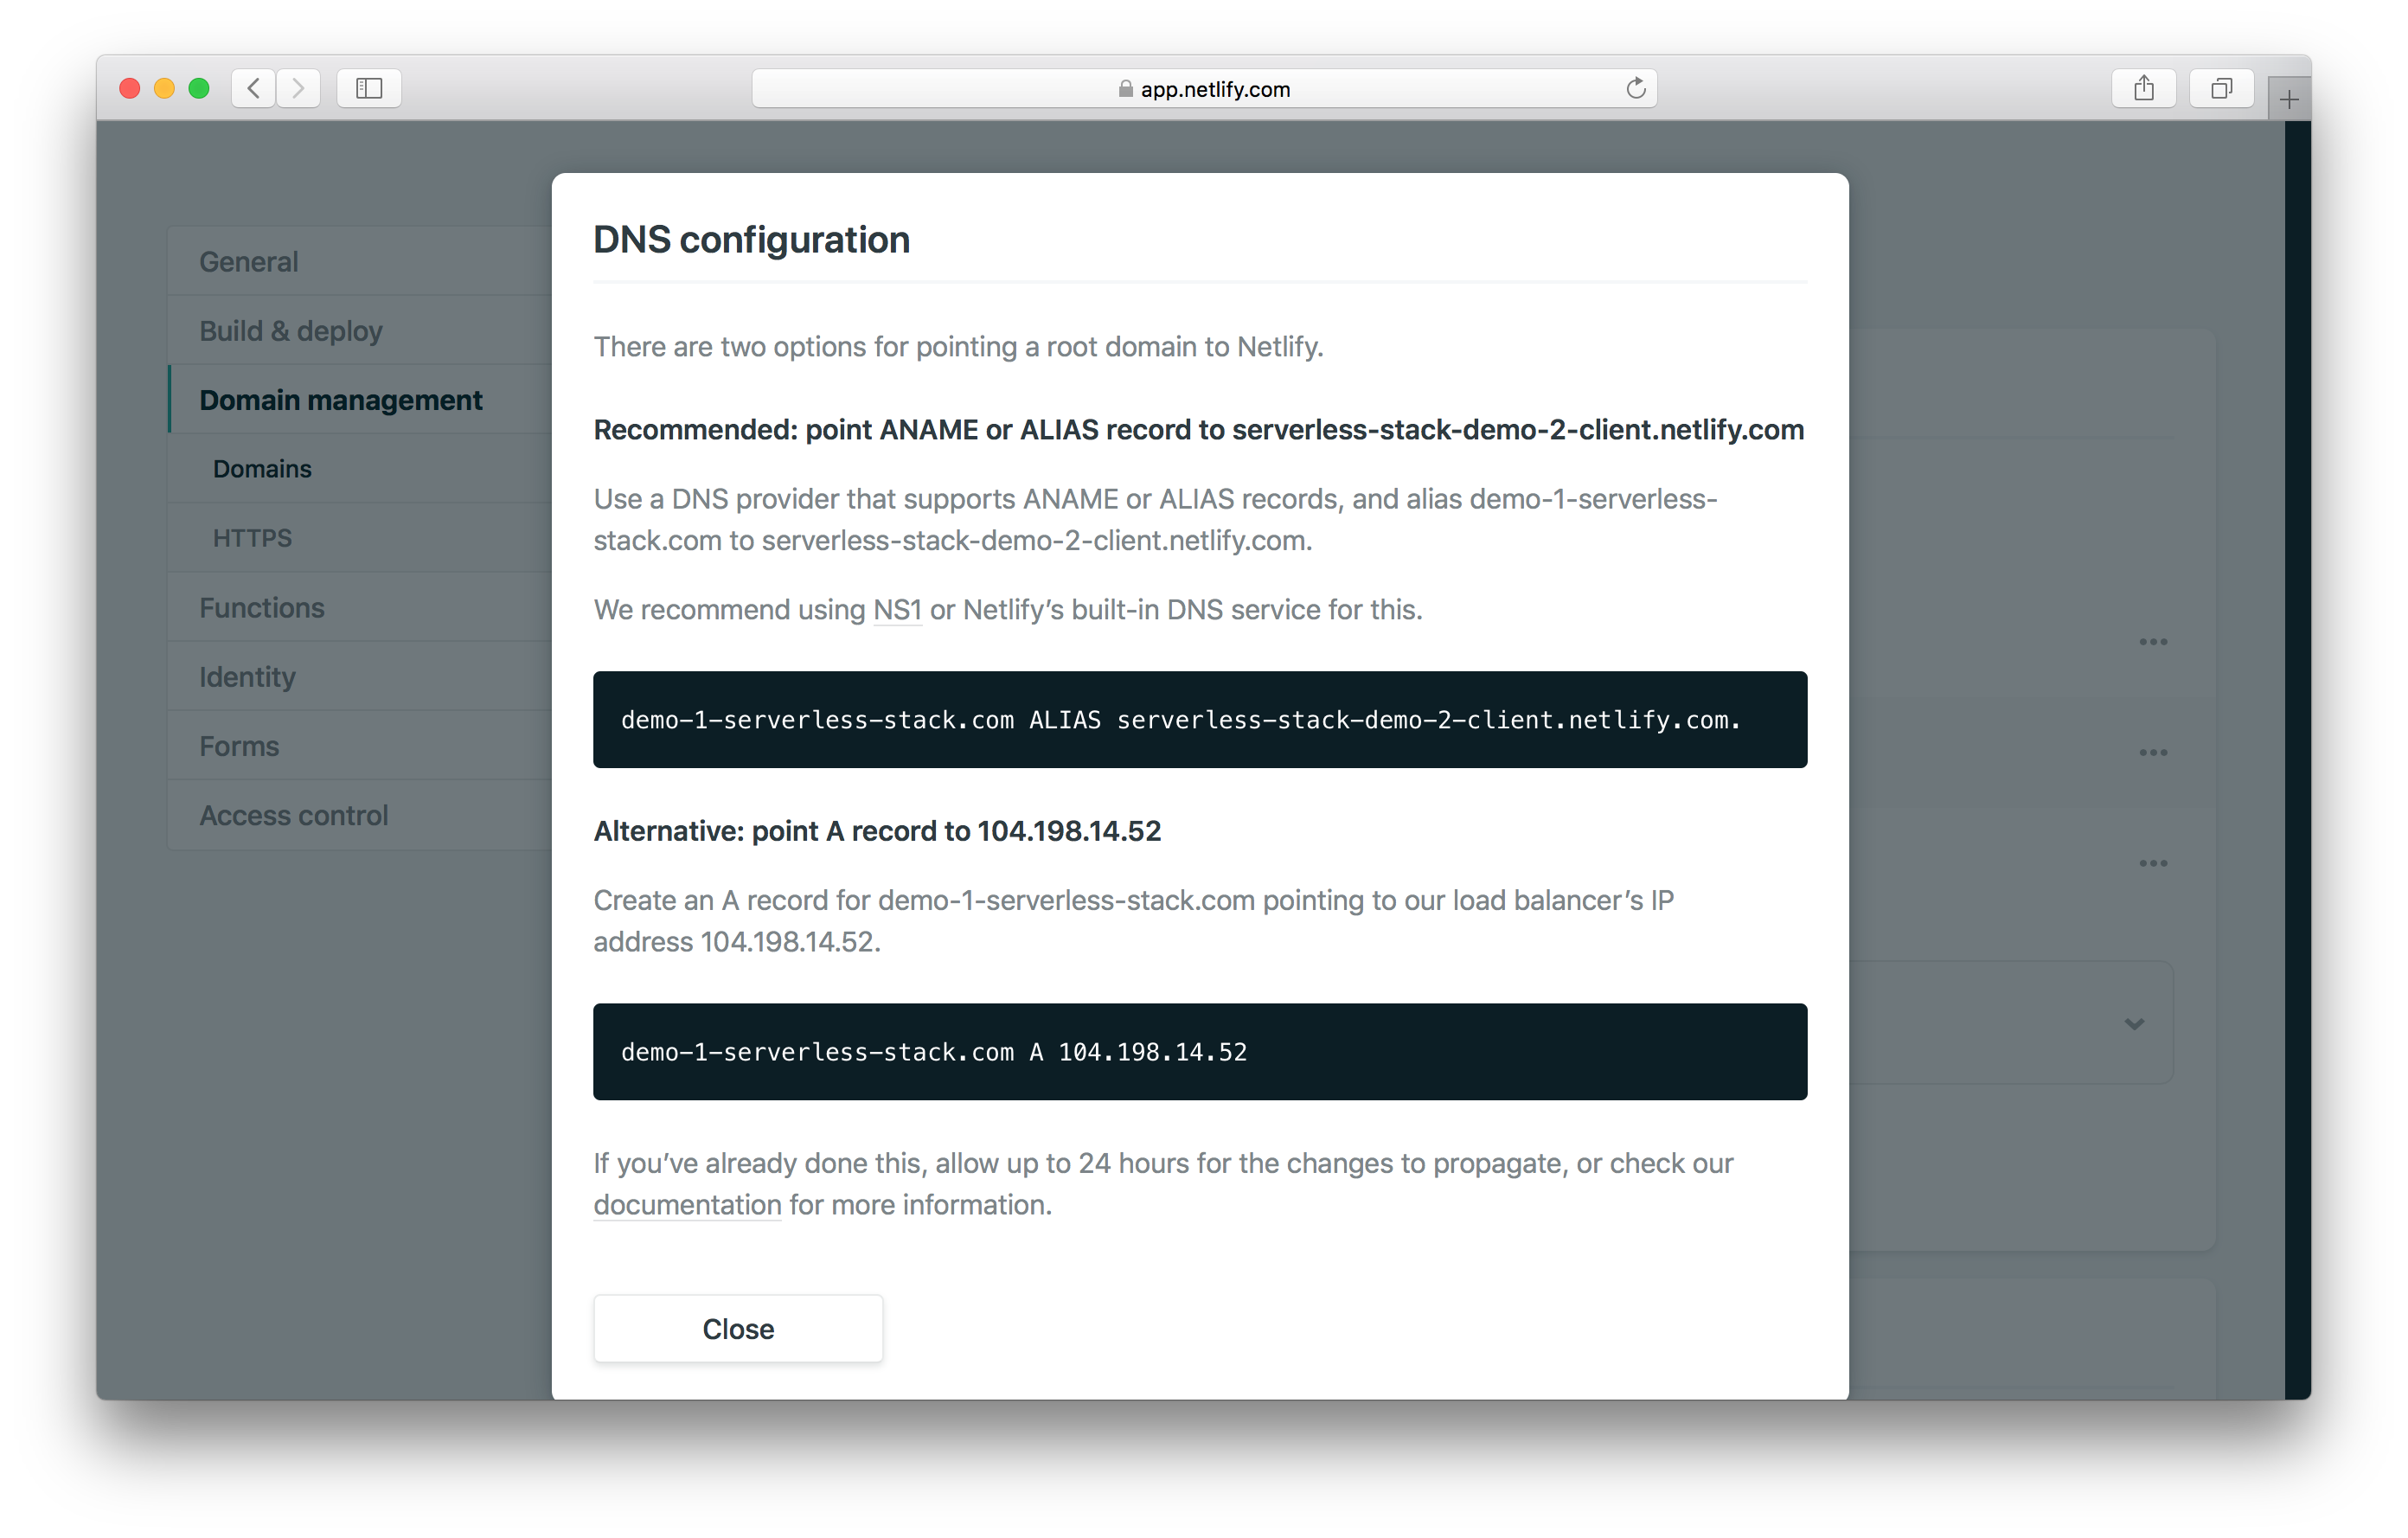
Next hit Check DNS configuration.
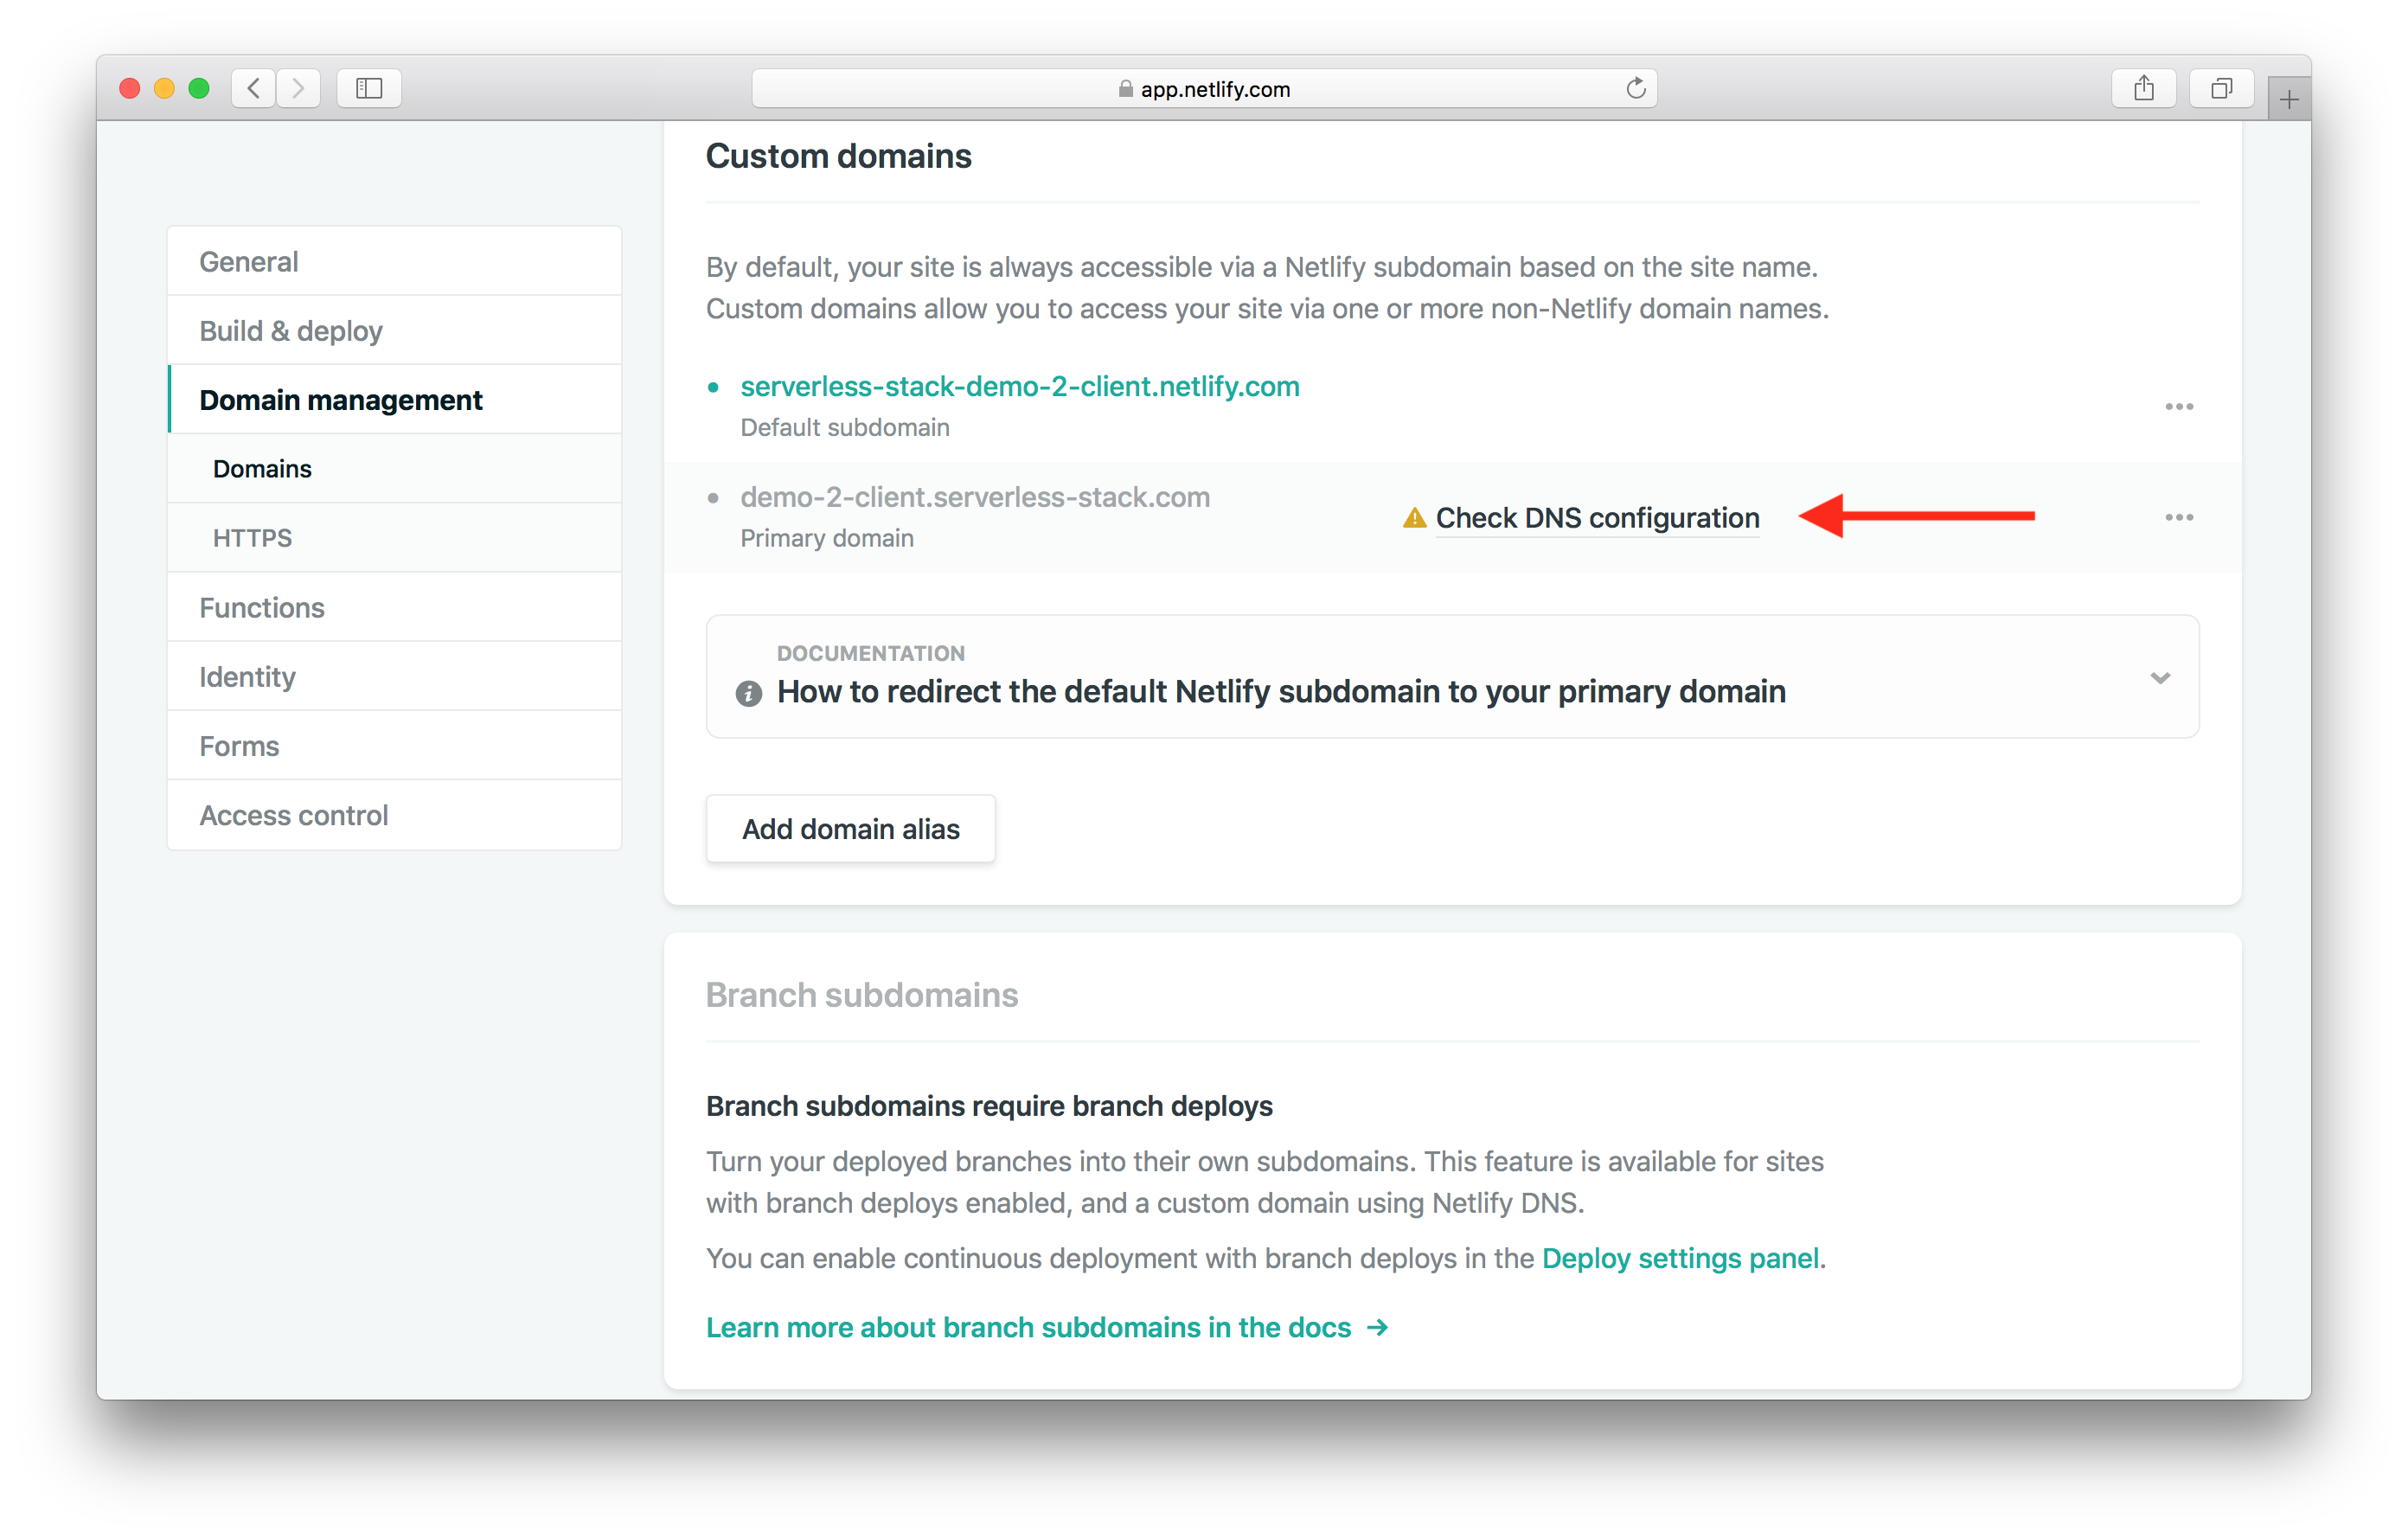
This will show you the instructions for setting up your domain through Route 53.
DNS Settings in Route 53
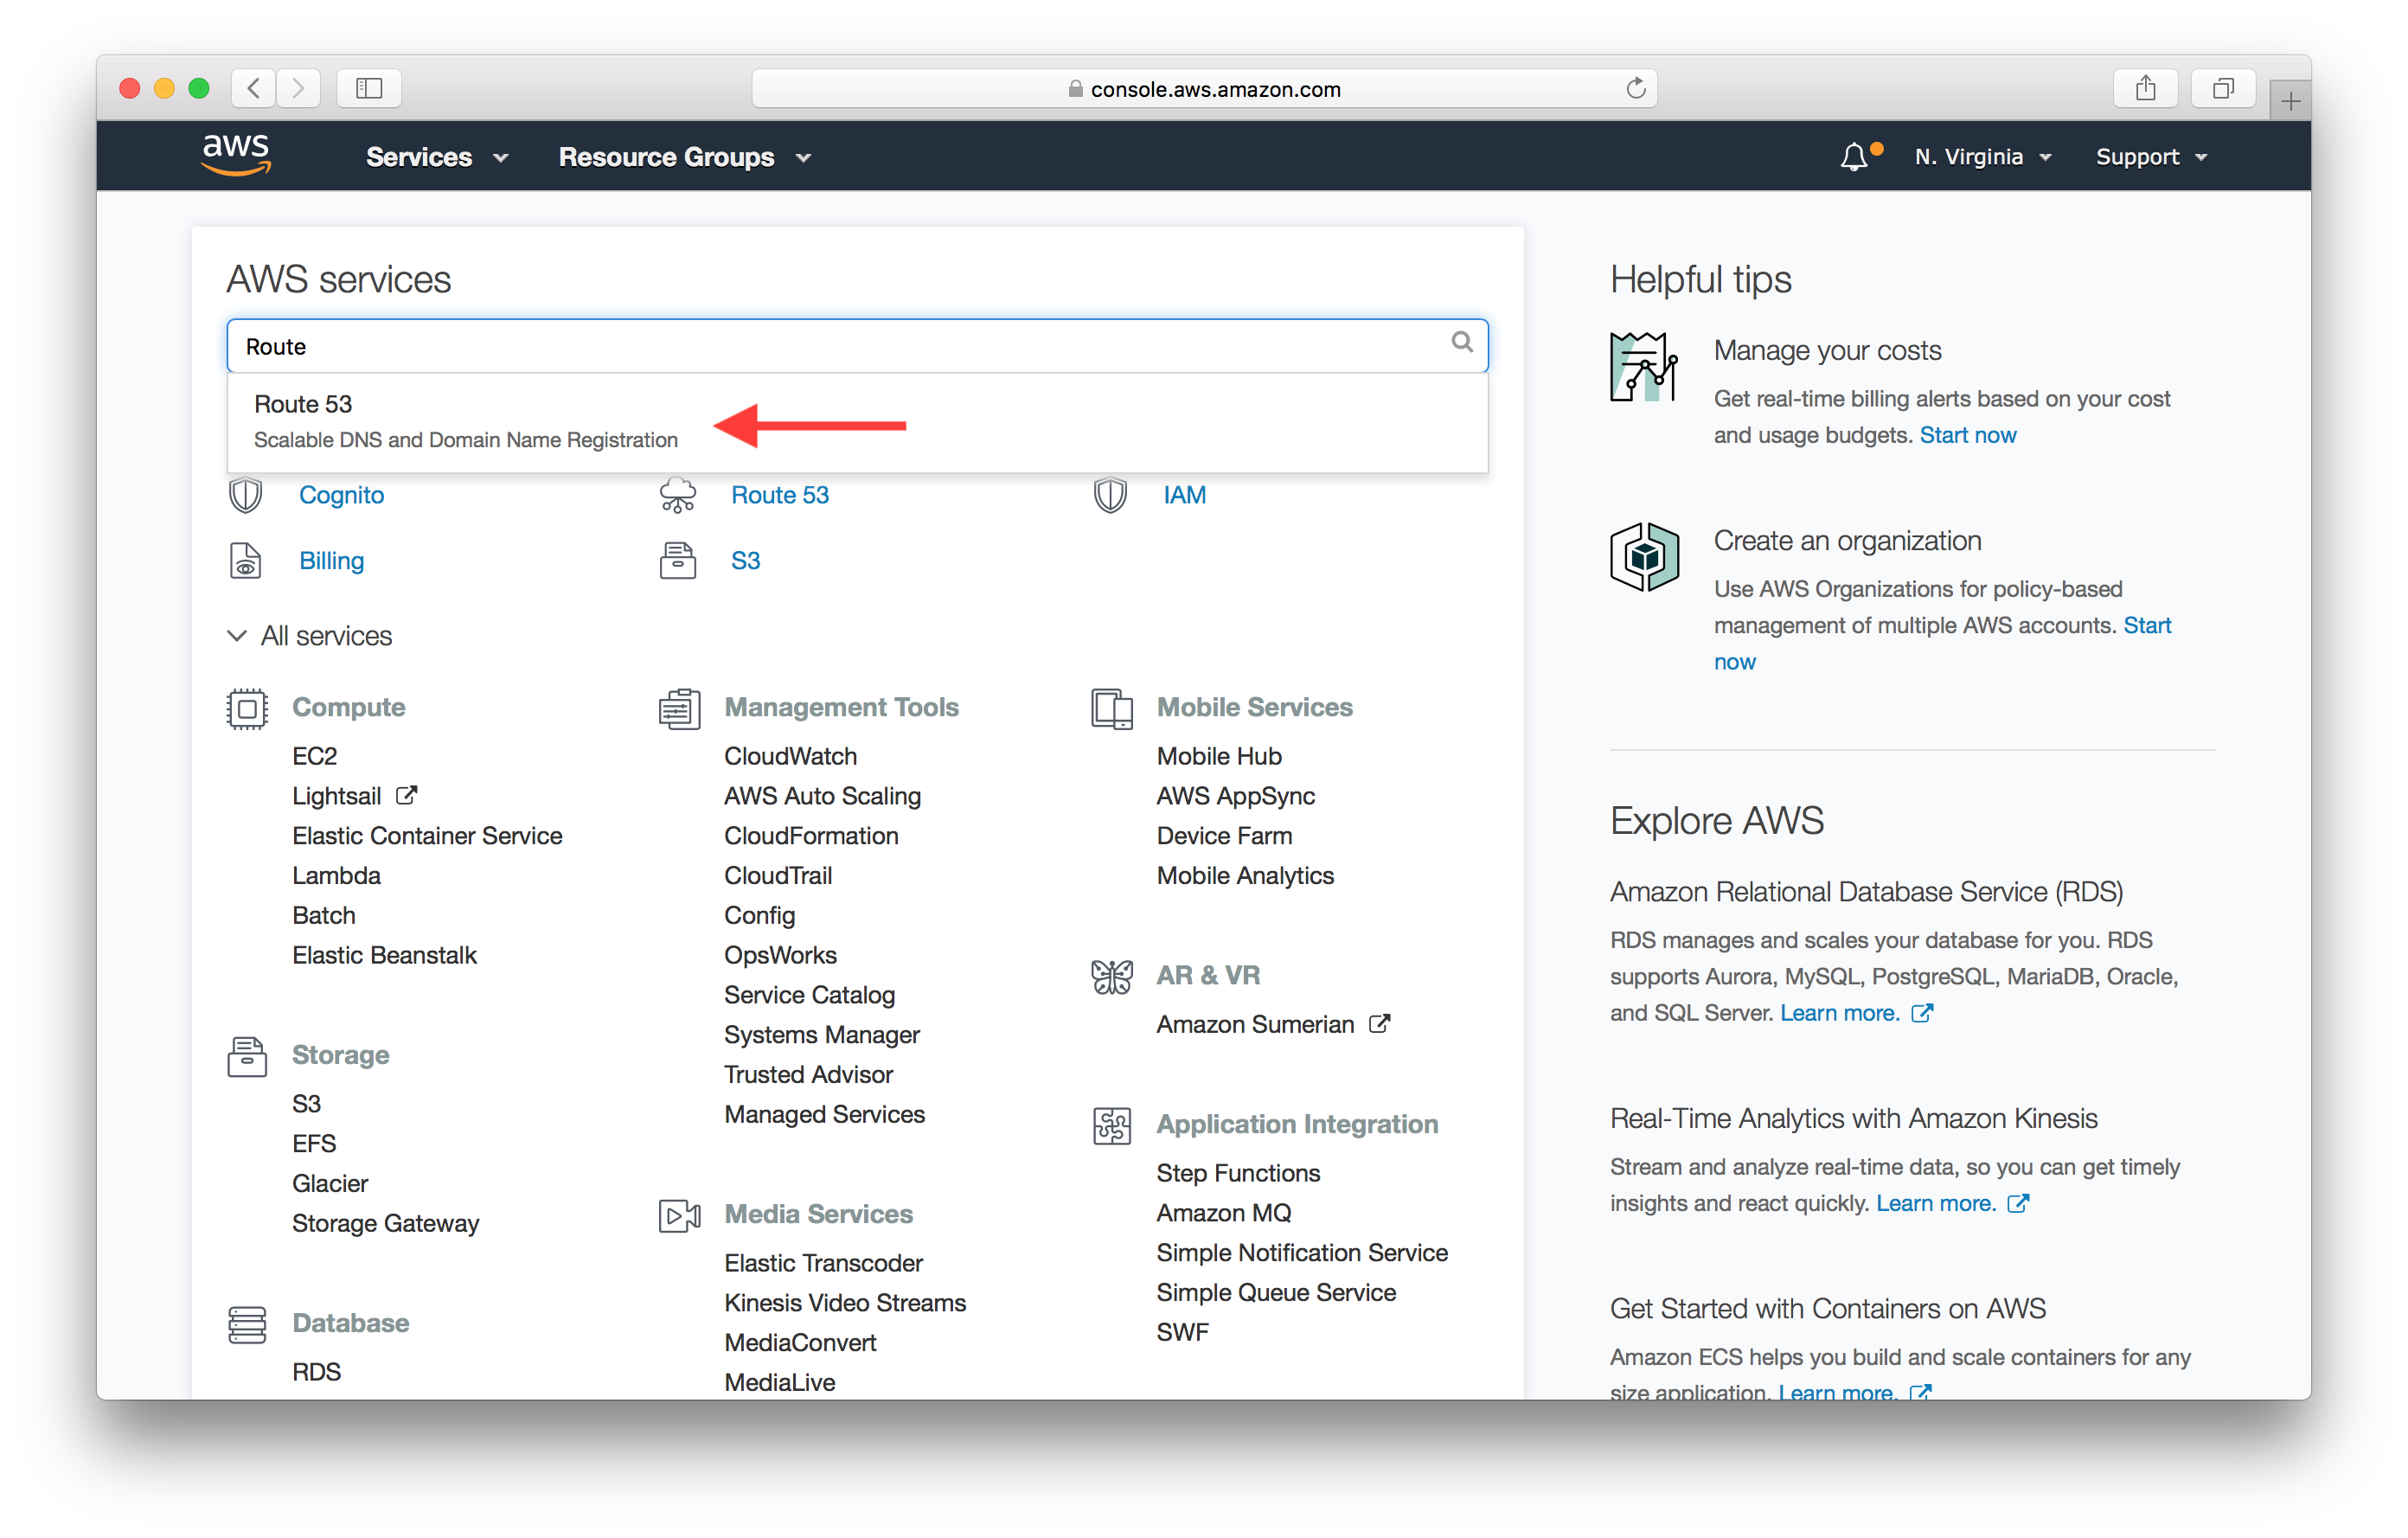
To do this we need to head back to the AWS Console. and search for Route 53 as the service.
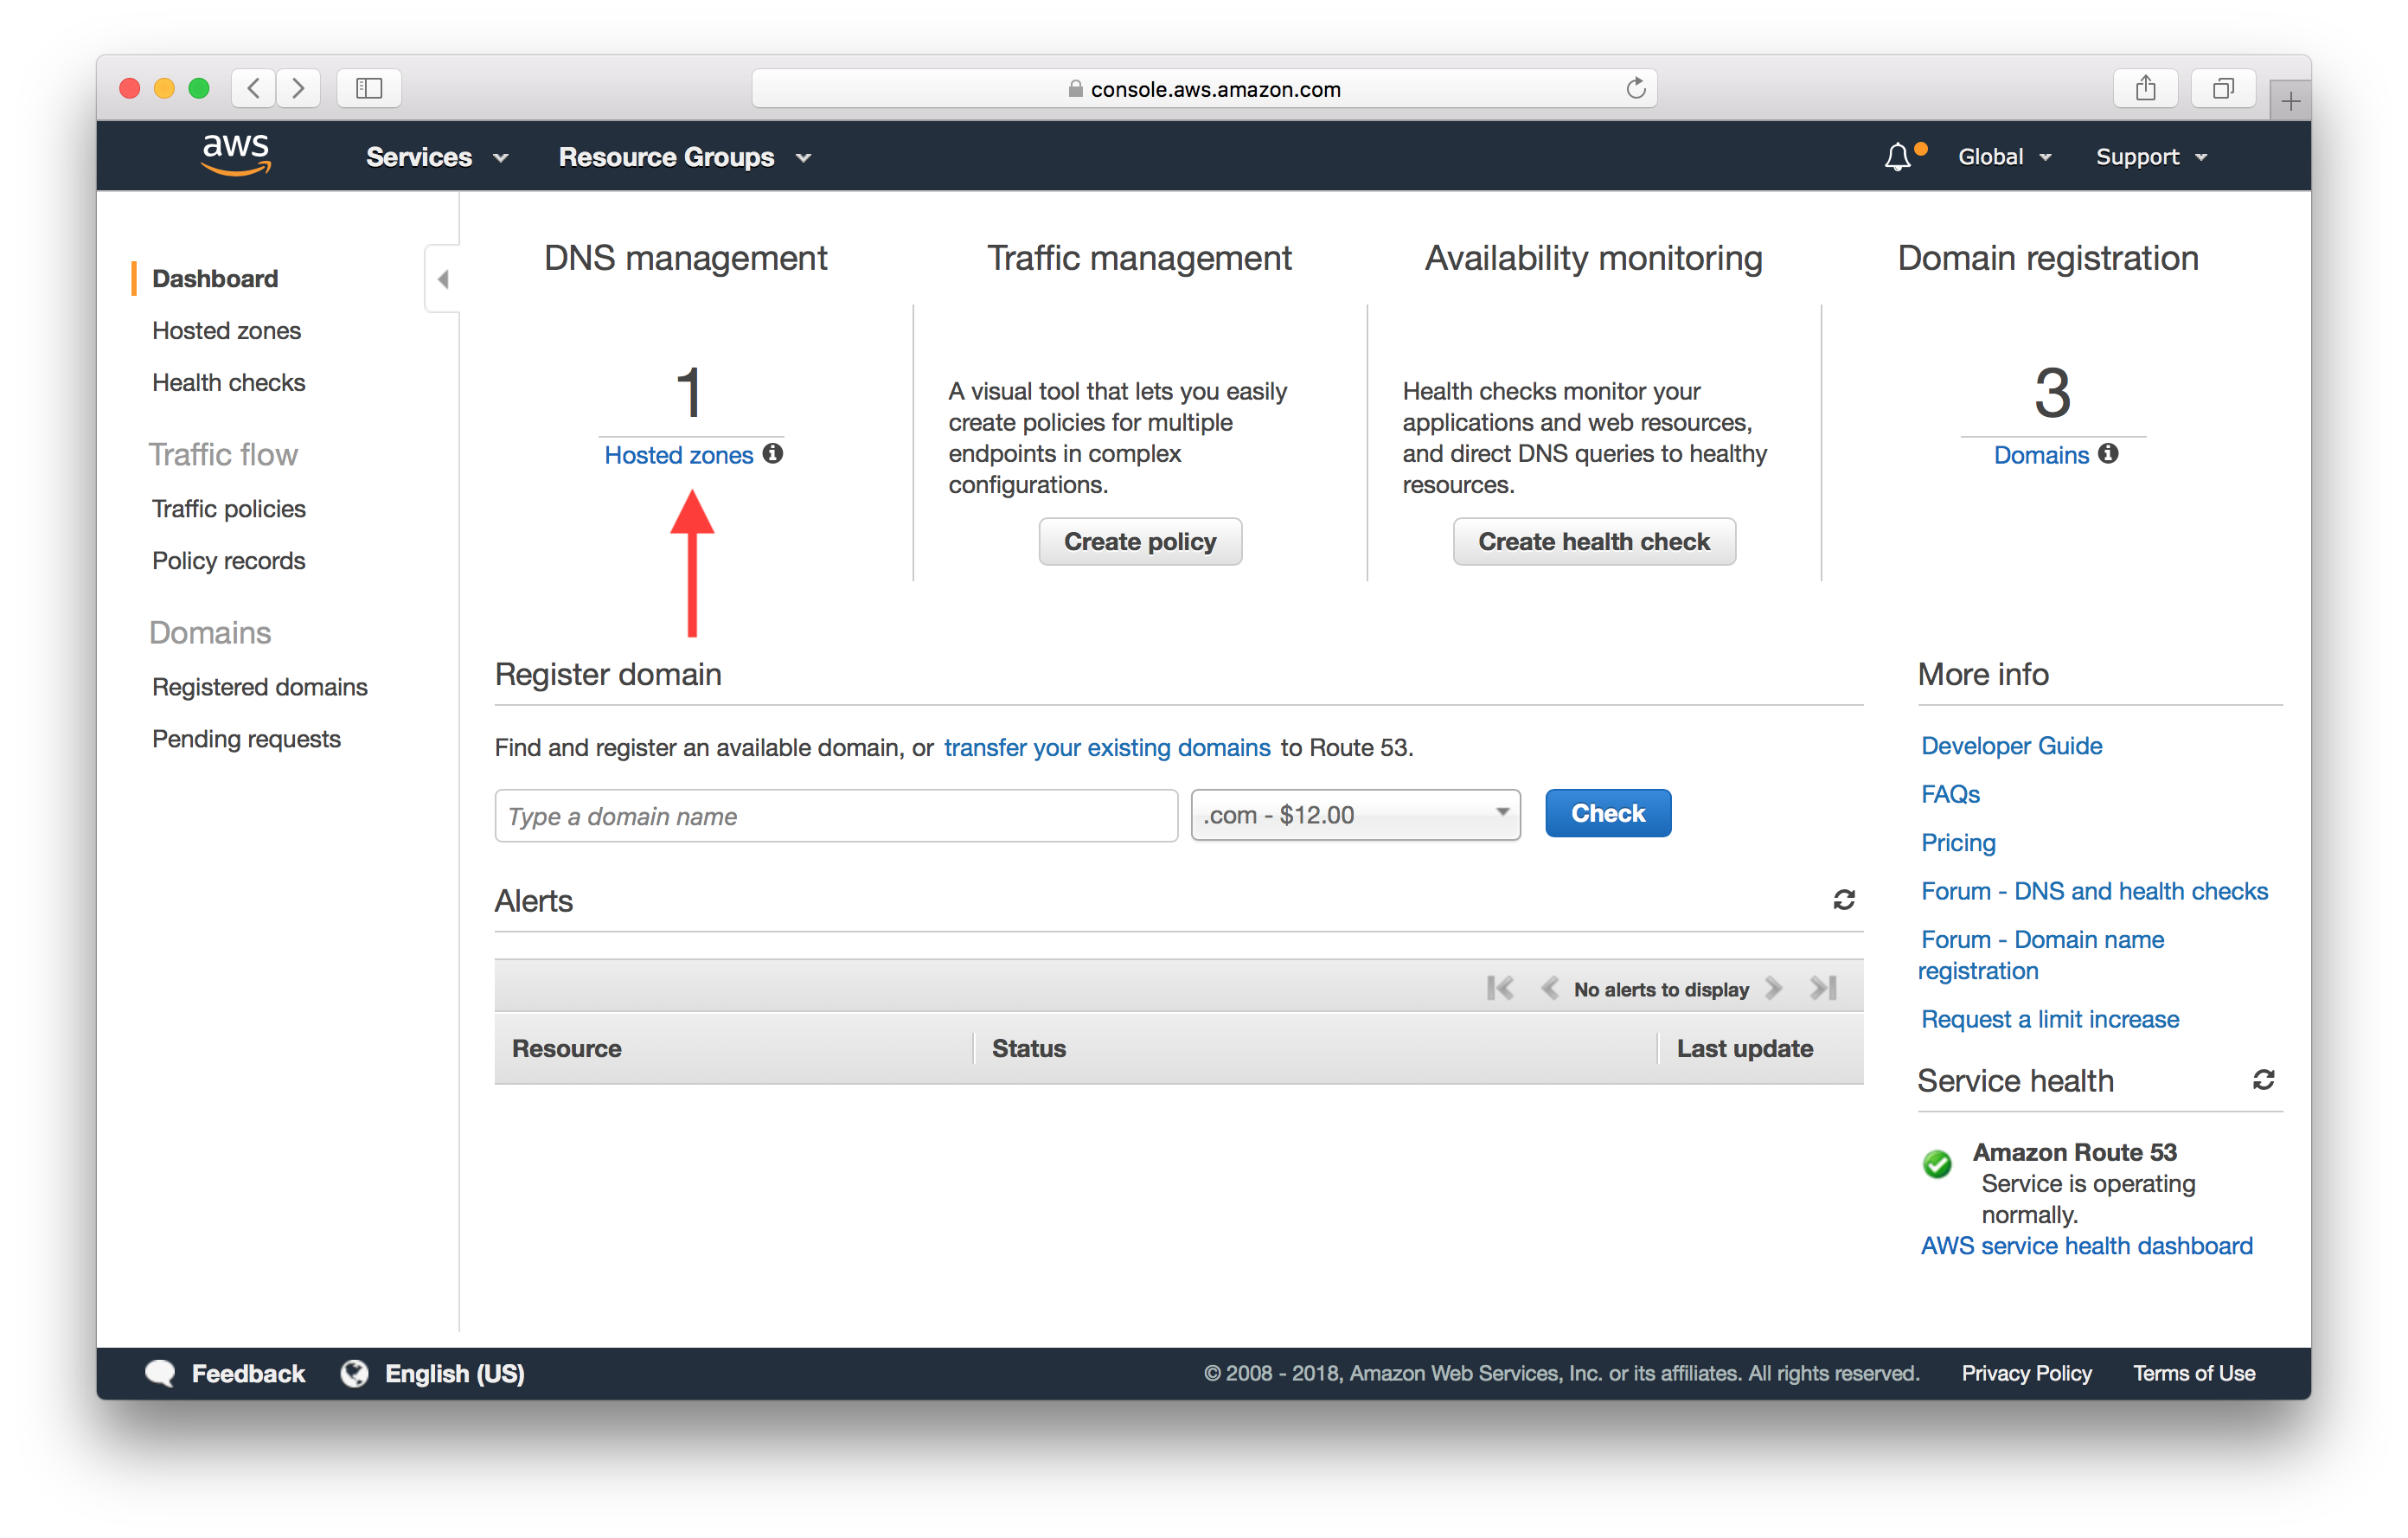
Click on Hosted zones.
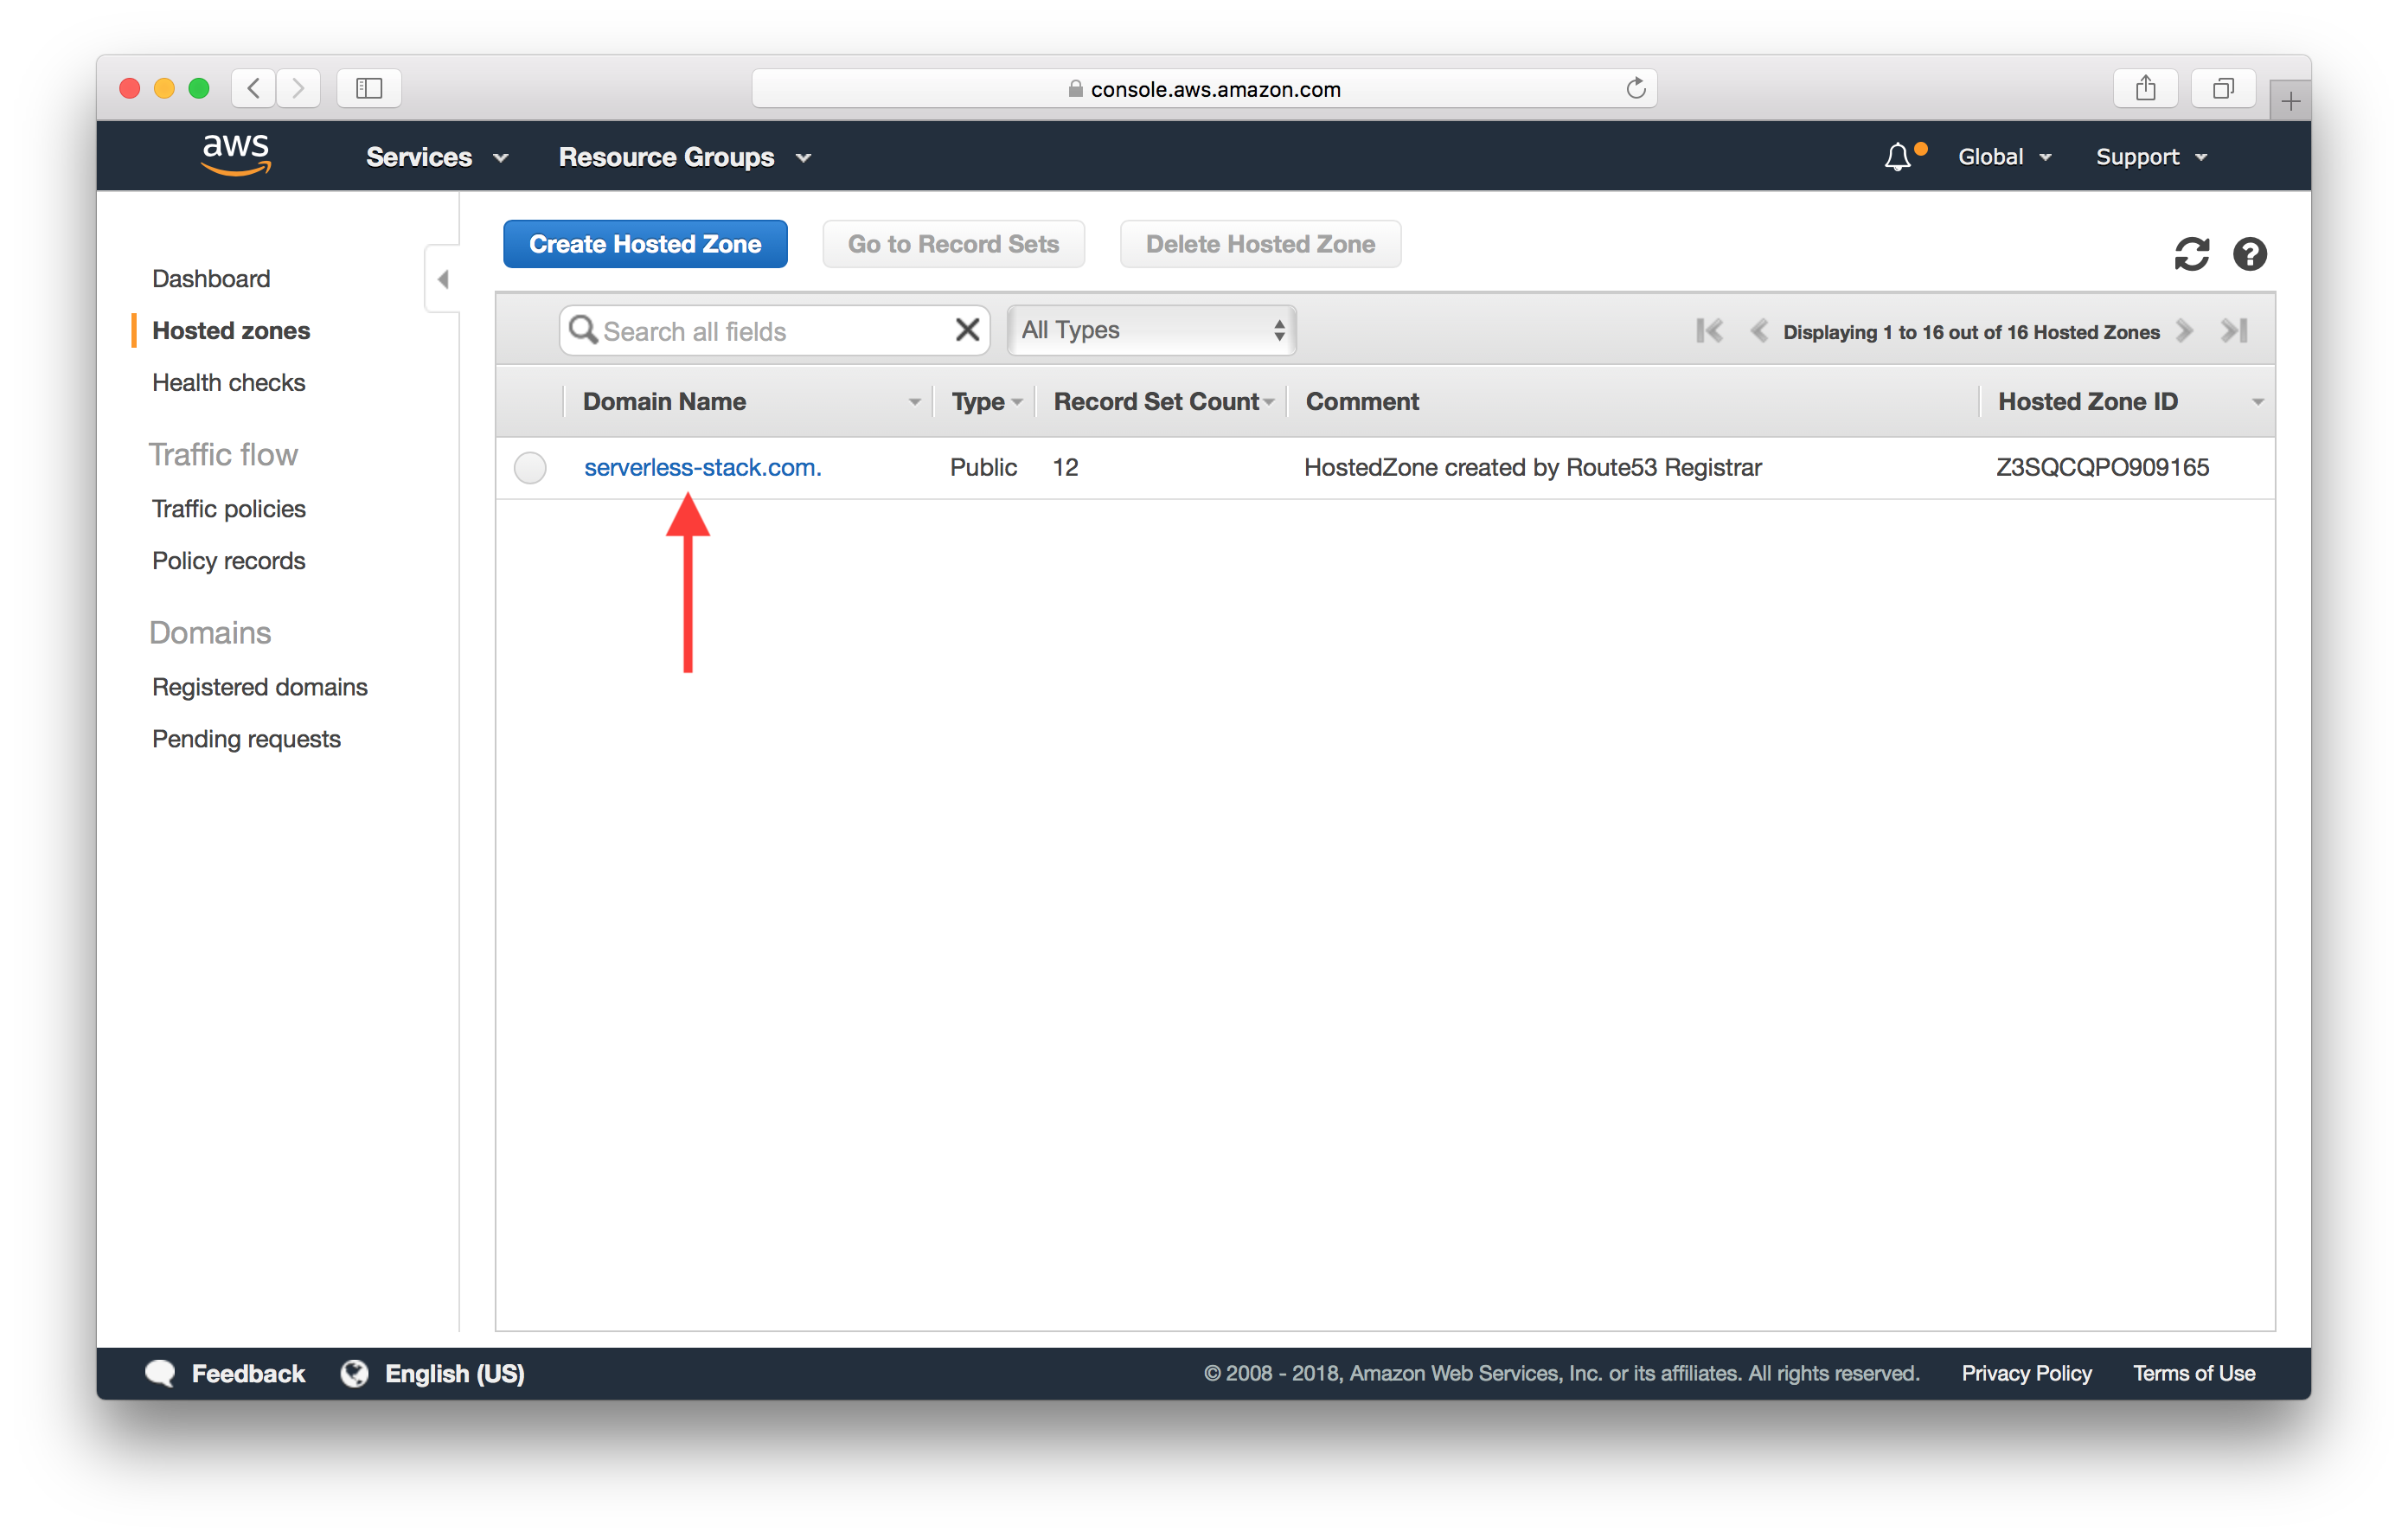
And select the domain we want to configure.
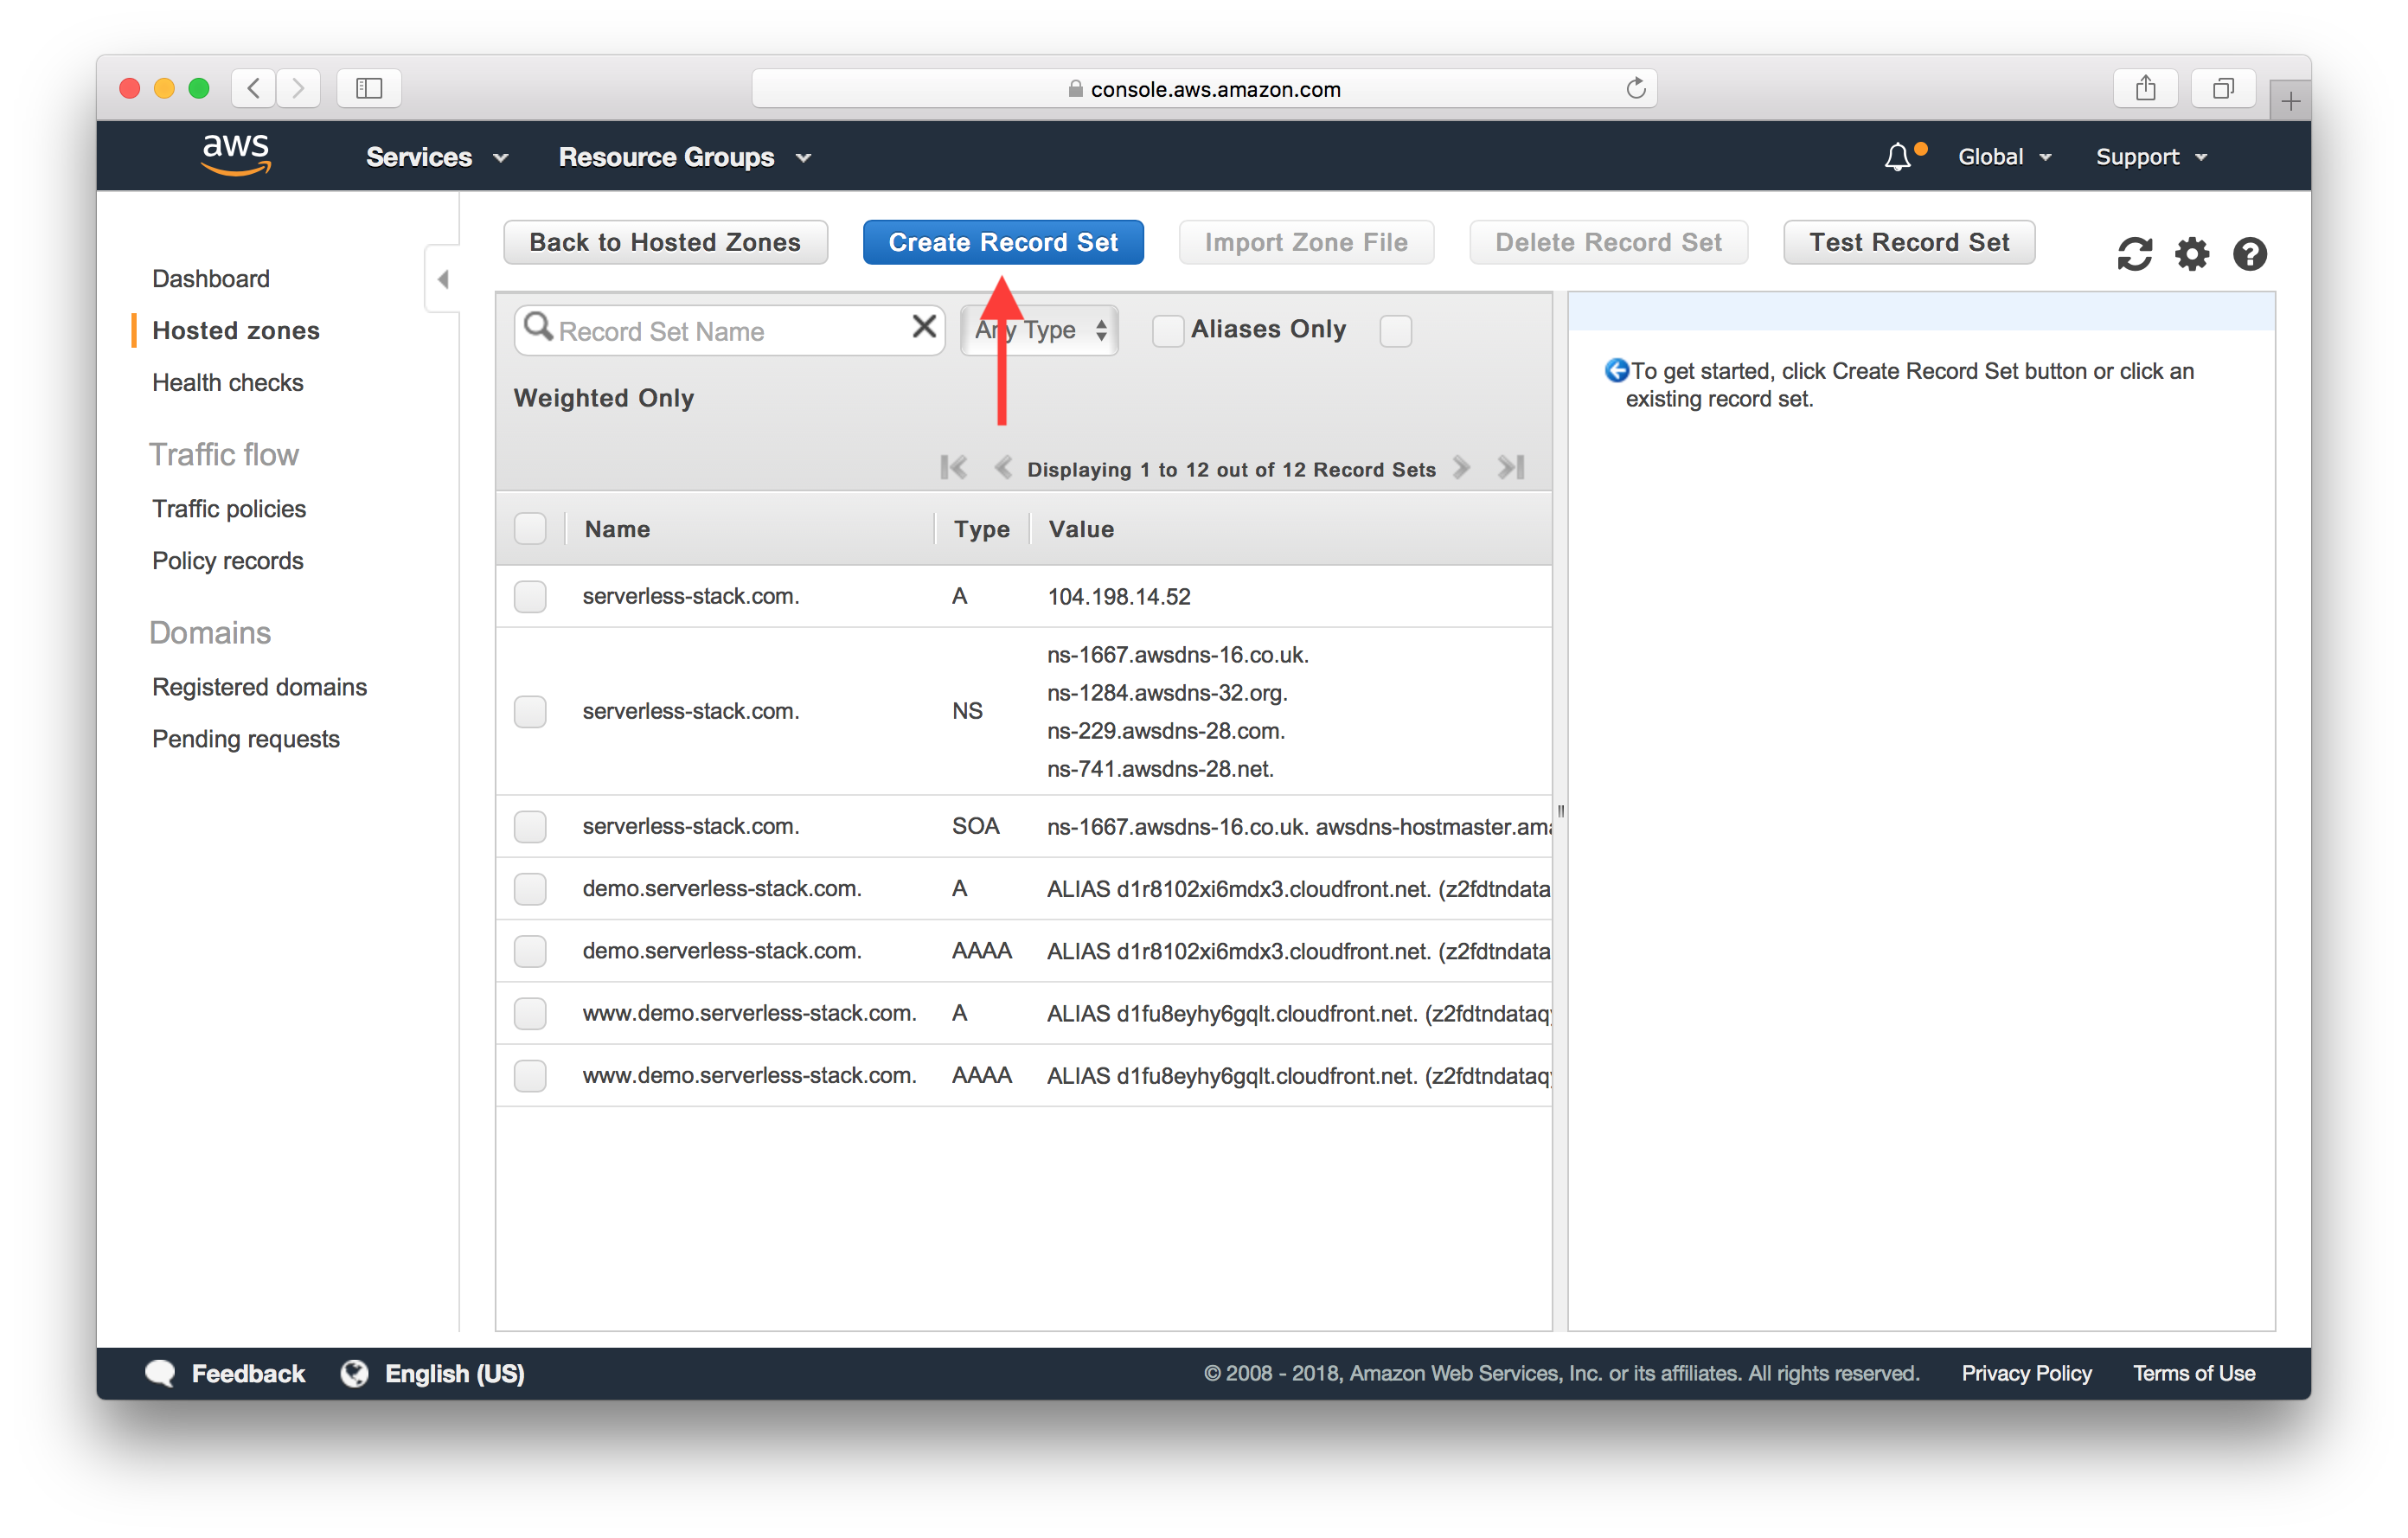
Here click on Create Record Set.
Select Type as A - IPv4 address and set the Value to 104.198.14.52. And hit Create. We get this IP from the Netlify docs on adding custom domains.
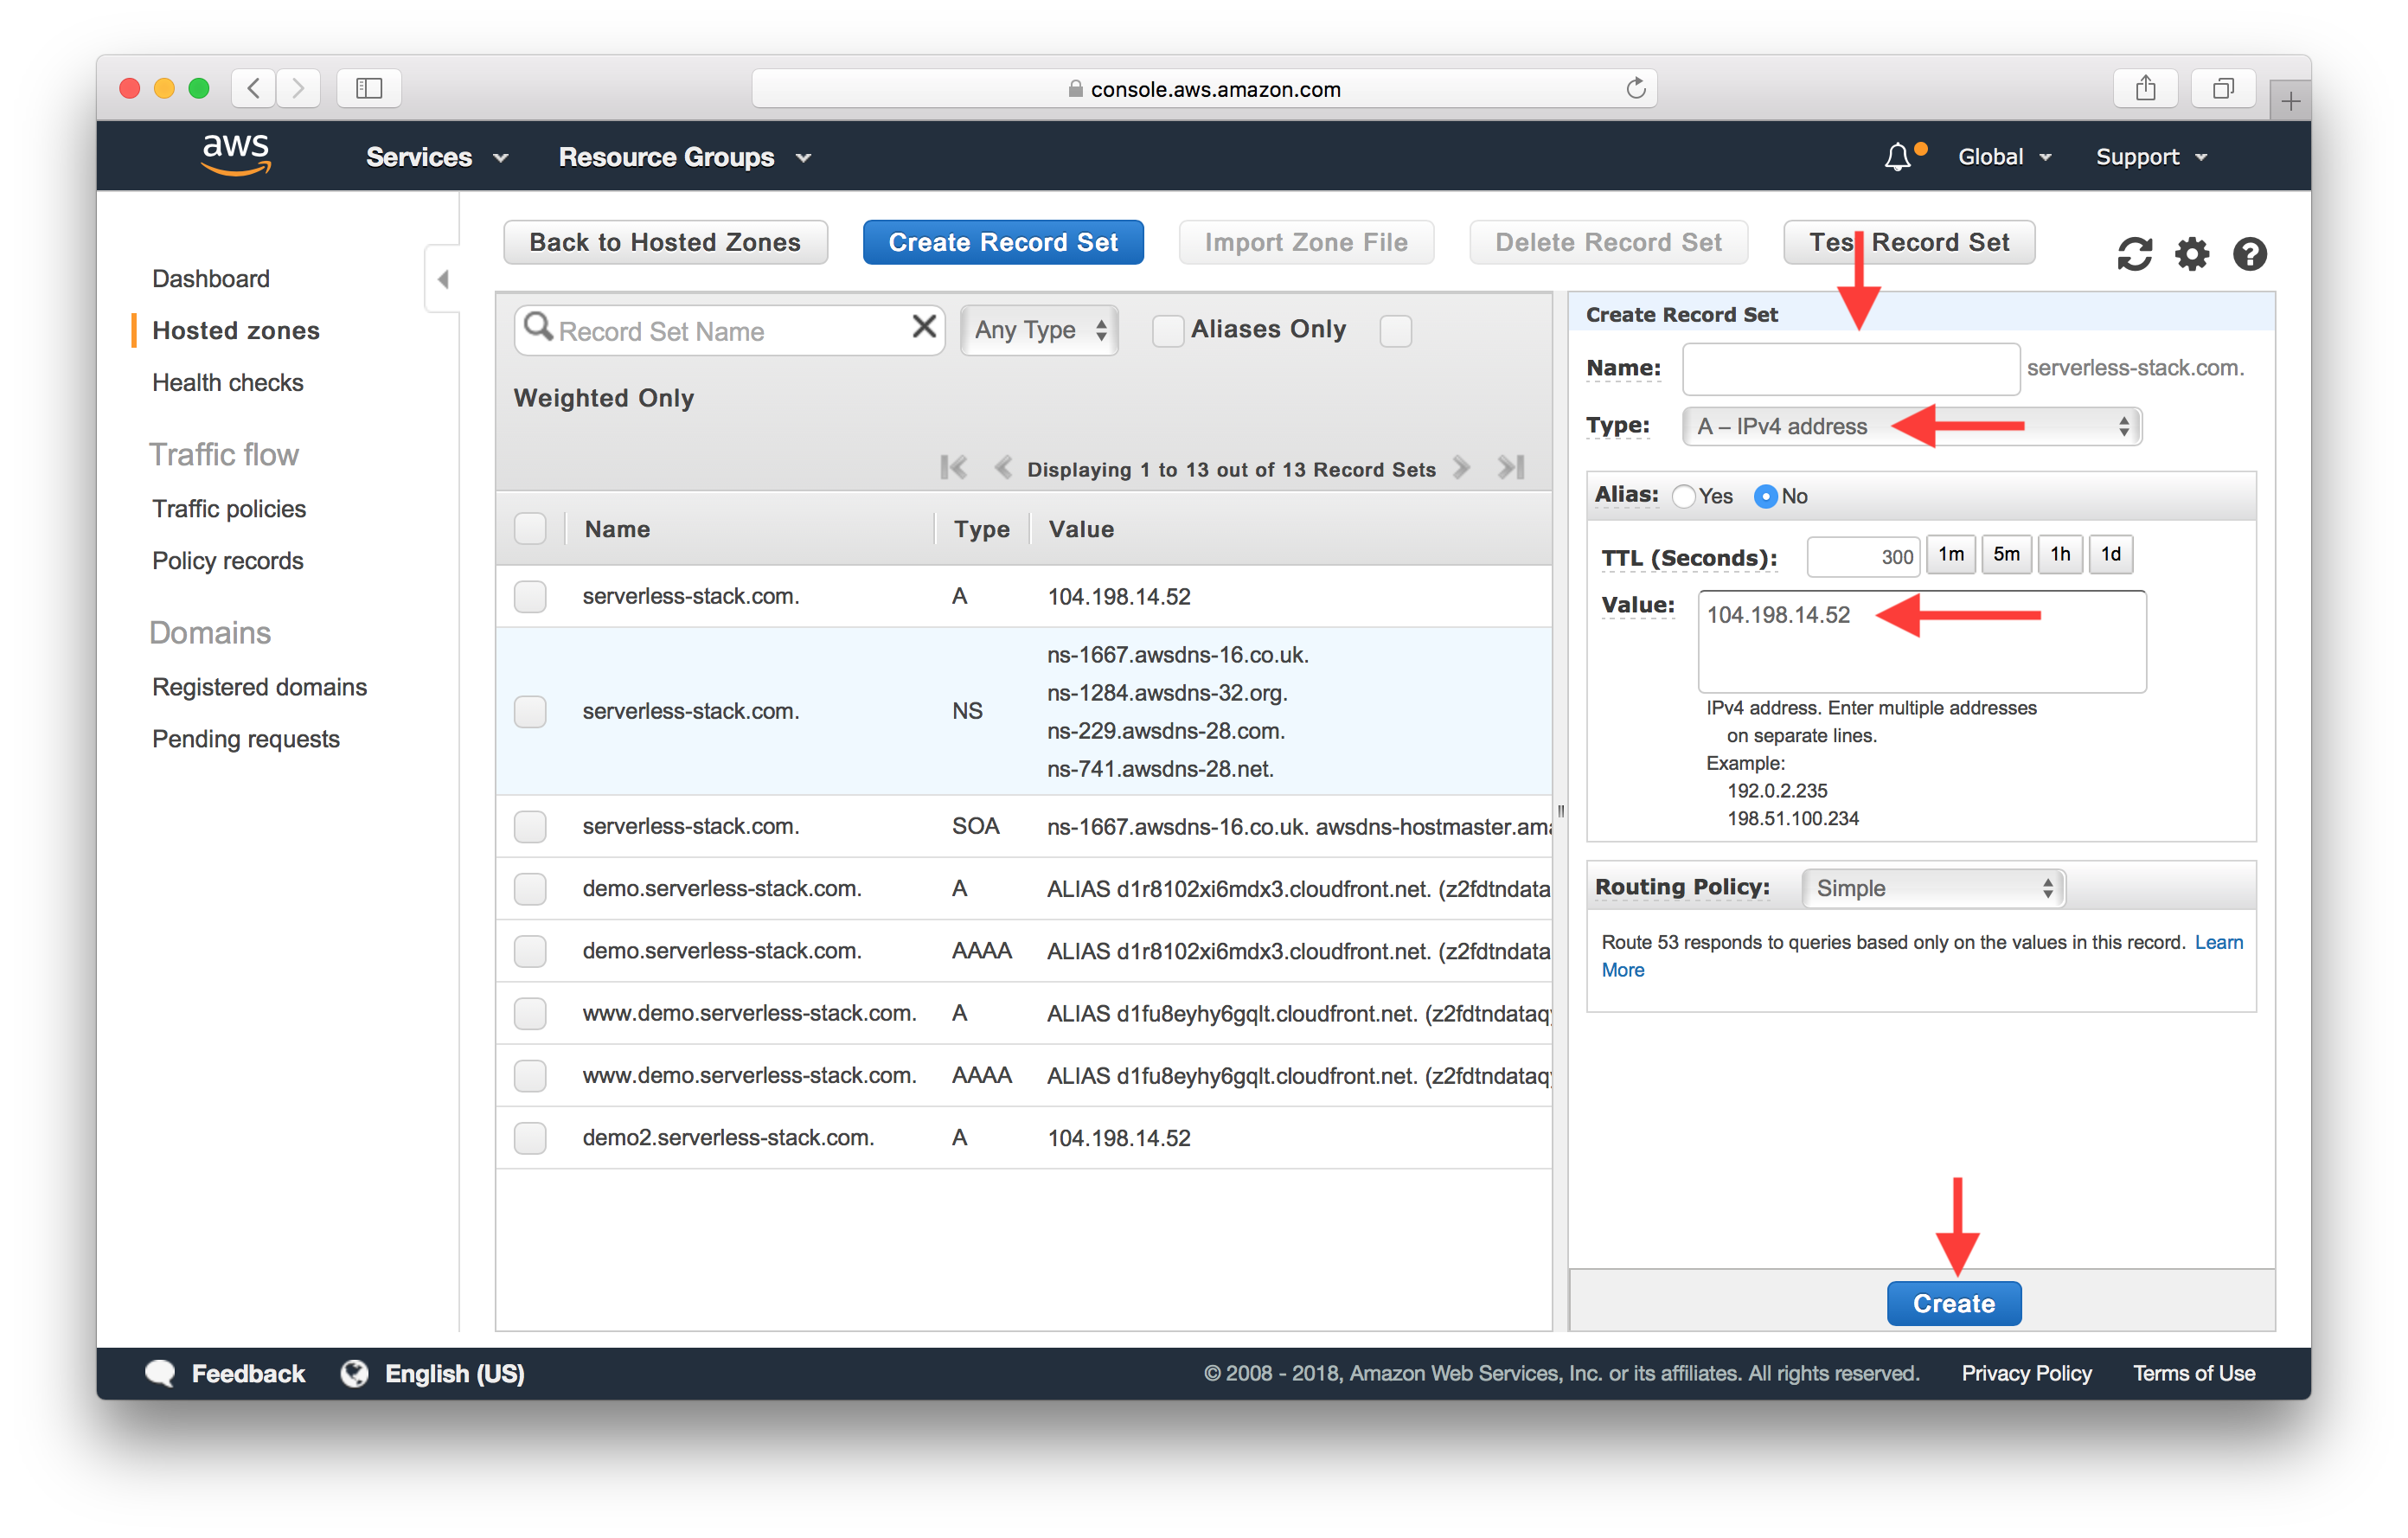
Next hit Create Record Set again.
Set Name to www, Type to CNAME - Canonical name, and the value to the Netlify site name as we noted above. In our case it is https://serverless-stack-2-client.netlify.com. Hit Create.
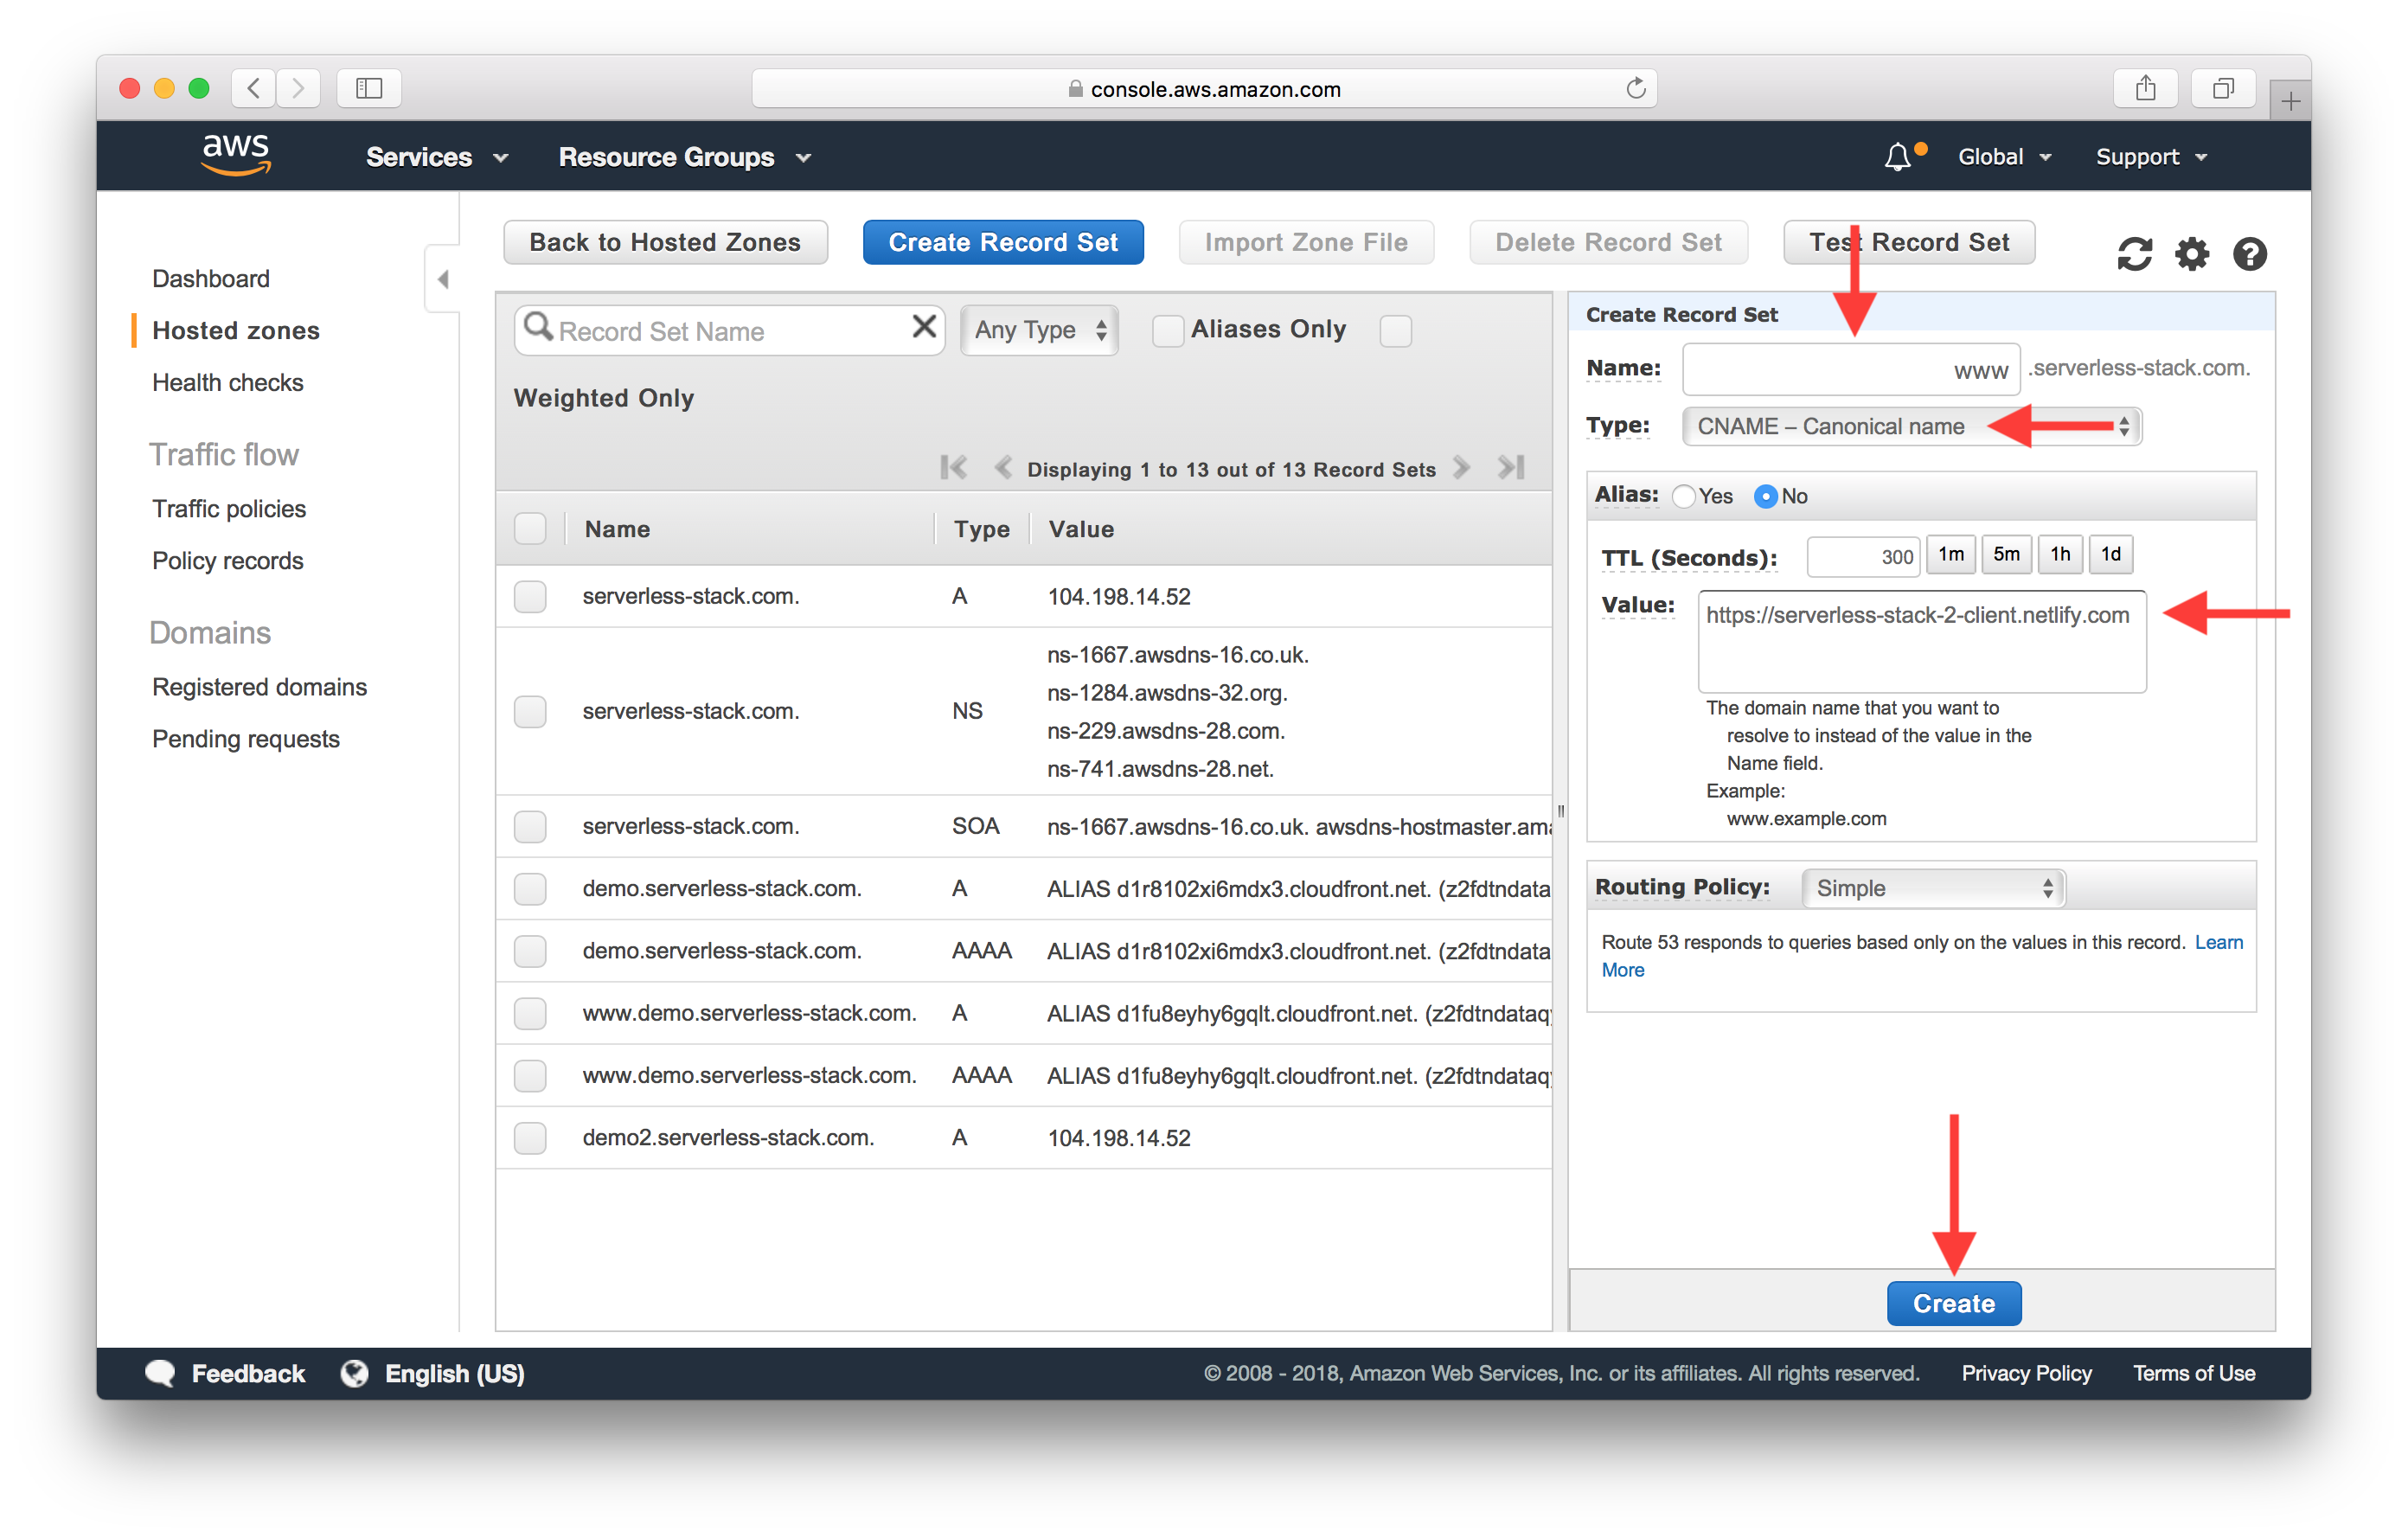
And give the DNS around 30 minutes to update.
Configure SSL
Back in Netlify, hit HTTPS in the side panel. And it should say that it is waiting for the DNS to propagate.
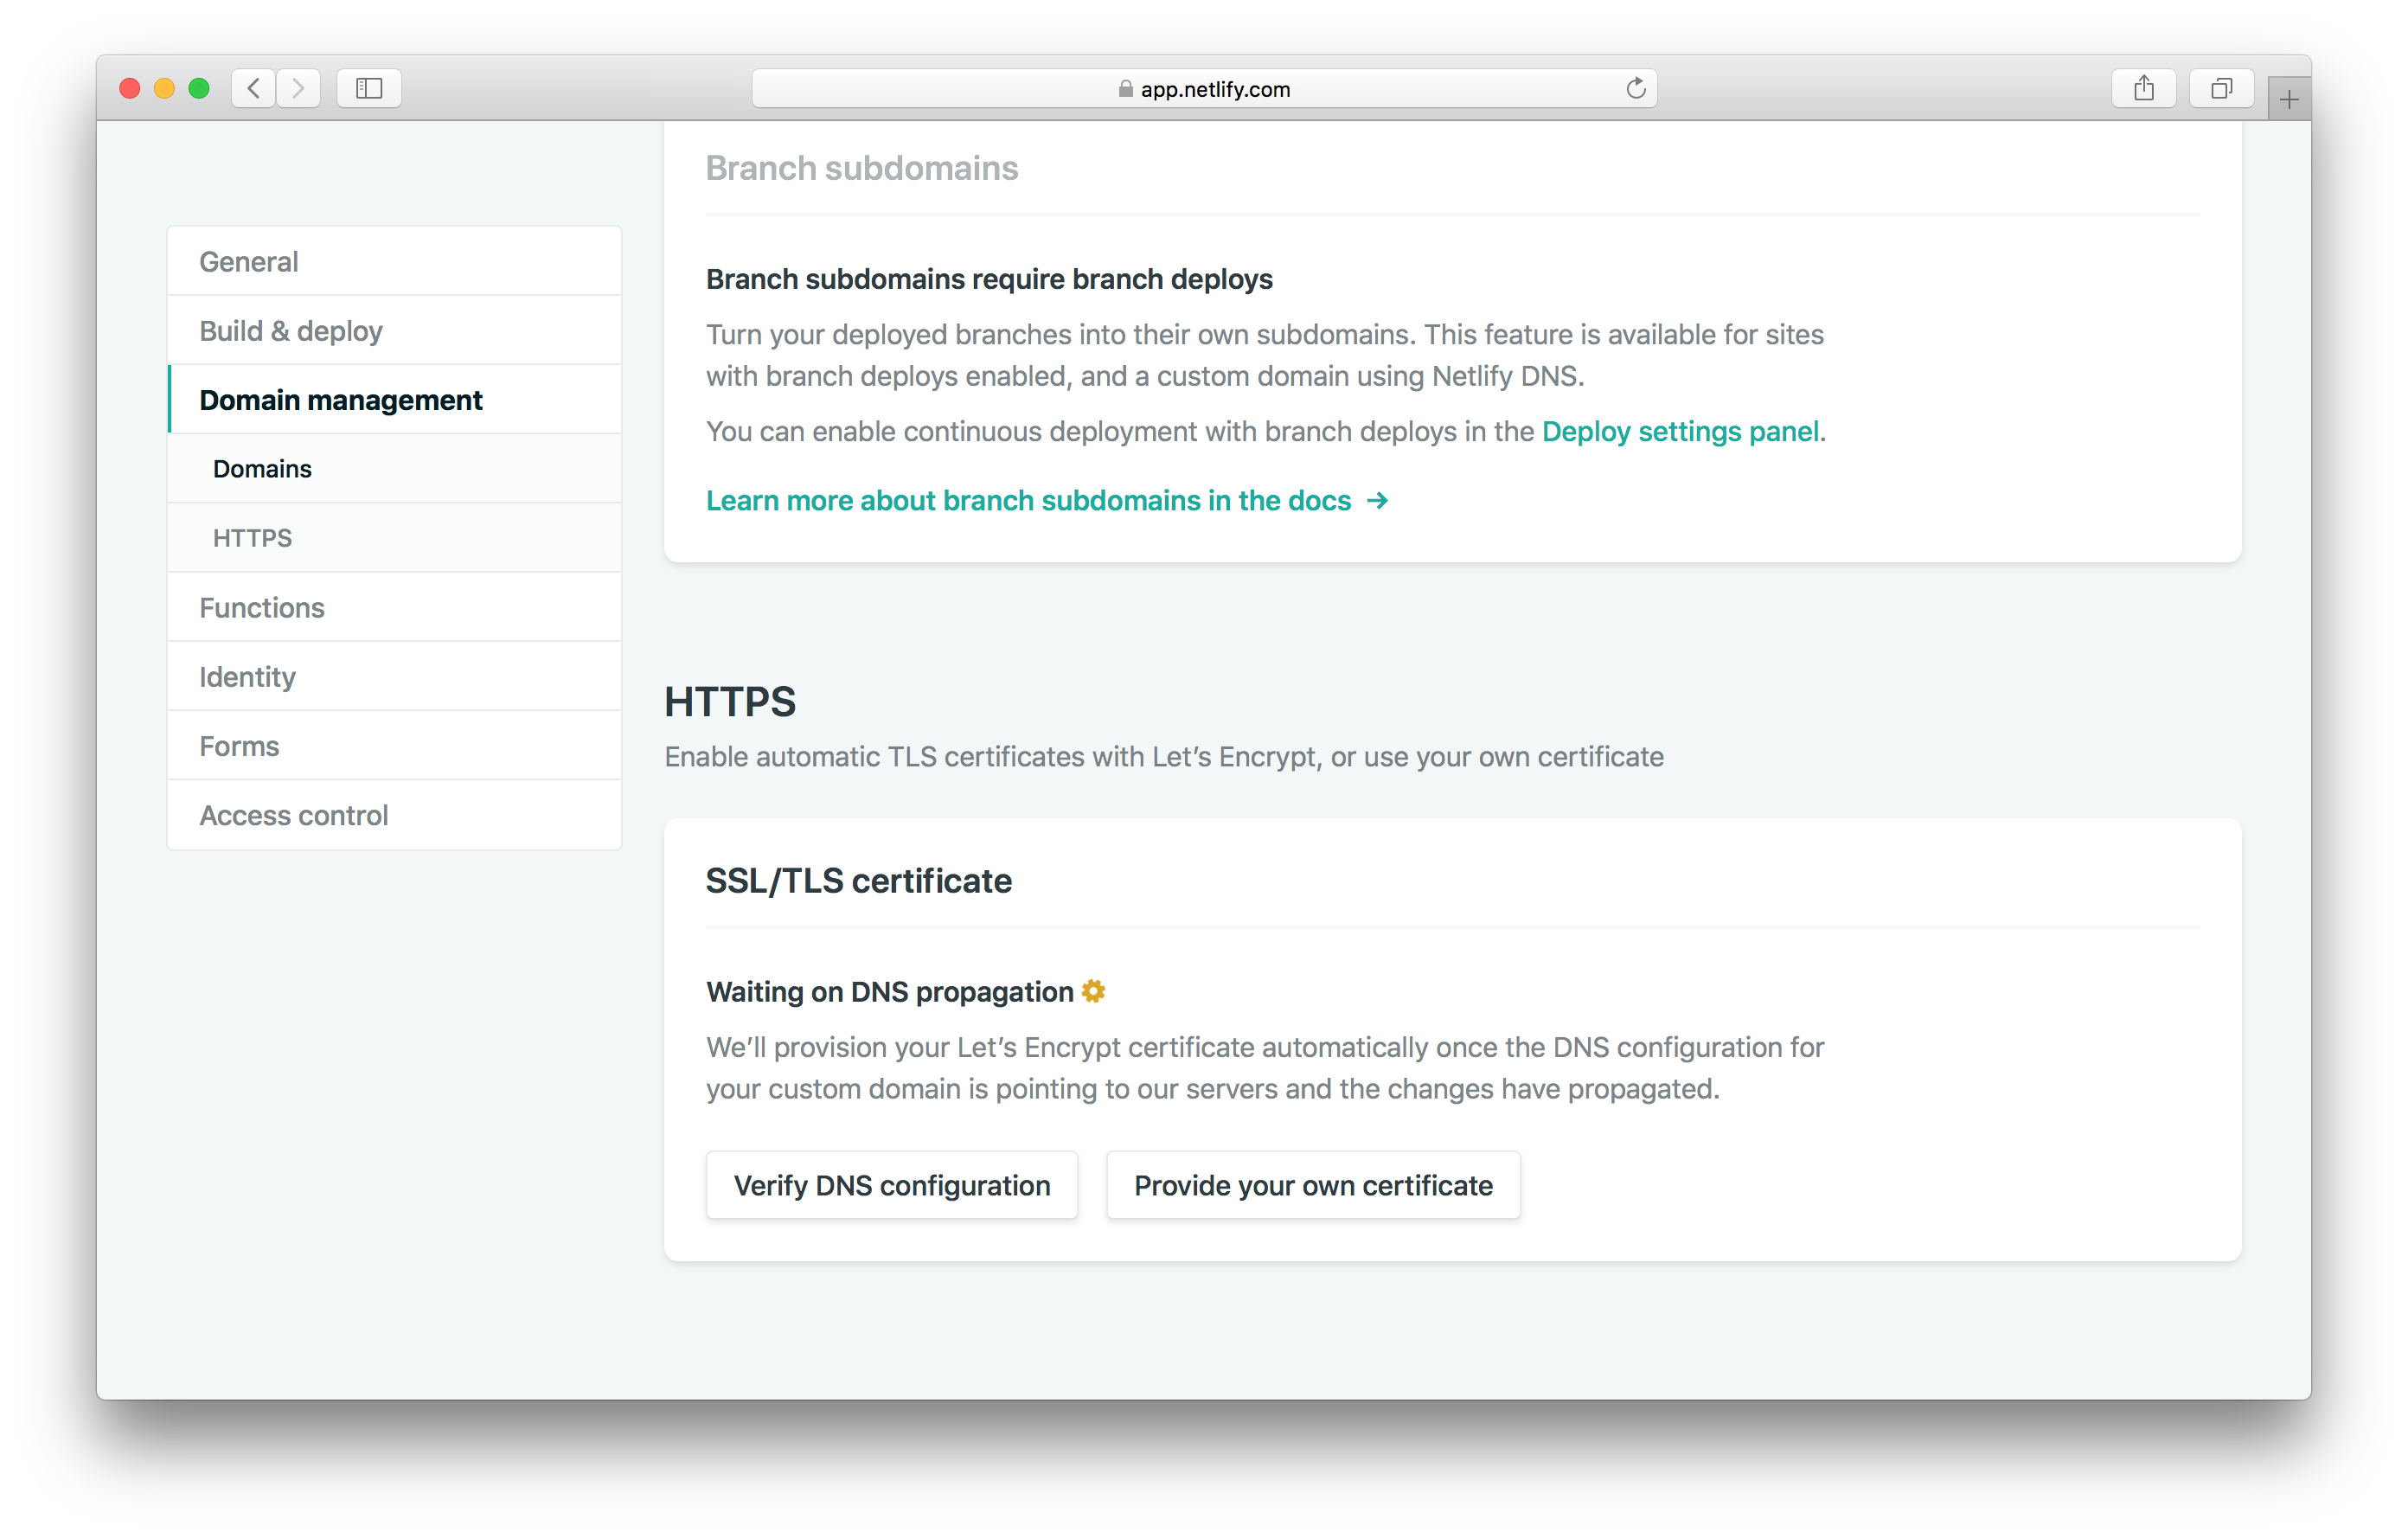
Once that is complete, Netlify will automatically provision your SSL ceritificate using Let’s Encrypt.
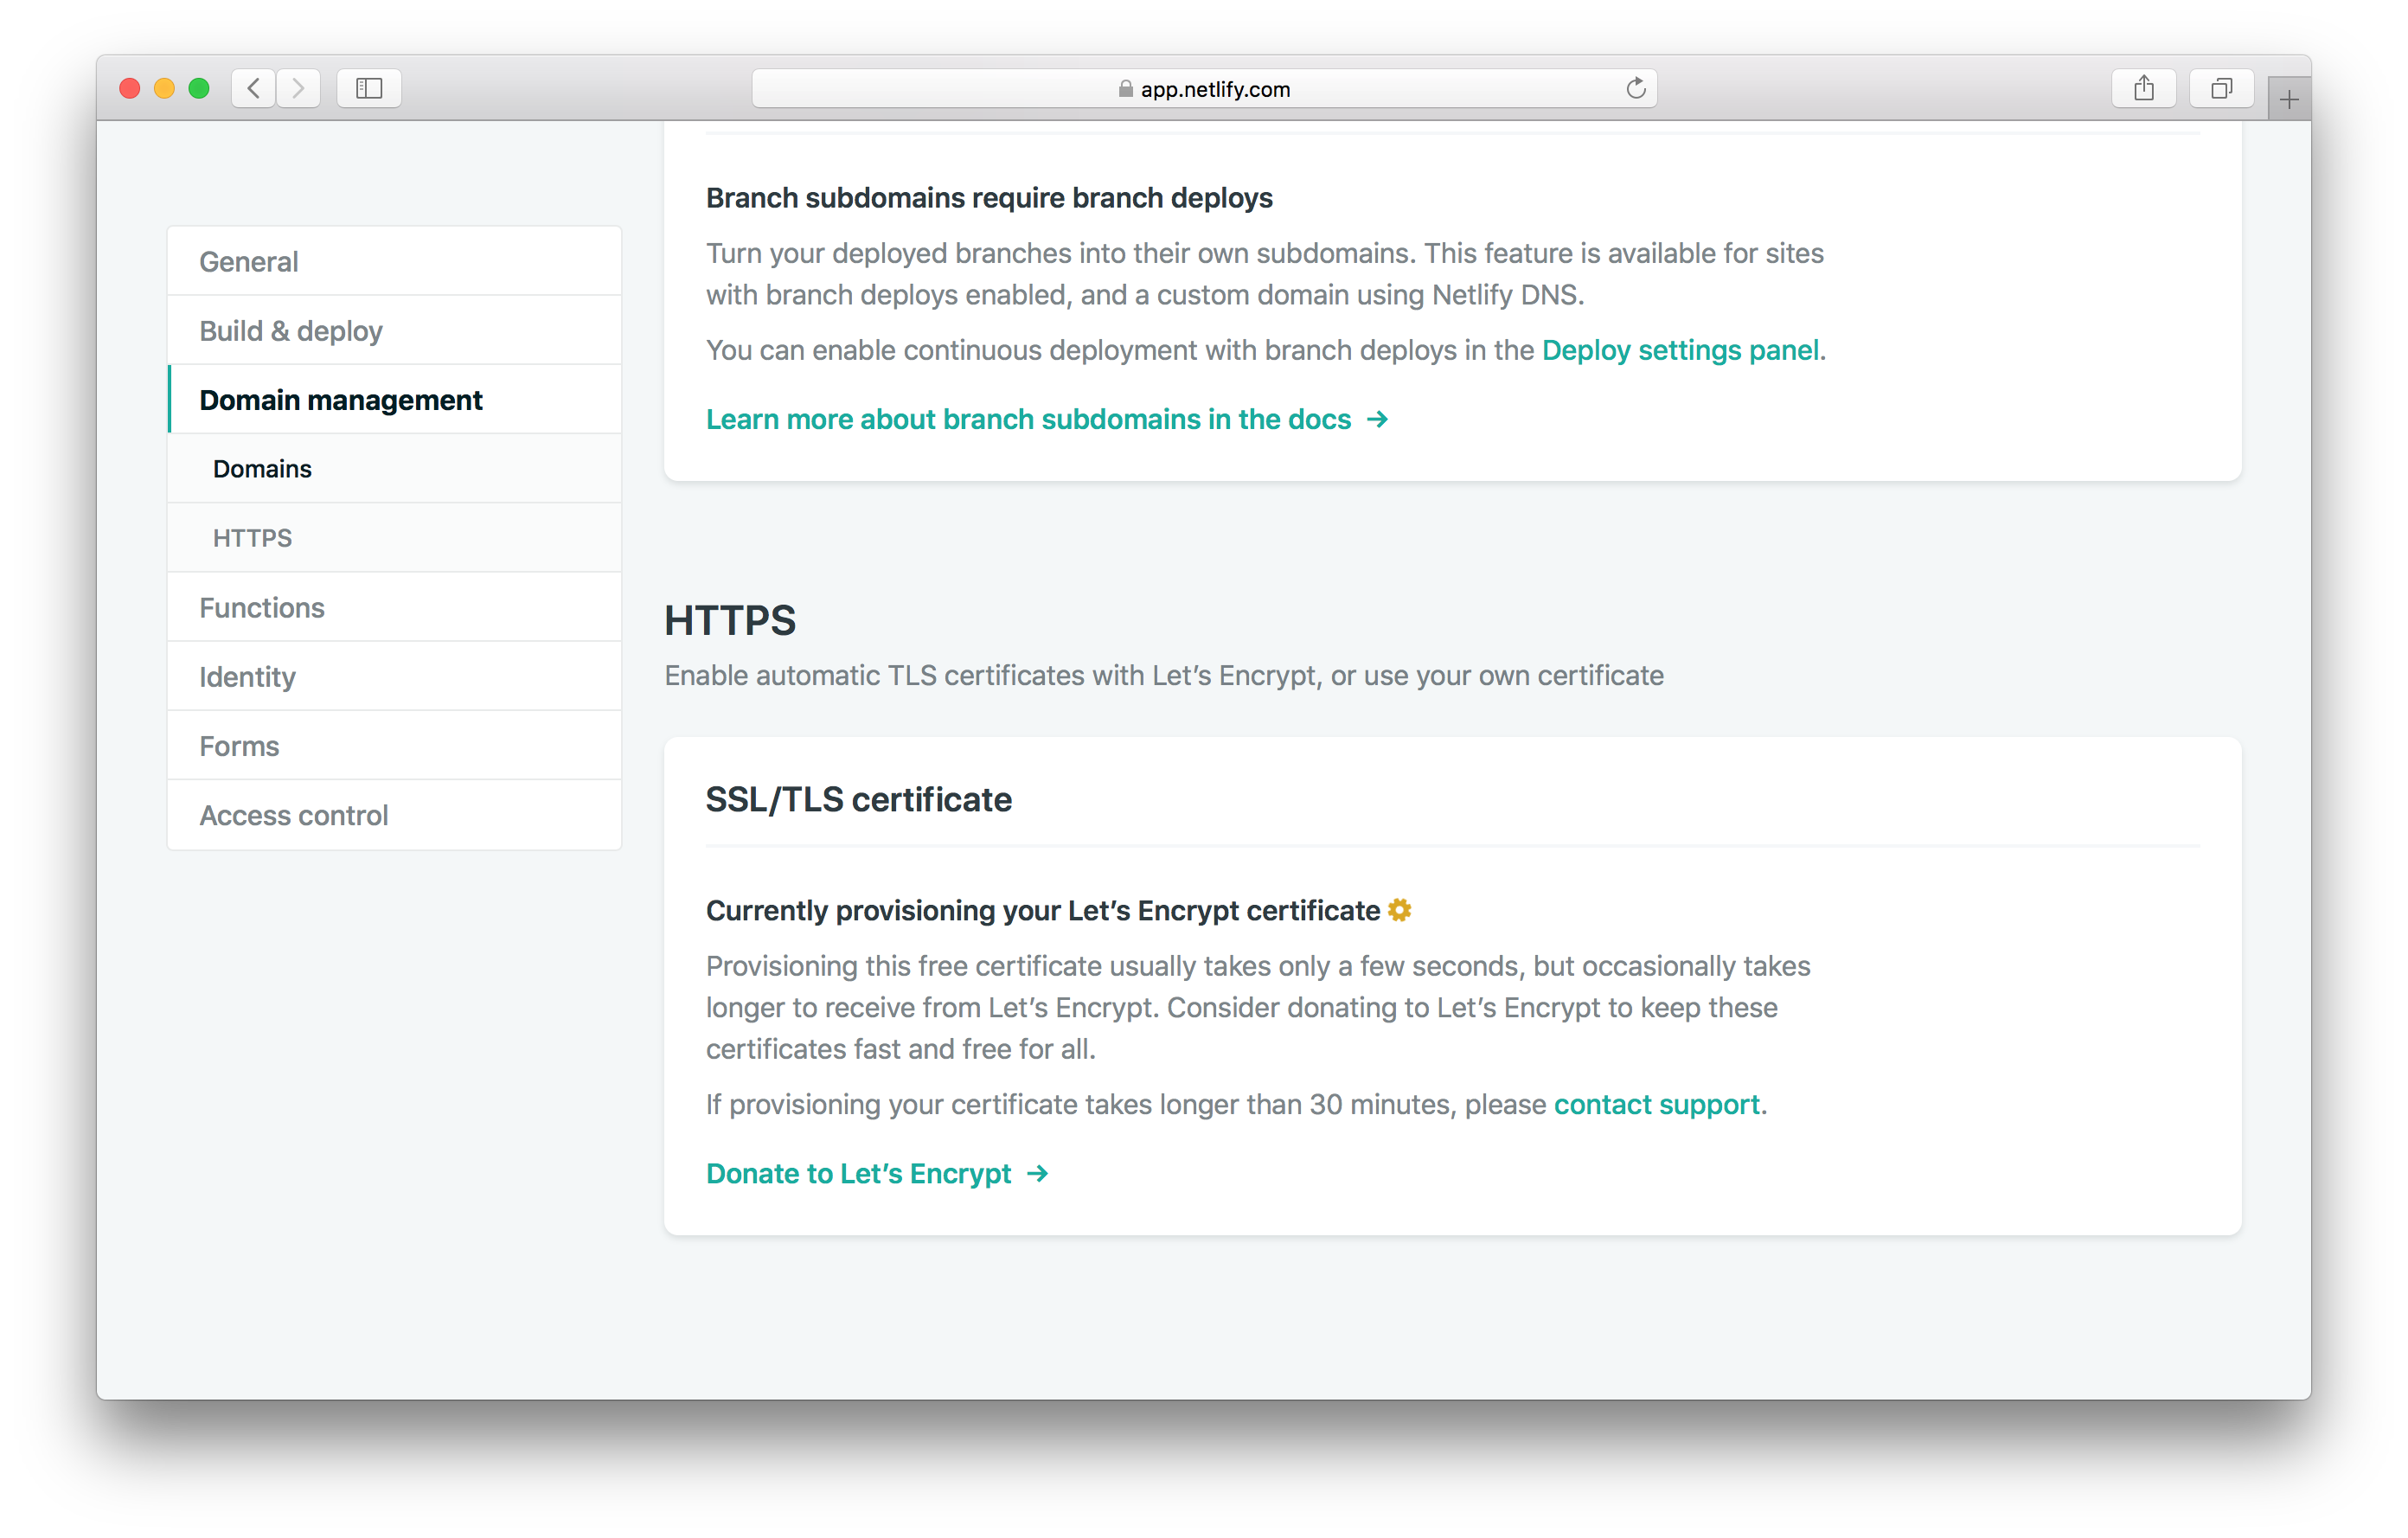
Wait a few seconds for the ceritificate to be provisioned.
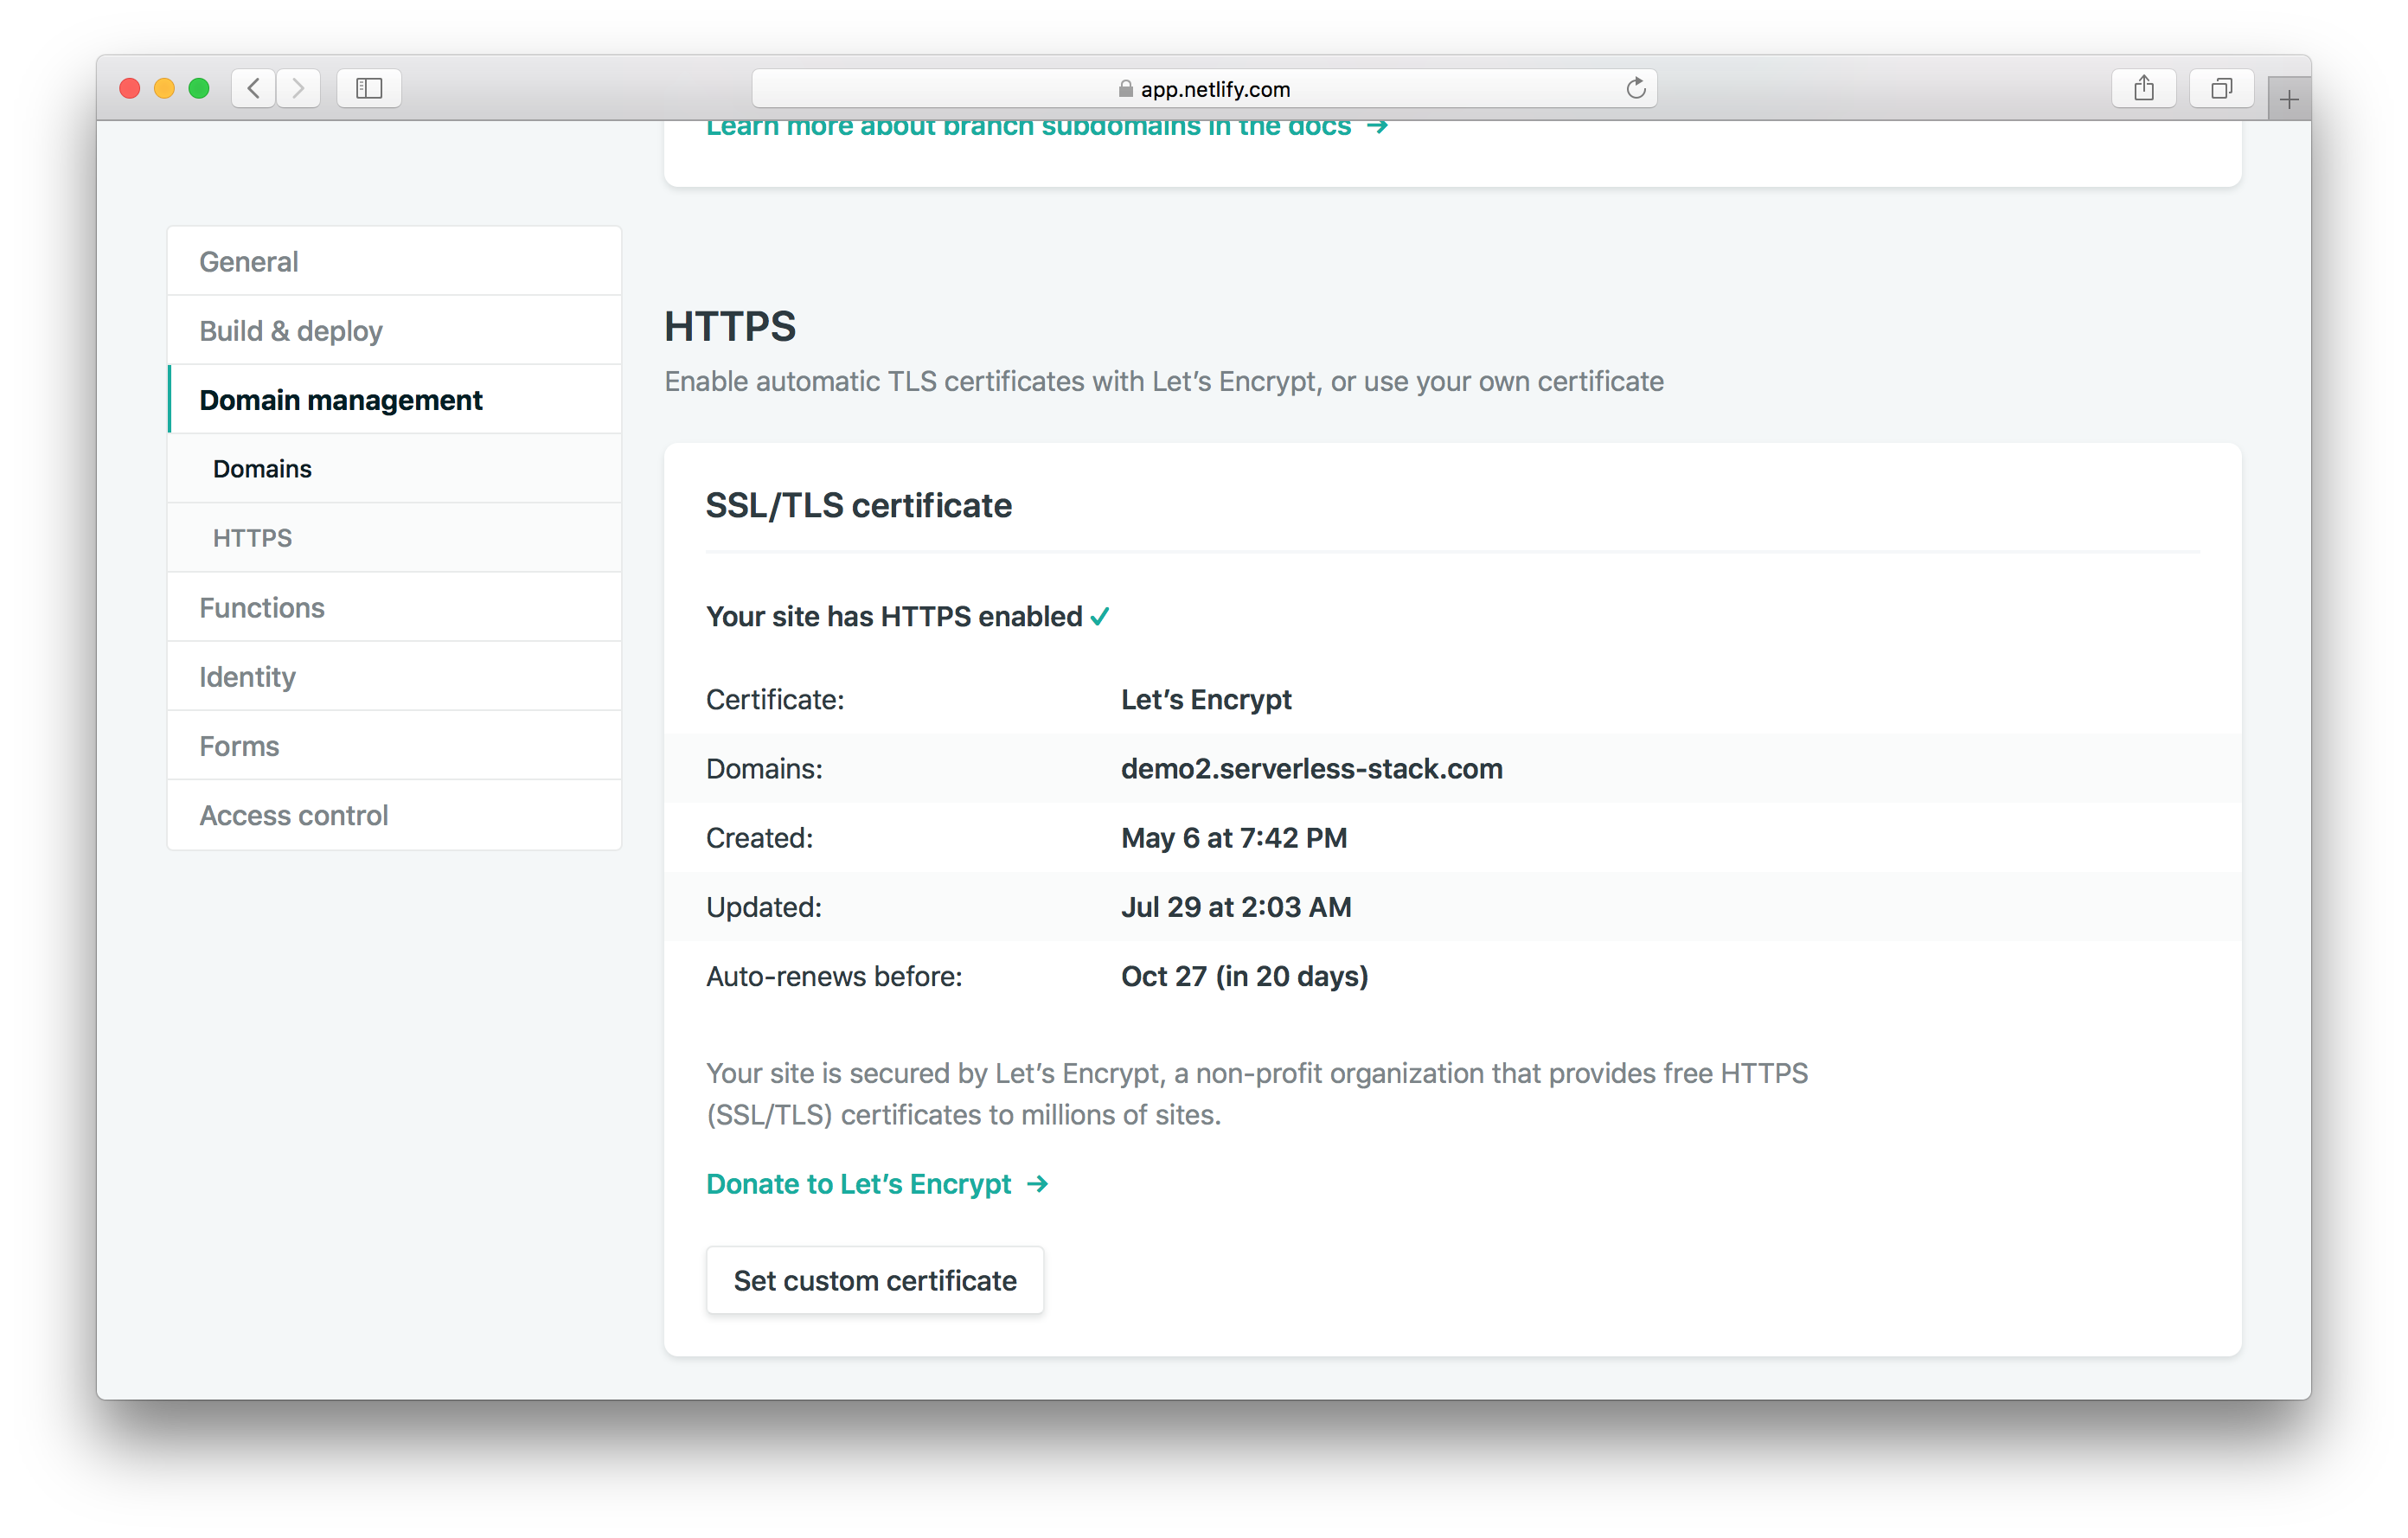
Now if you head over to your browser and go to your custom domain, your notes app should be up and running!
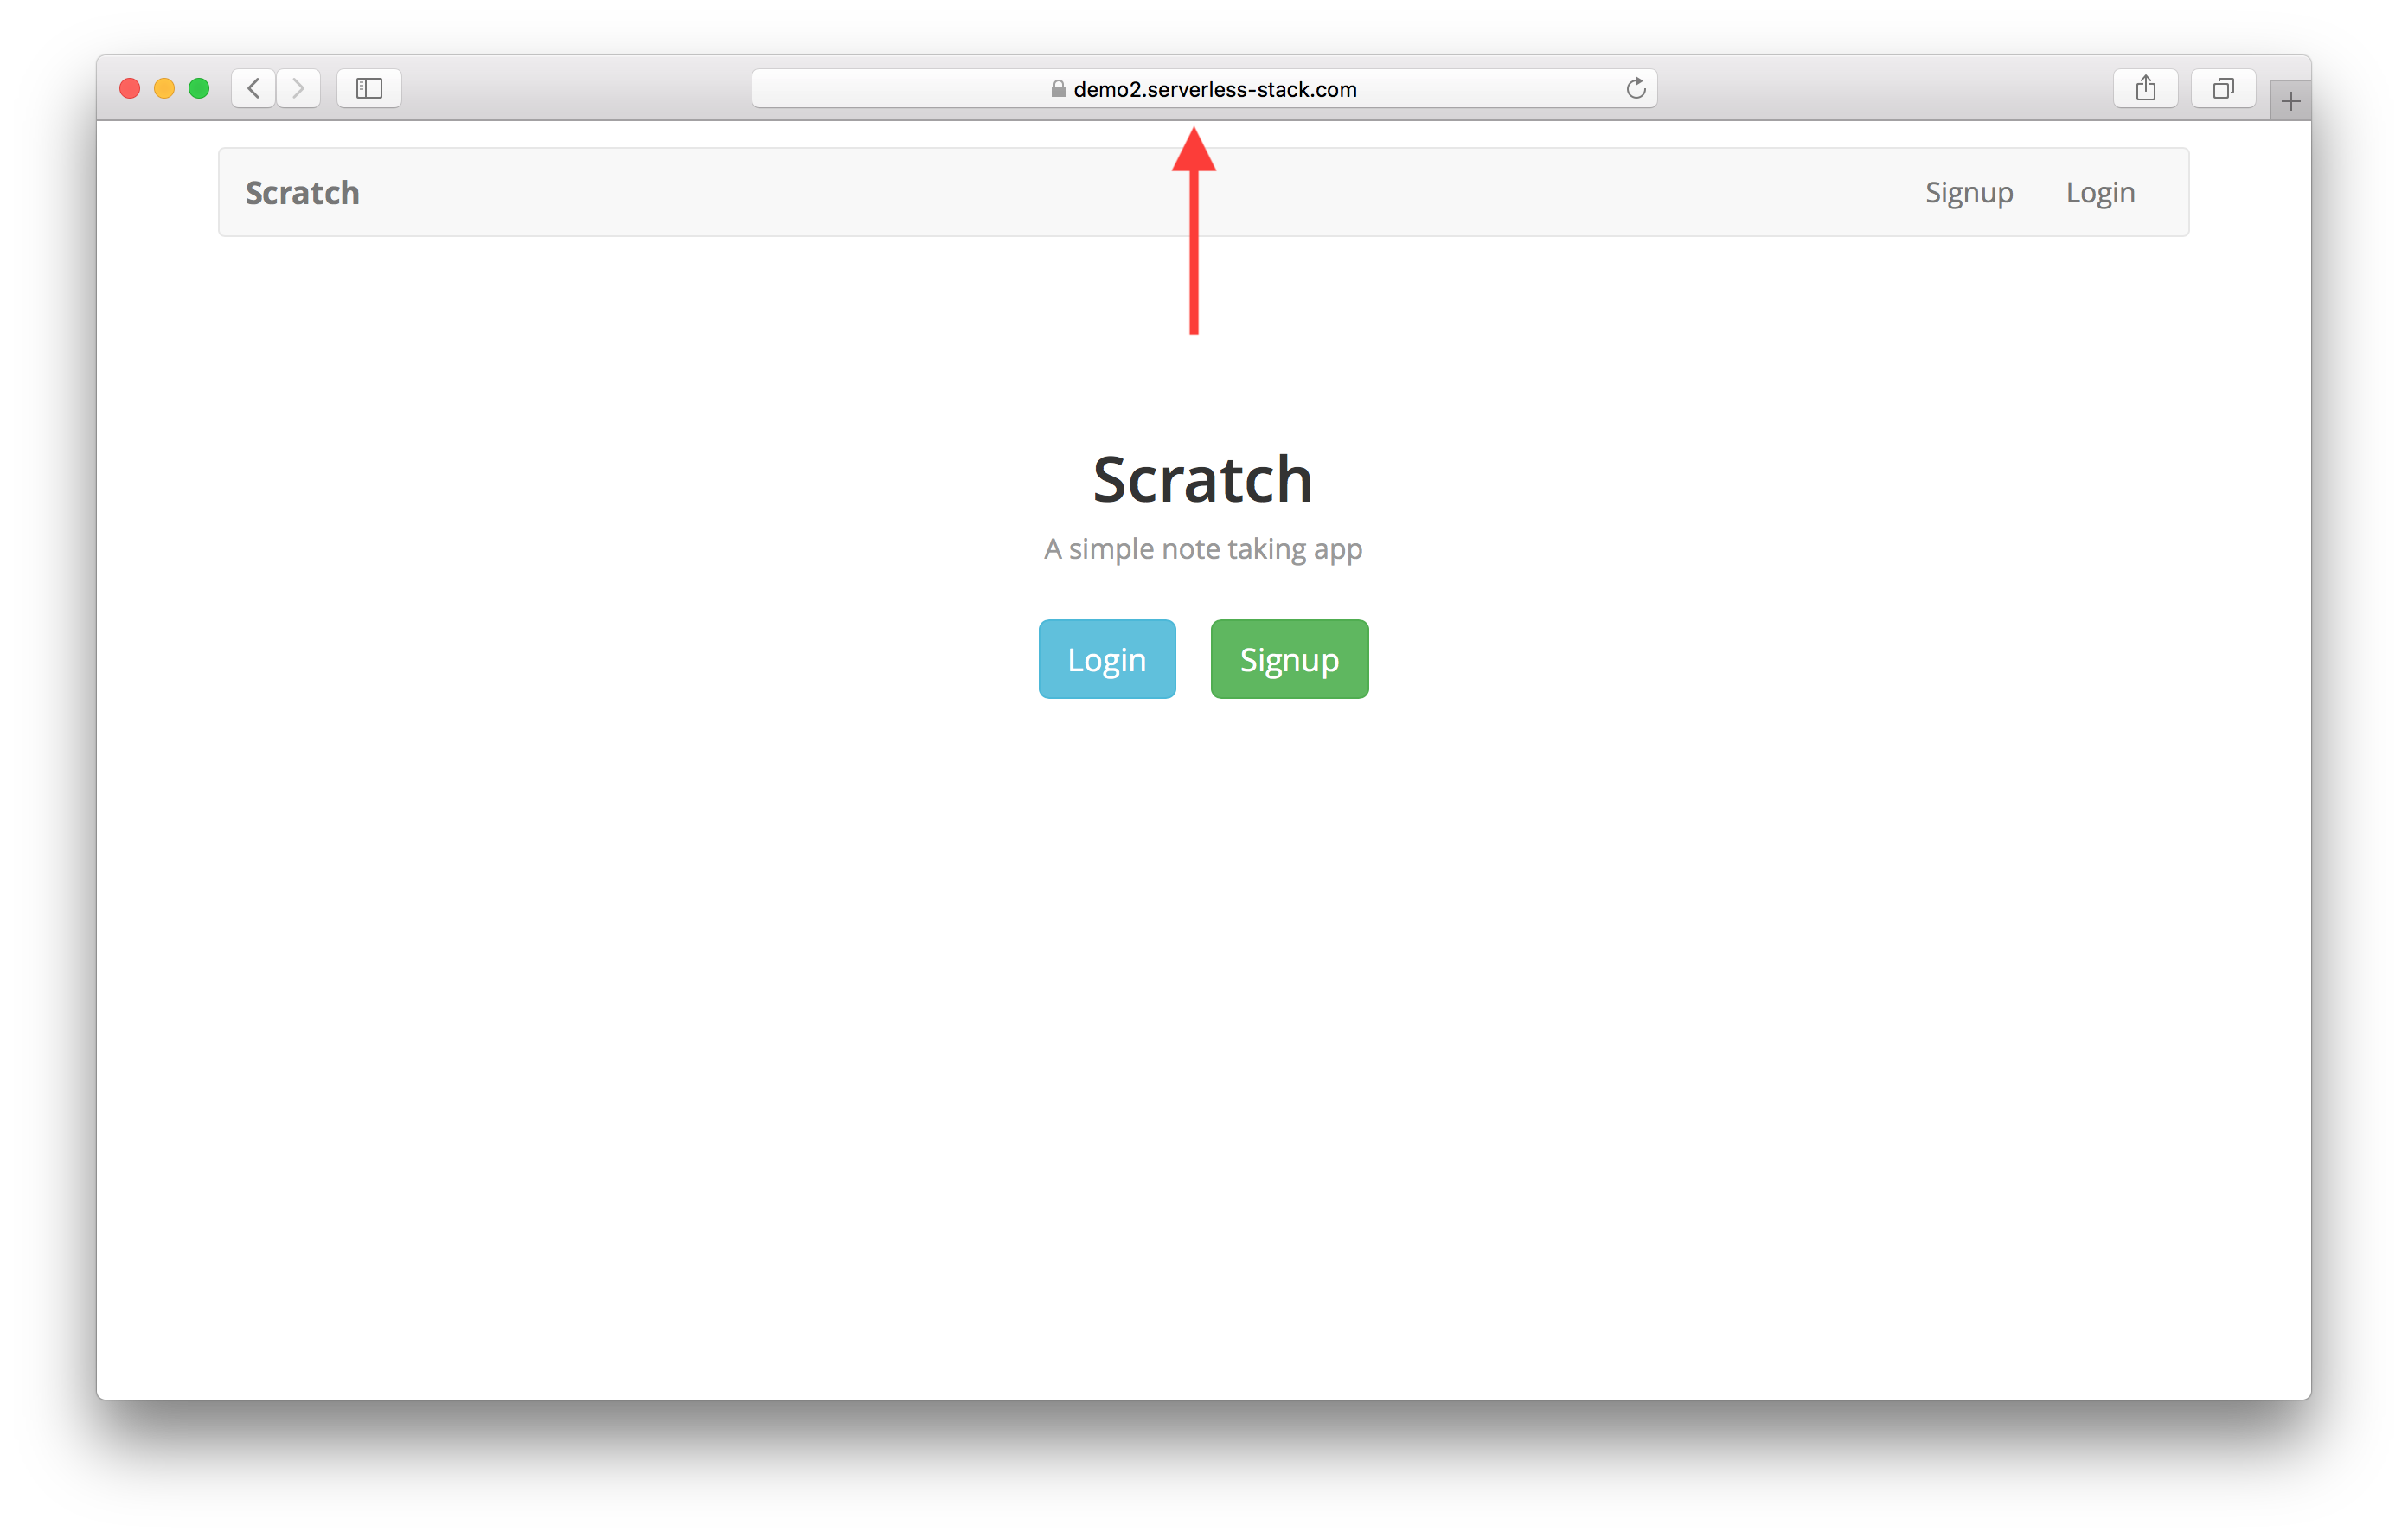
We have our app in production but we haven’t had a chance to go through our workflow just yet. Let’s take a look at that next.
For help and discussion
Comments on this chapterIf you liked this post, please subscribe to our newsletter, give us a star on GitHub, and follow us on Twitter.
Brought to you by
