Monitoring Deployments in Seed
Despite our best intentions we might run into cases where some faulty code ends up in production. We want to make sure we have a plan for that. Let’s go through what this would look like in Seed.
Push Some Faulty Code
First start by pushing an obvious mistake.
 Add the following to
 functions/create.js right at the top of our function.
gibberish.what;
Now there is no such variable as gibberish so this code should fail.
 Let’s commit and push this to dev.
$ git add .
$ git commit -m "Making a mistake"
$ git push
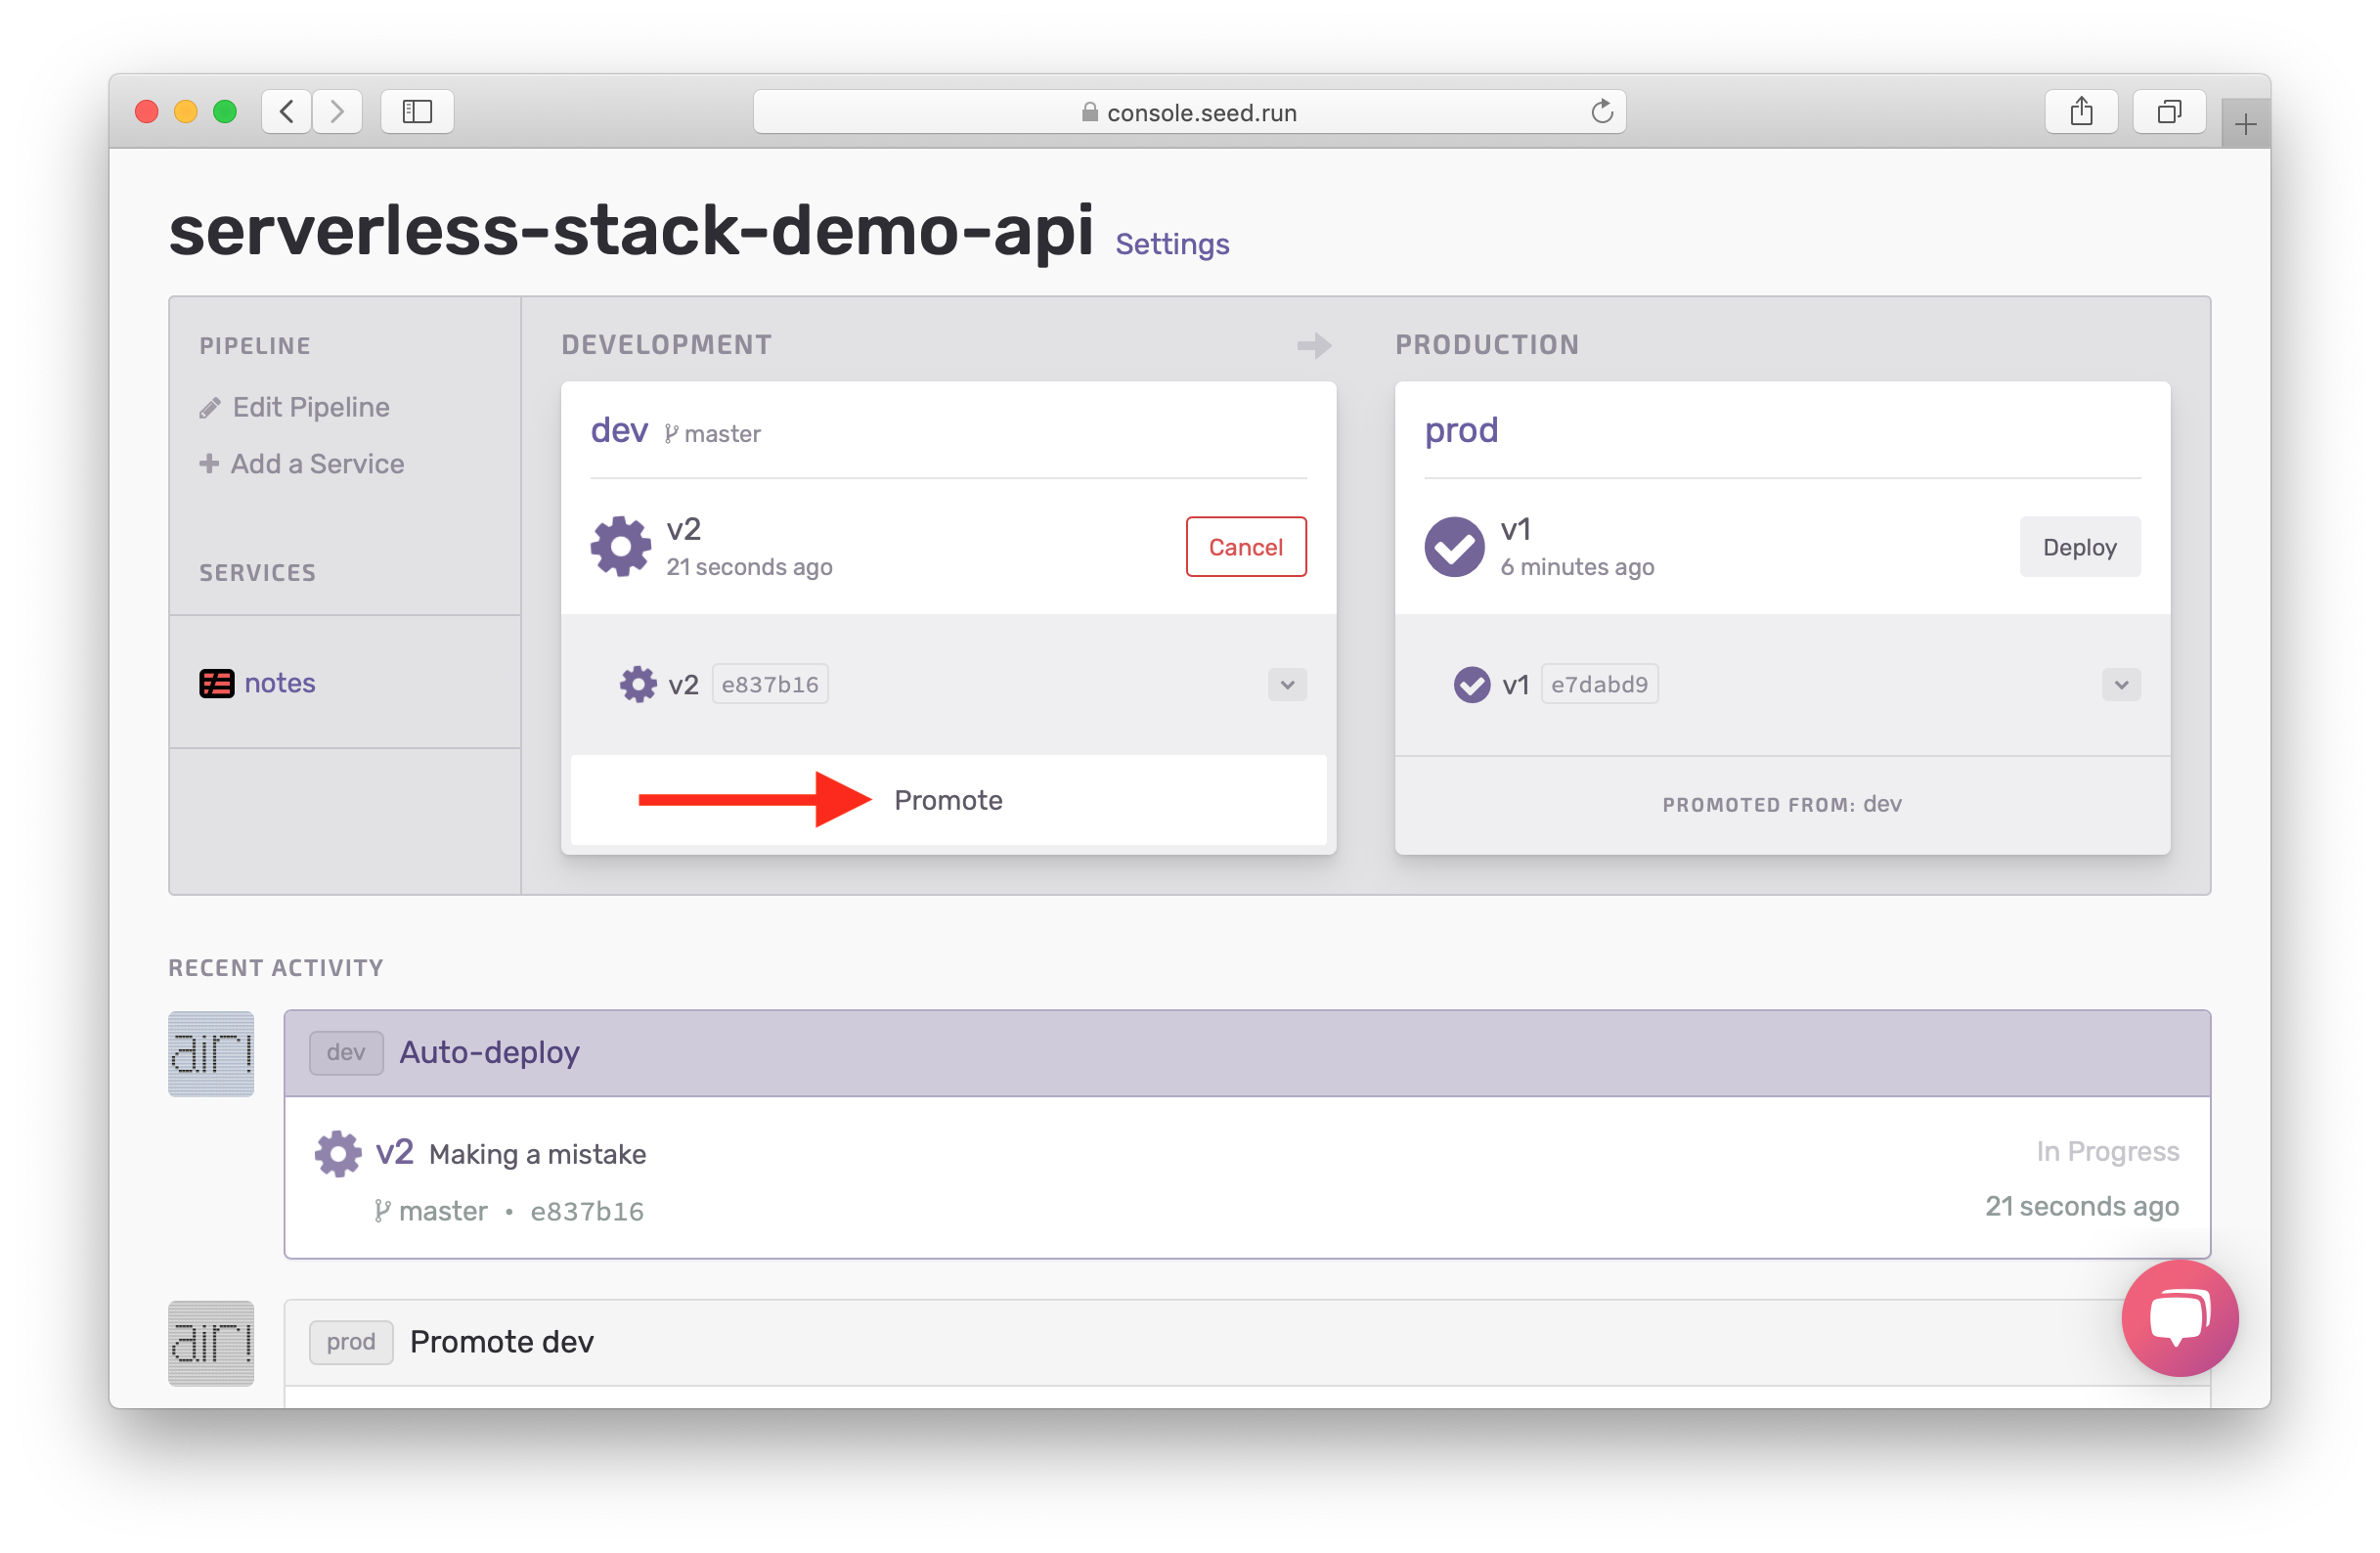
Now you can see a build in progress. Wait for it to complete and hit Promote.
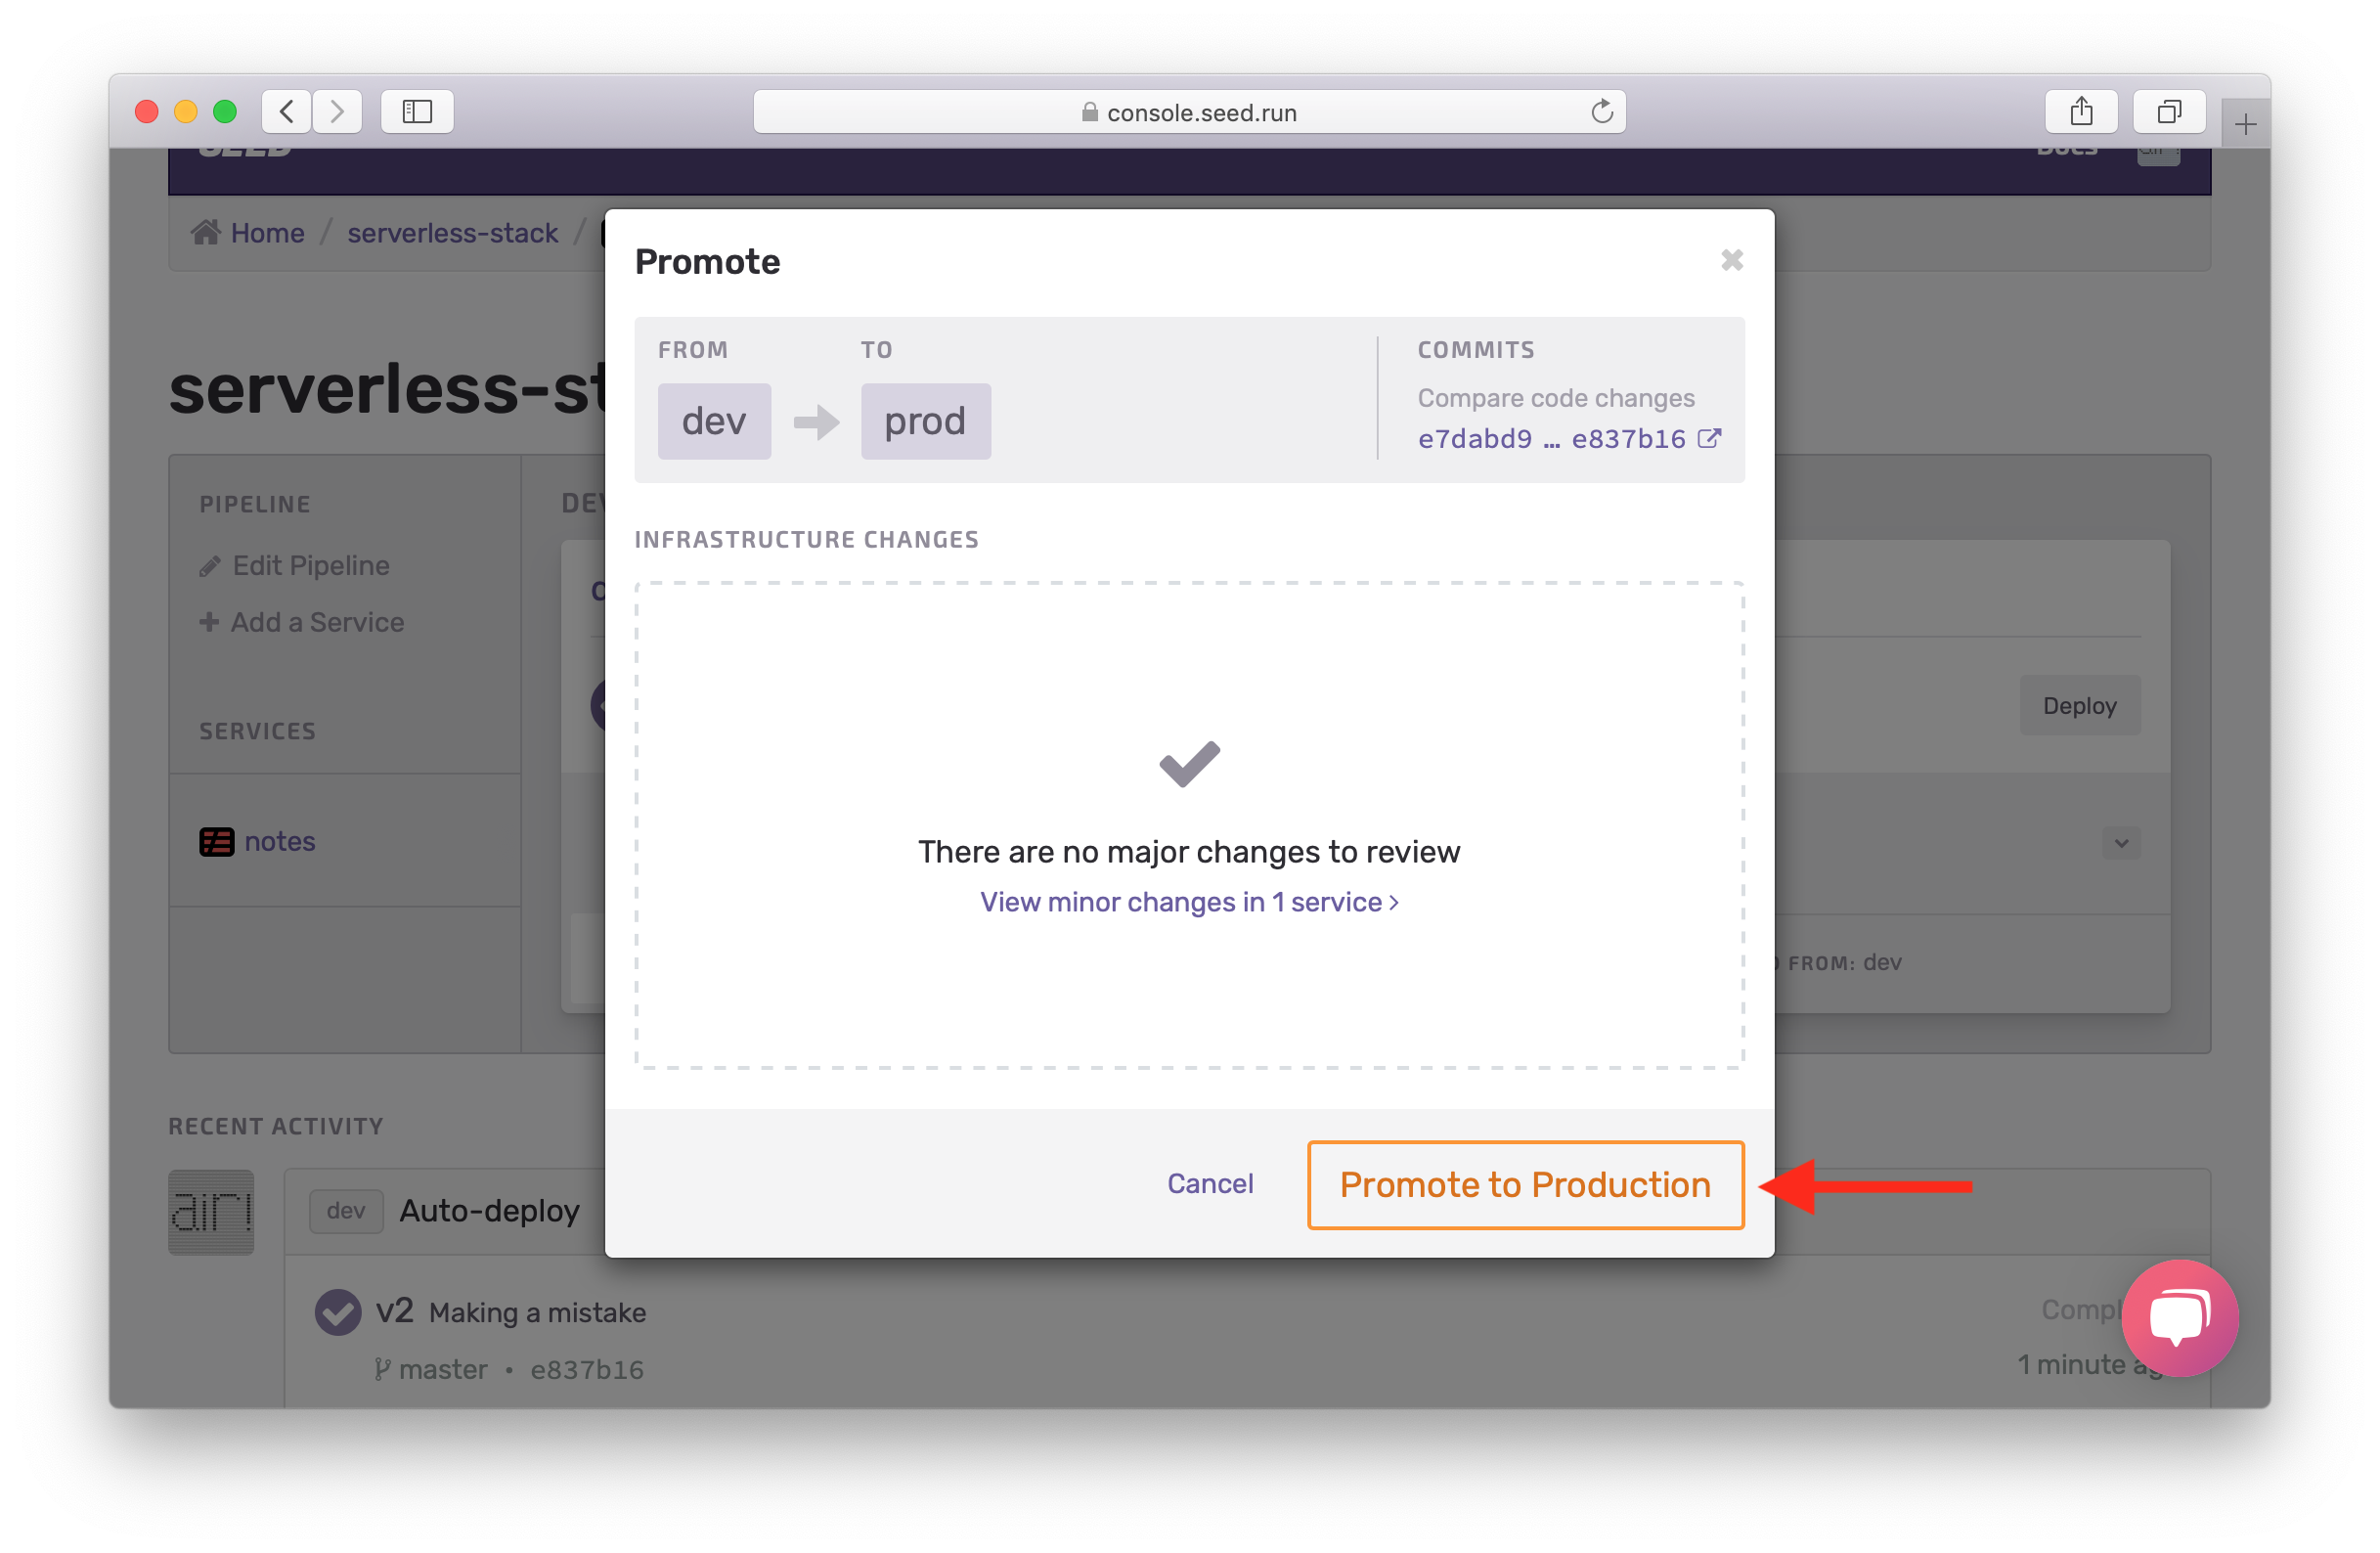
Confirm the Change Set by hitting Promote to Production.
Enable Access Logs
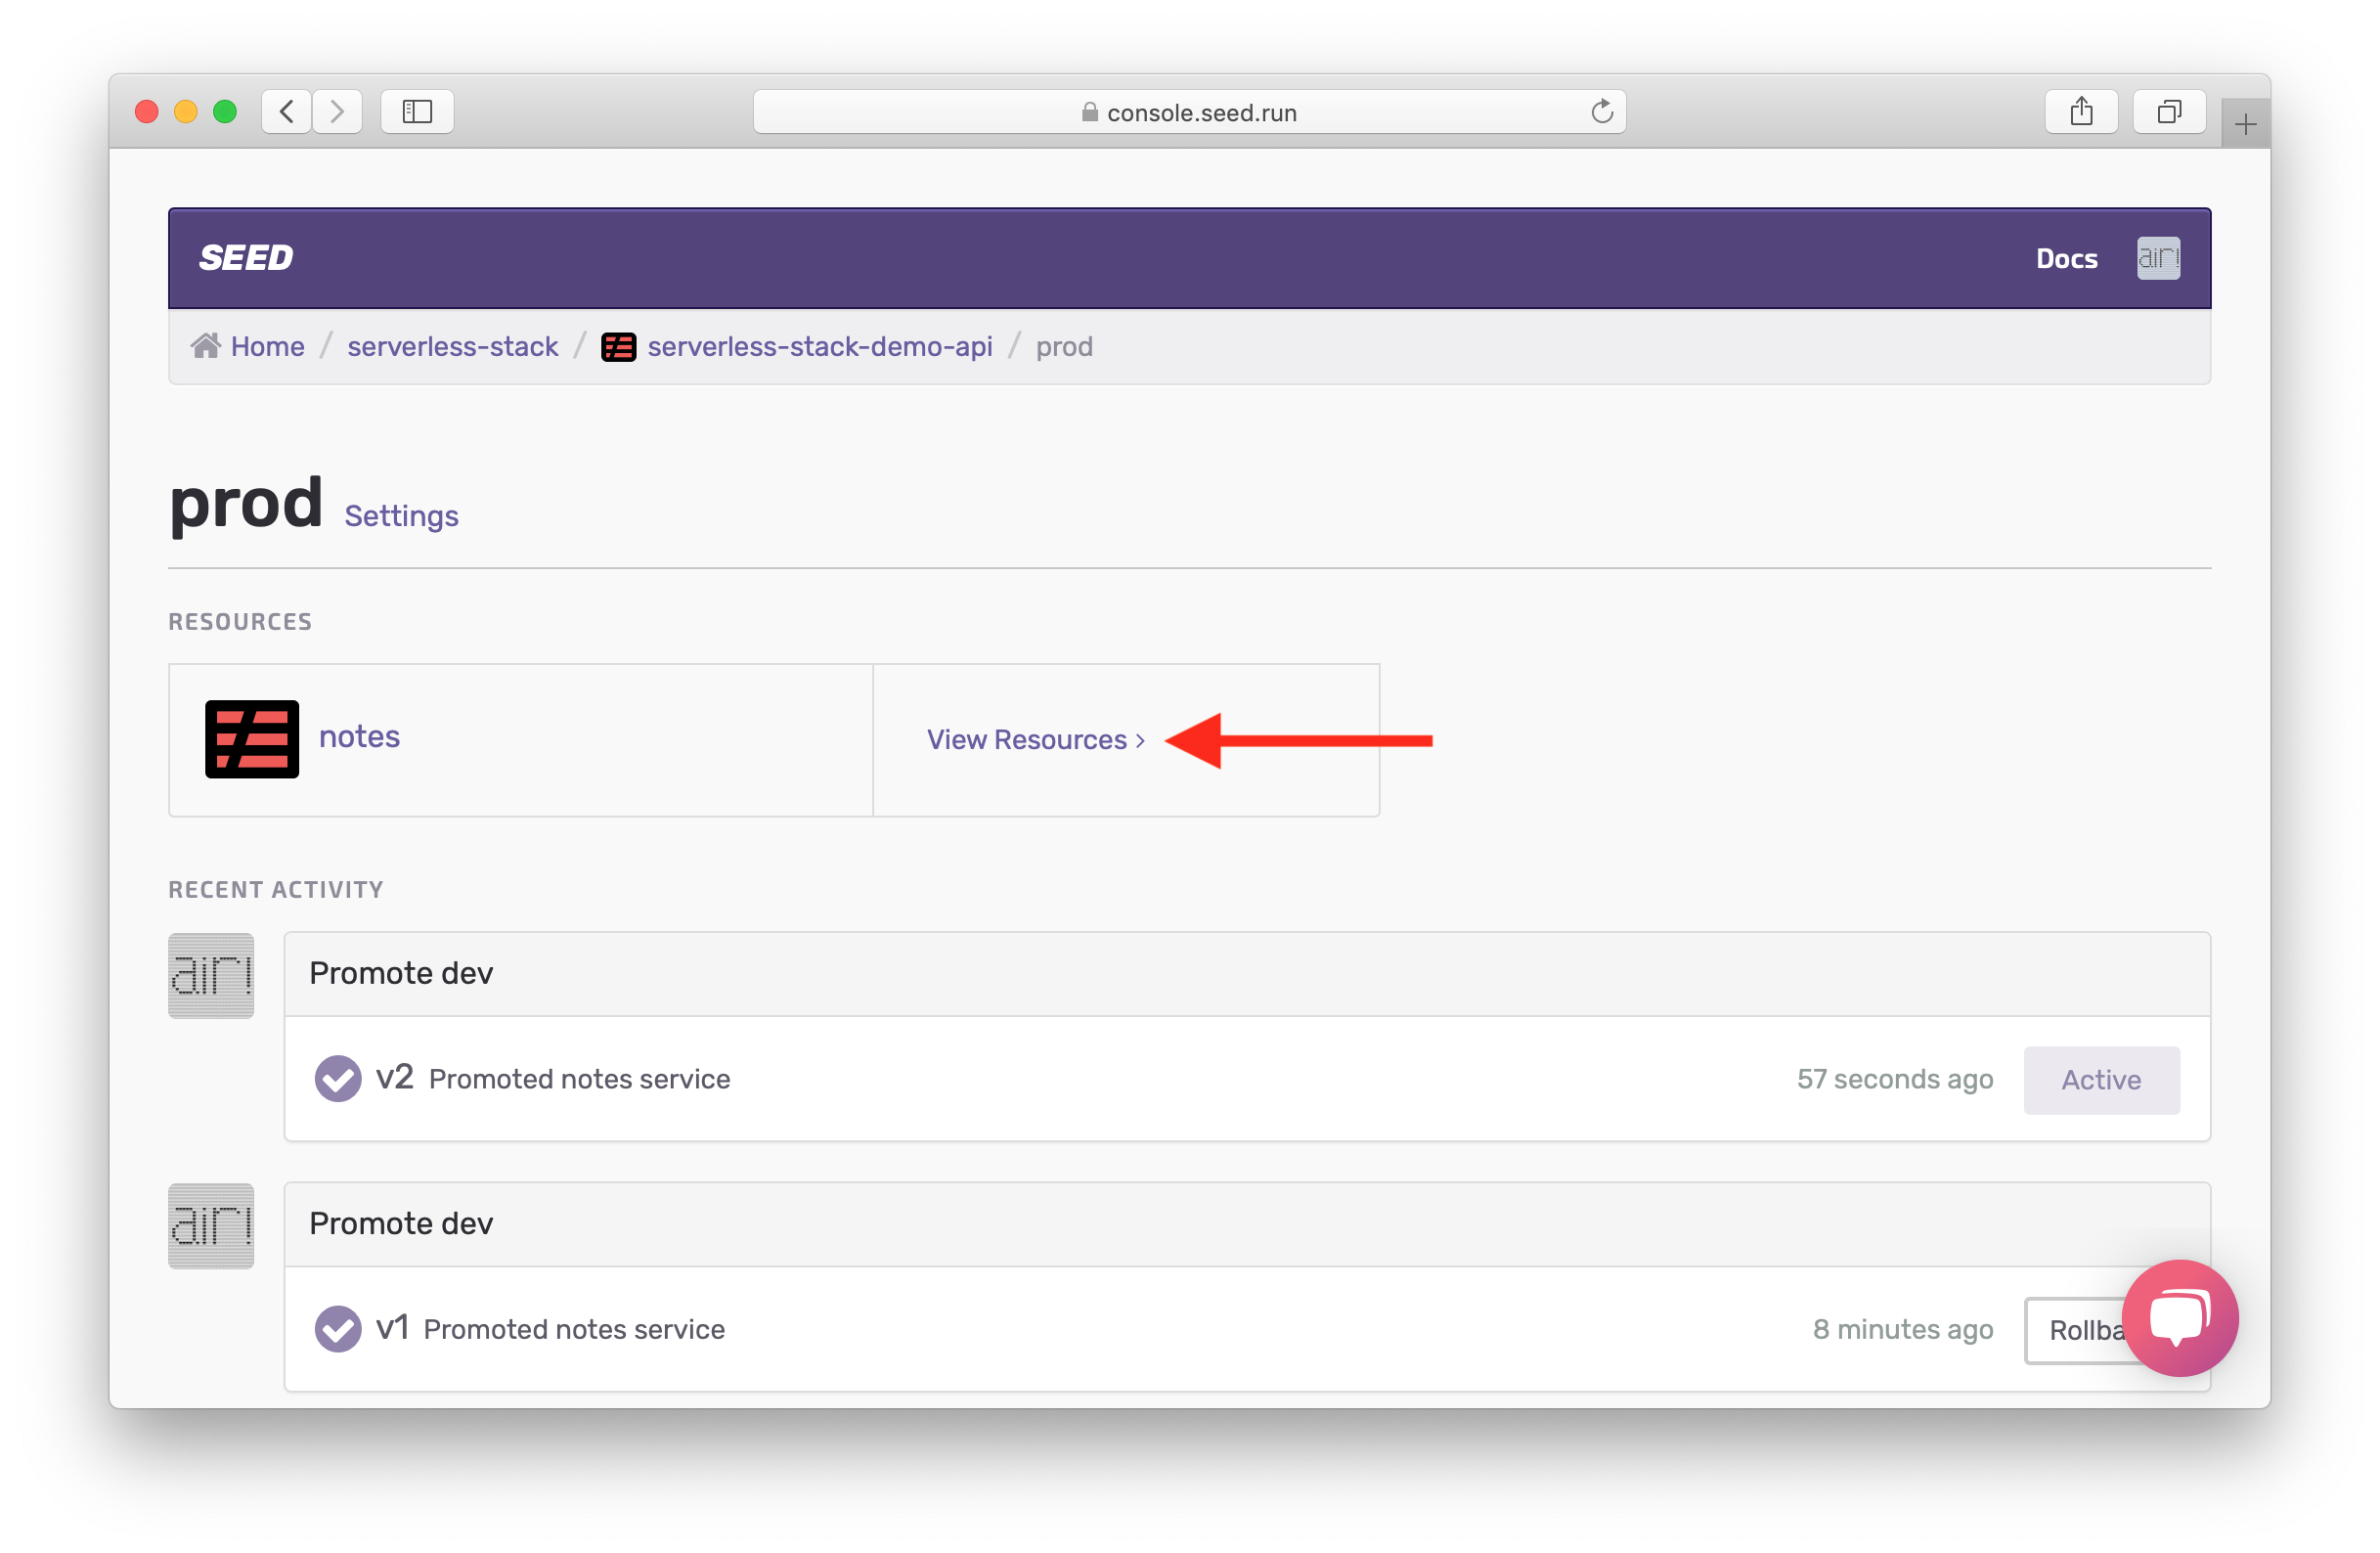
Now before we test our faulty code, we’ll turn on API Gateway access logs so we can see the error. Click on the prod stage View Resources.
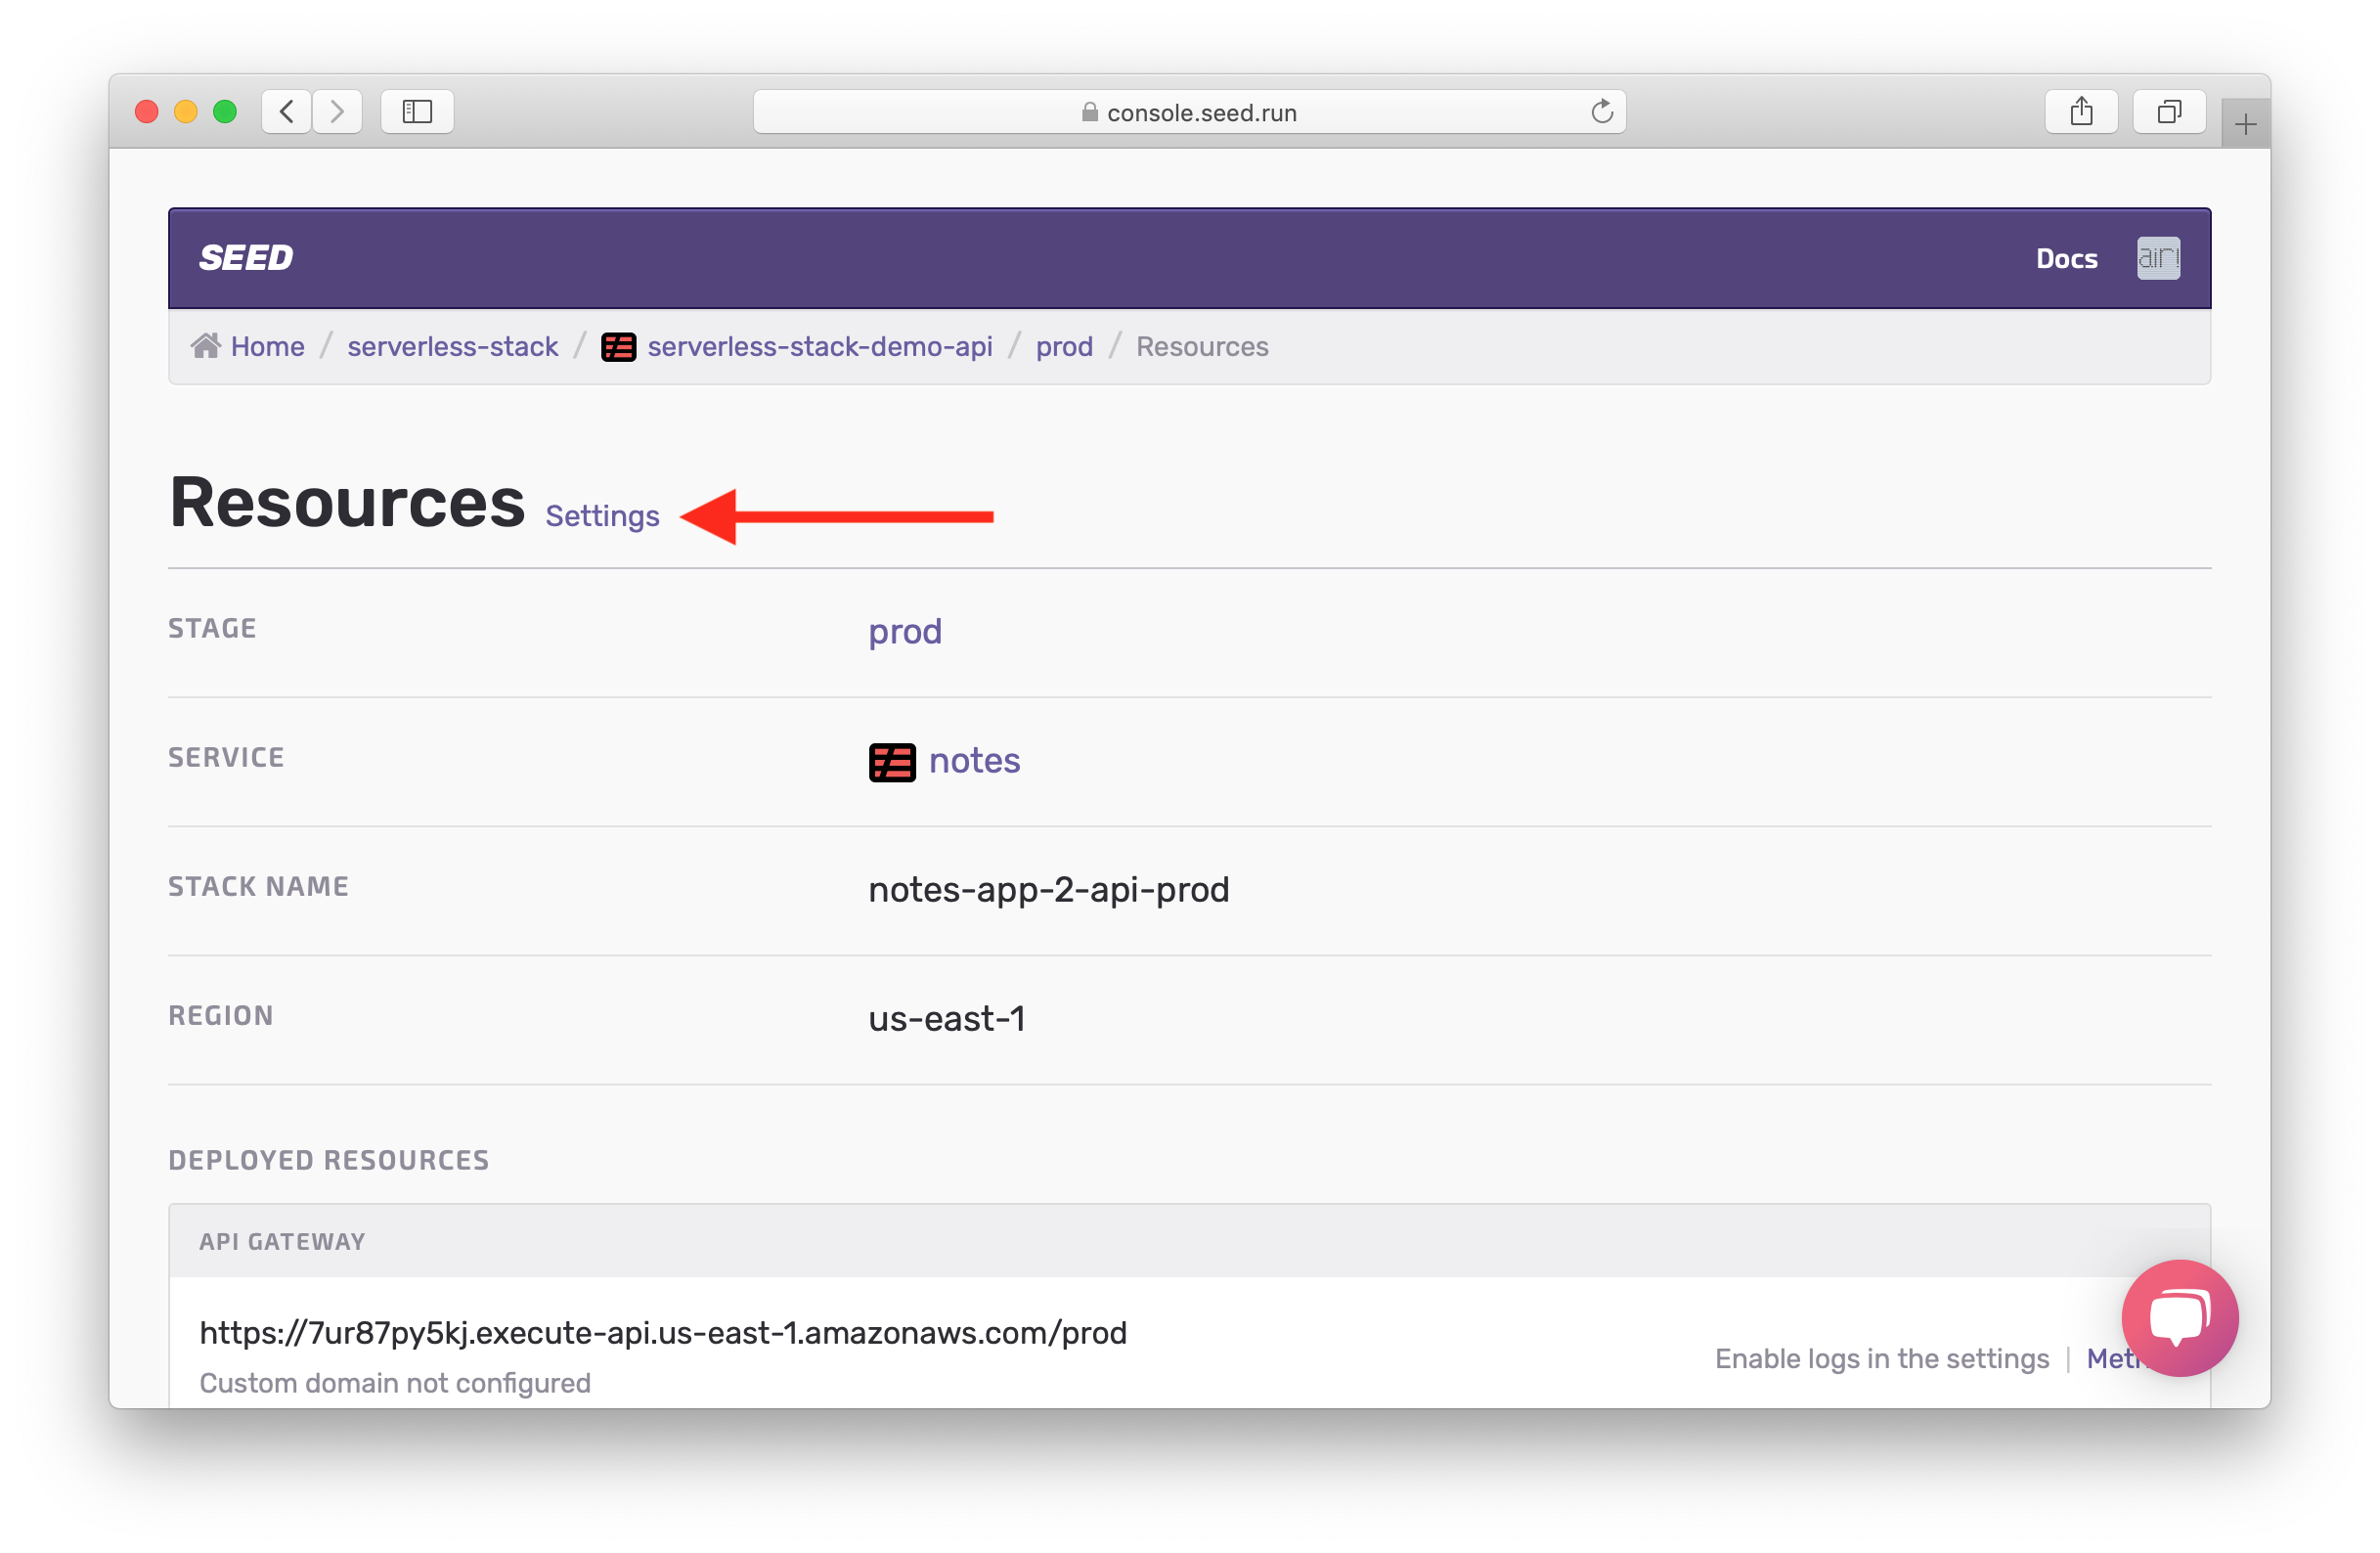
Hit Settings.
Hit Enable Access Logs.
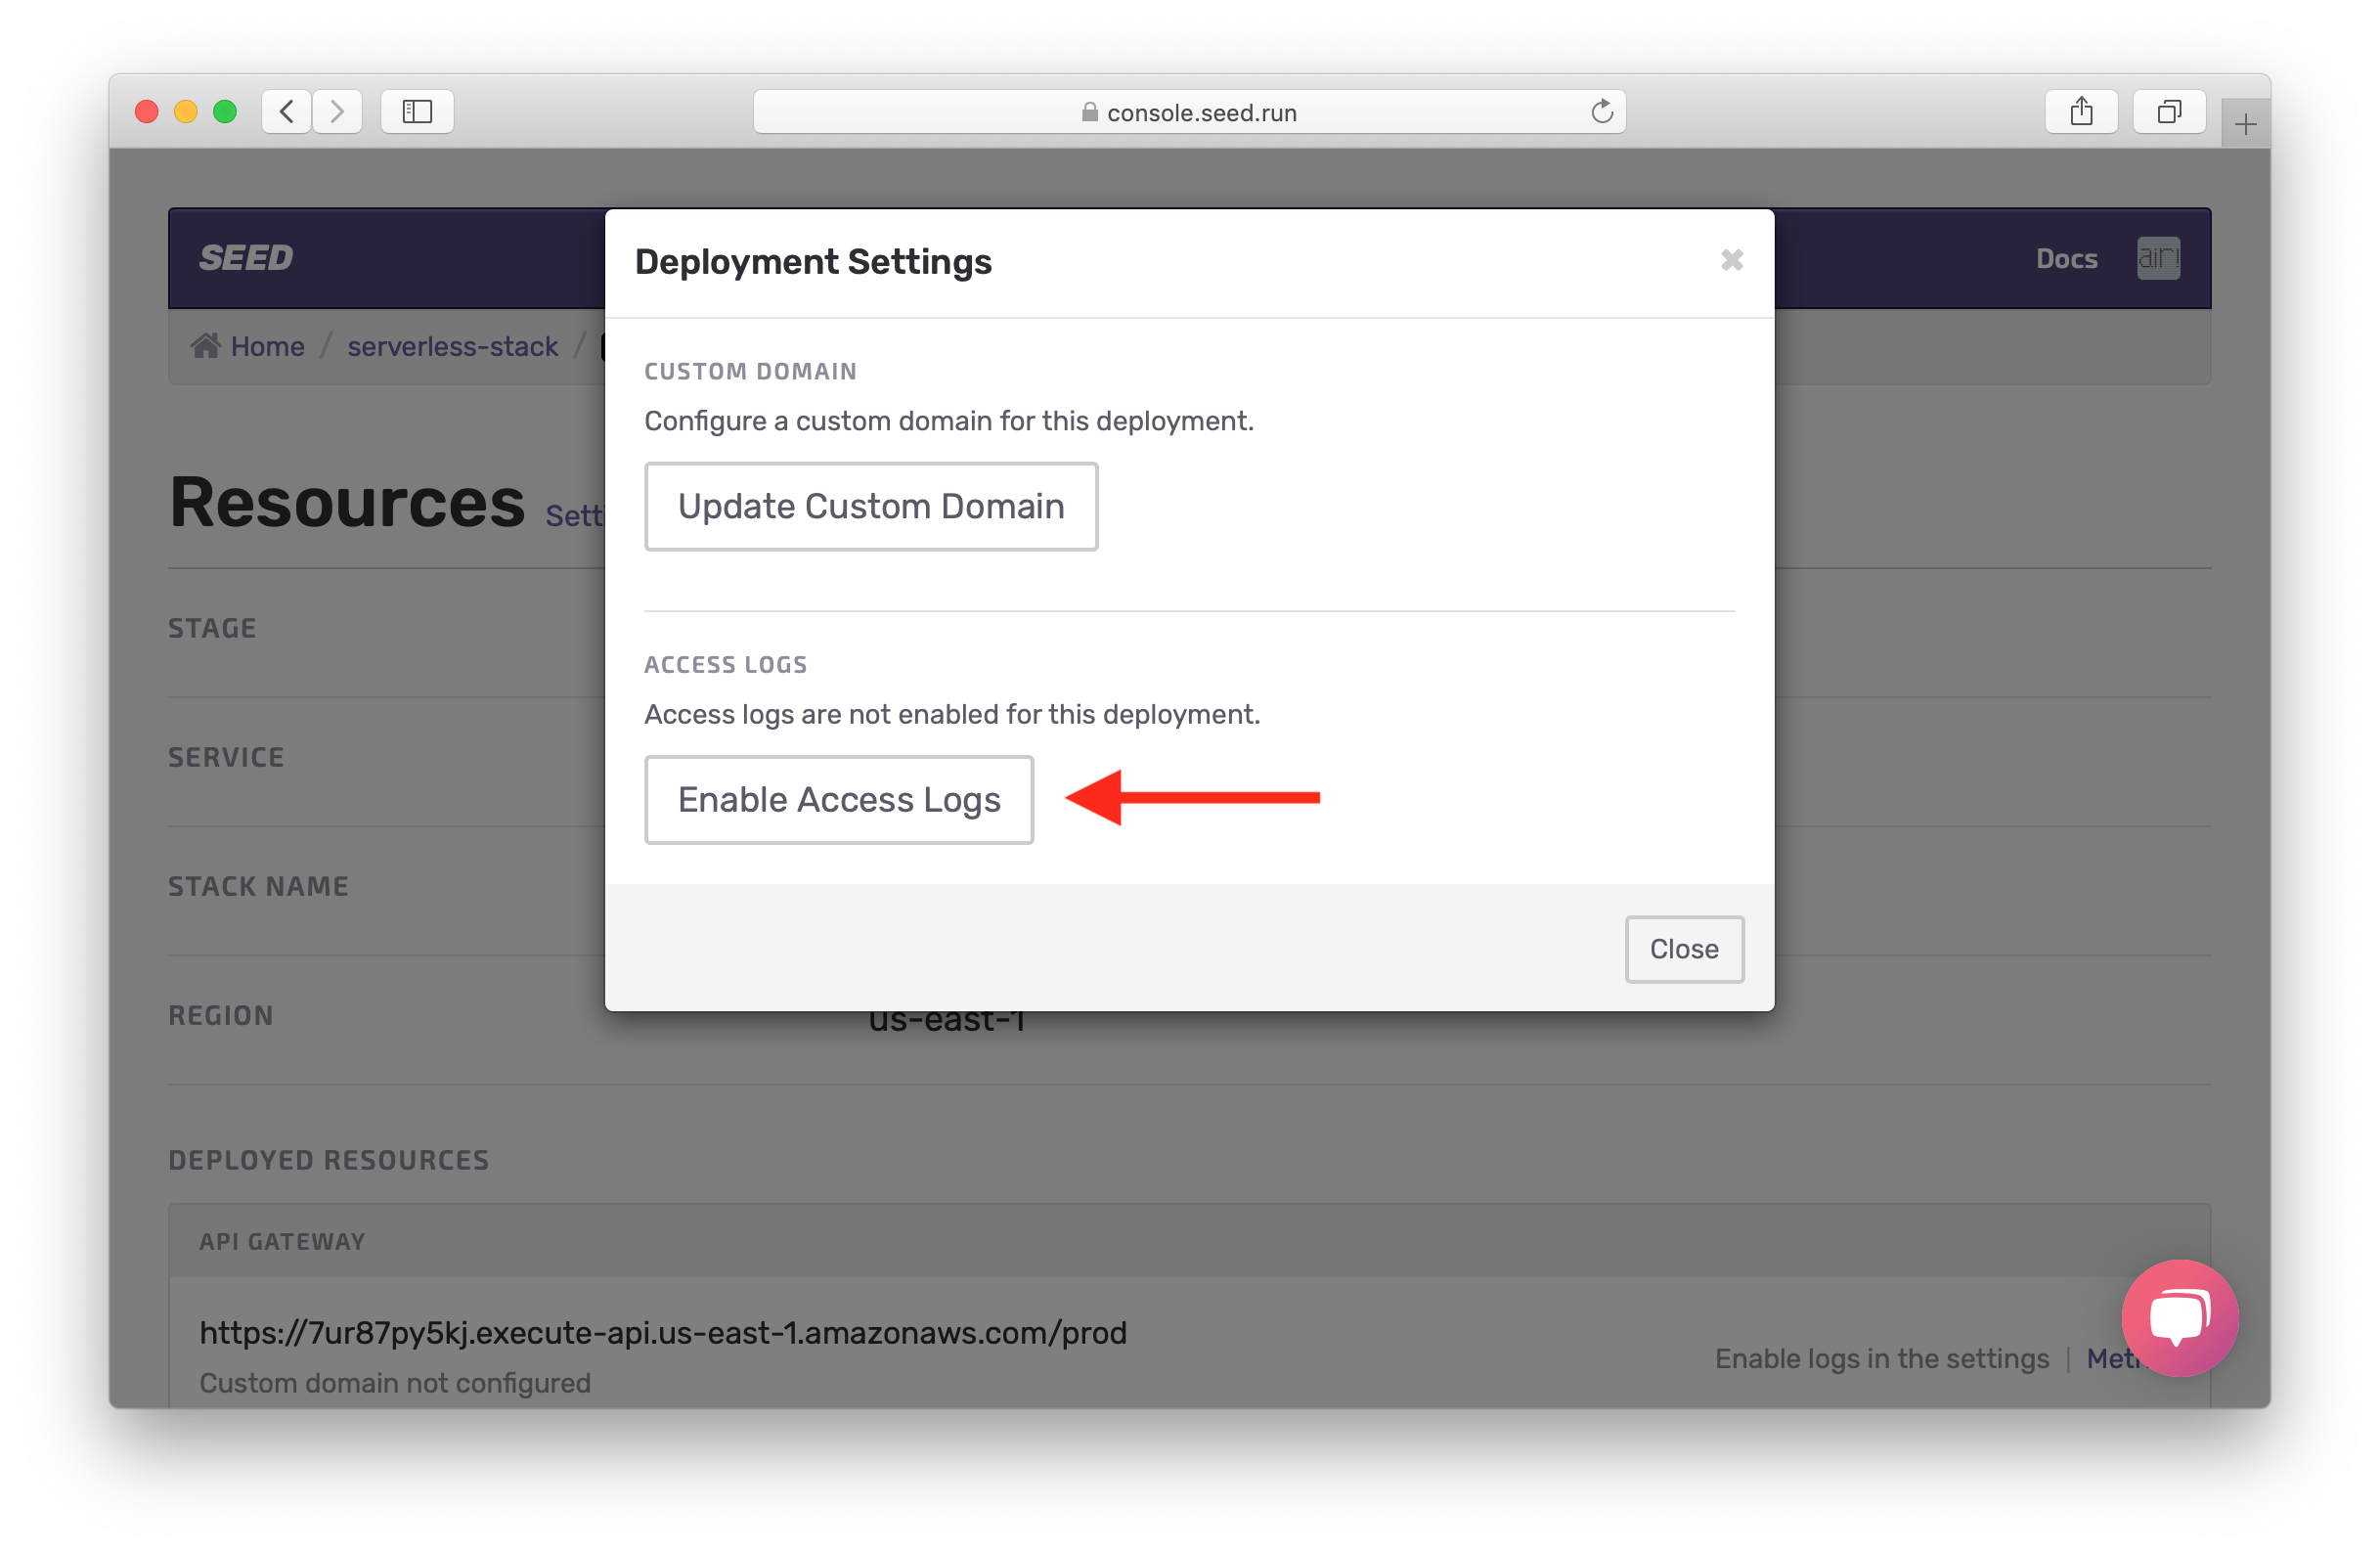
This will take a couple of minutes but Seed will automatically configure the IAM roles necessary for this and enable API Gateway access logs for your prod environment.
Test the Faulty Code
Now to test our code, run the same command from the last chapter to test our API.
$ npx aws-api-gateway-cli-test \
--username='admin@example.com' \
--password='Passw0rd!' \
--user-pool-id='YOUR_PROD_COGNITO_USER_POOL_ID' \
--app-client-id='YOUR_PROD_COGNITO_APP_CLIENT_ID' \
--cognito-region='YOUR_PROD_COGNITO_REGION' \
--identity-pool-id='YOUR_PROD_IDENTITY_POOL_ID' \
--invoke-url='YOUR_PROD_API_GATEWAY_URL' \
--api-gateway-region='YOUR_PROD_API_GATEWAY_REGION' \
--path-template='/notes' \
--method='POST' \
--body='{"content":"hello world","attachment":"hello.jpg"}'
Make sure to use the prod version of your resources.
You should see an error that looks something like this.
Authenticating with User Pool
Getting temporary credentials
Making API request
{ status: 502,
  statusText: 'Bad Gateway',
  data: { message: 'Internal server error' } }
View Logs and Metrics
Back in the Seed console, you should be able to click on Access Logs.
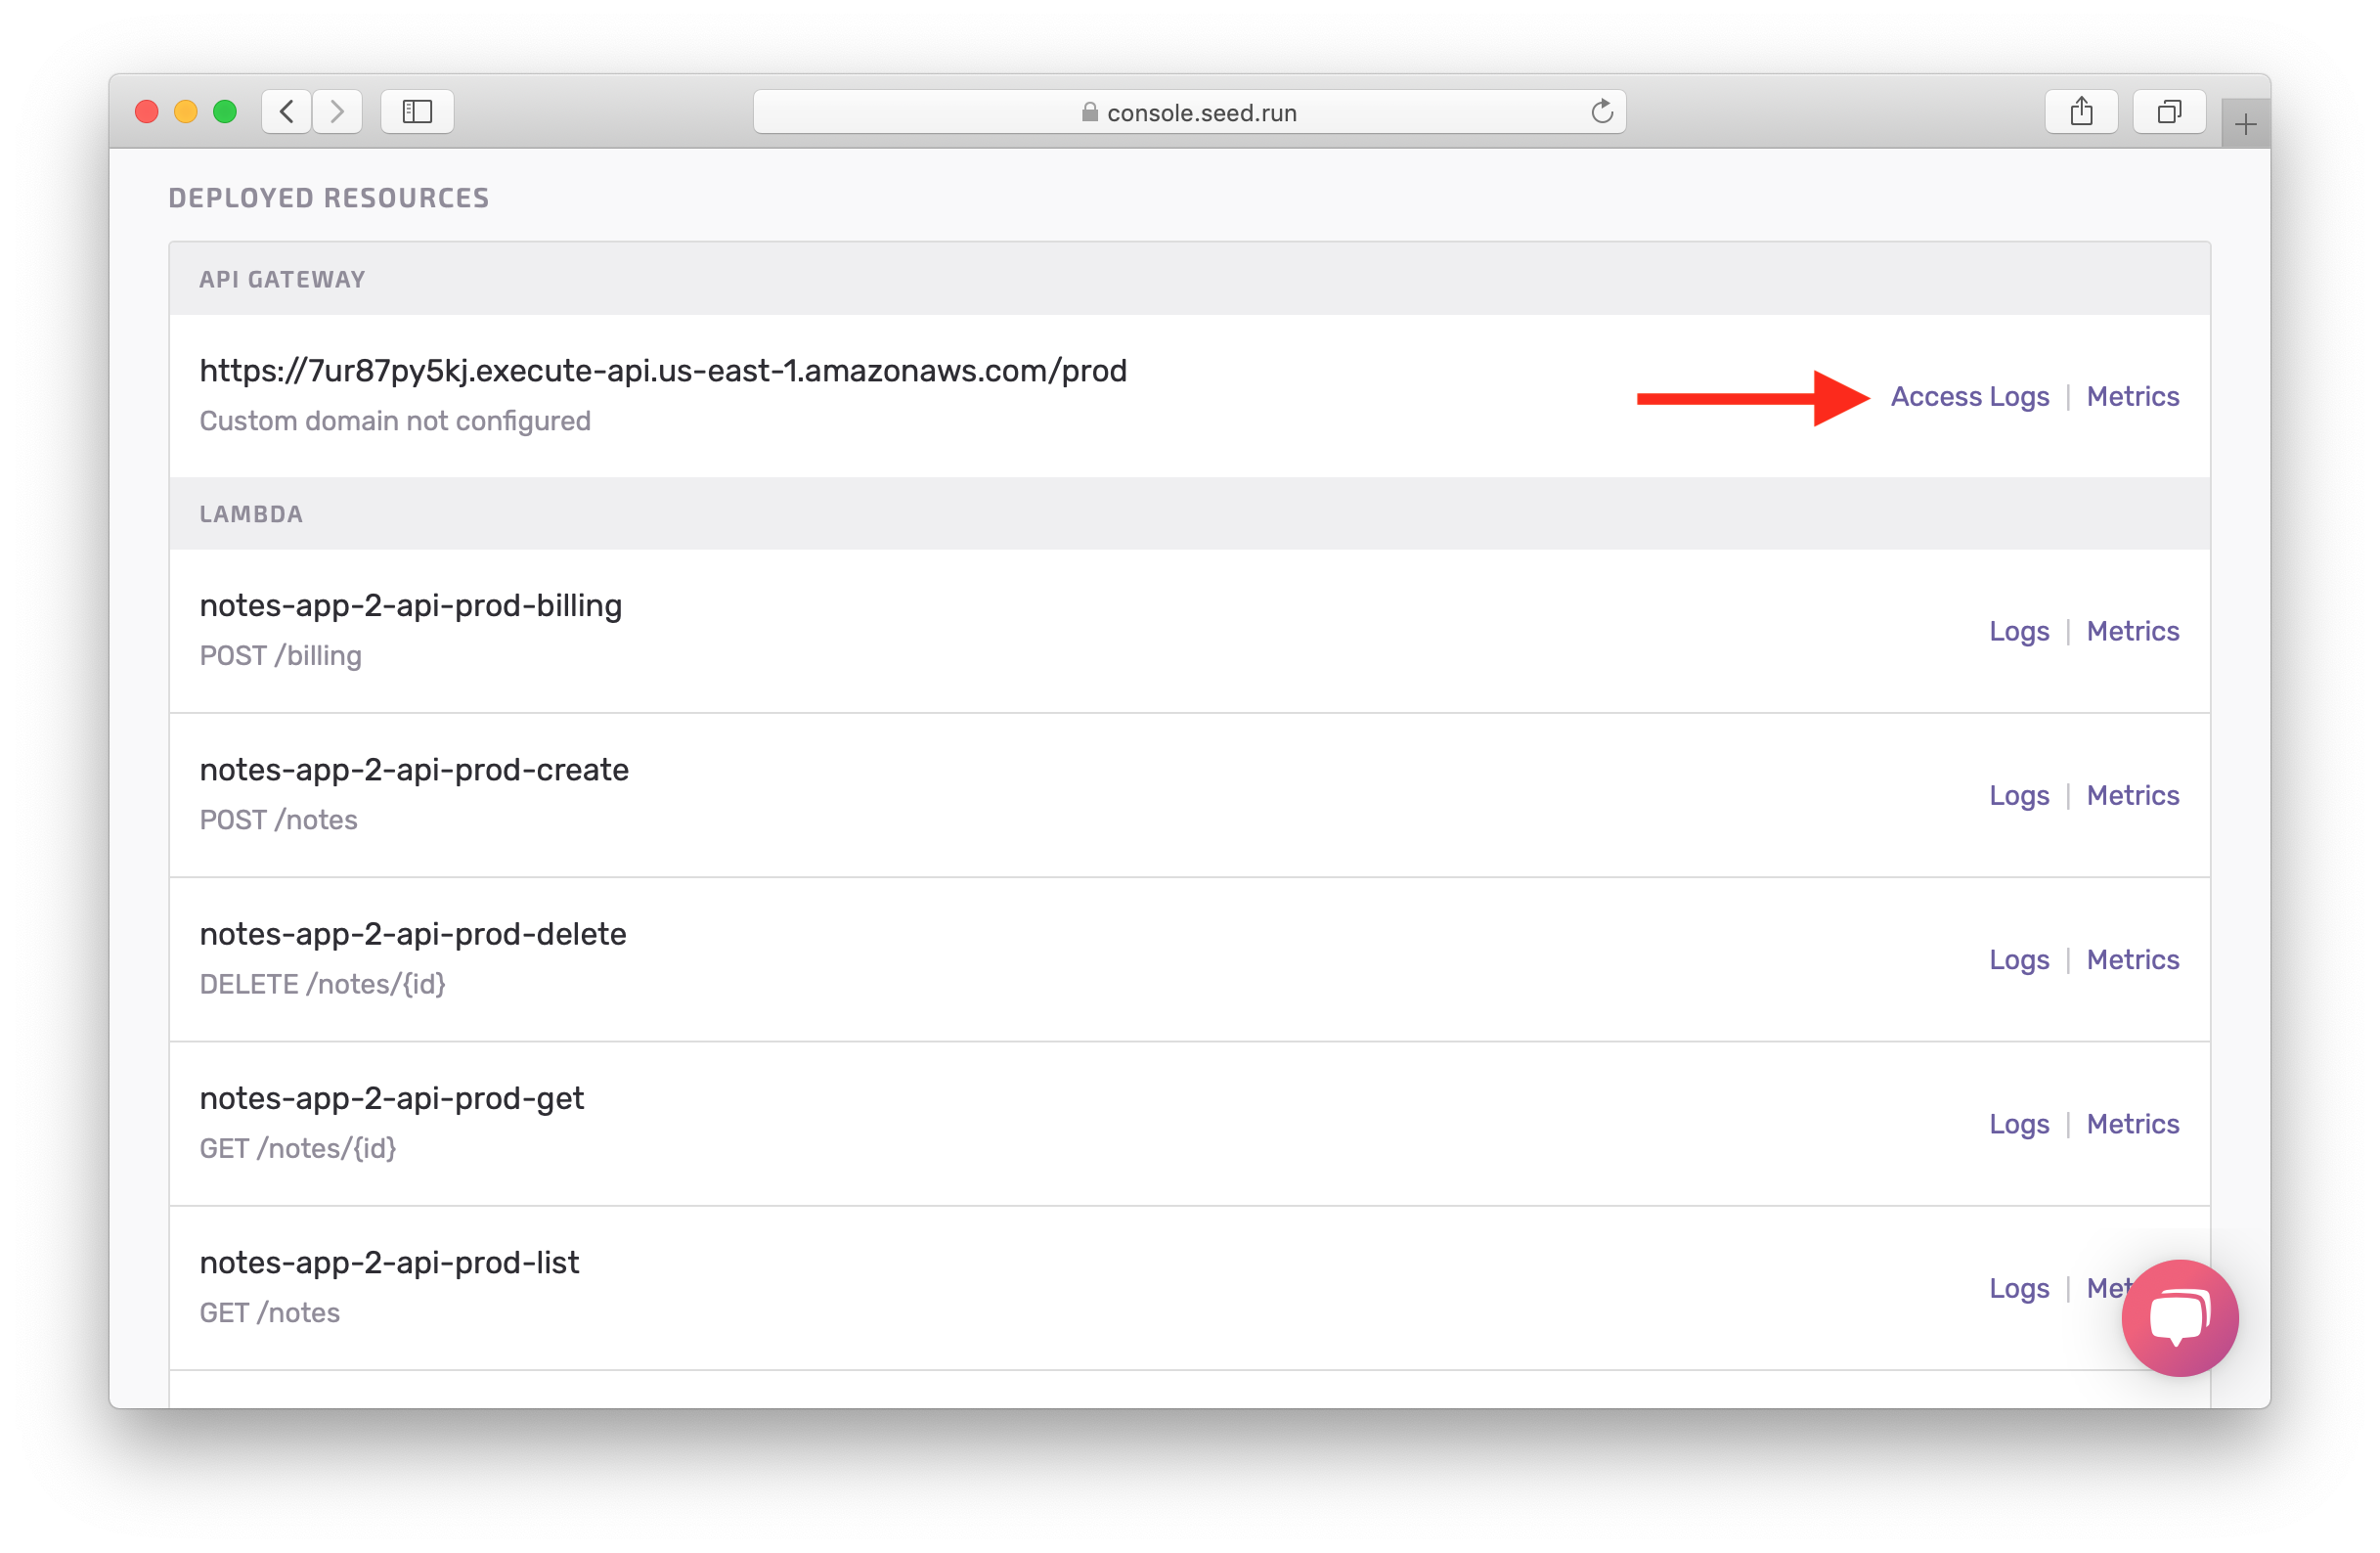
This should show you that there was a 502 error on a recent request.
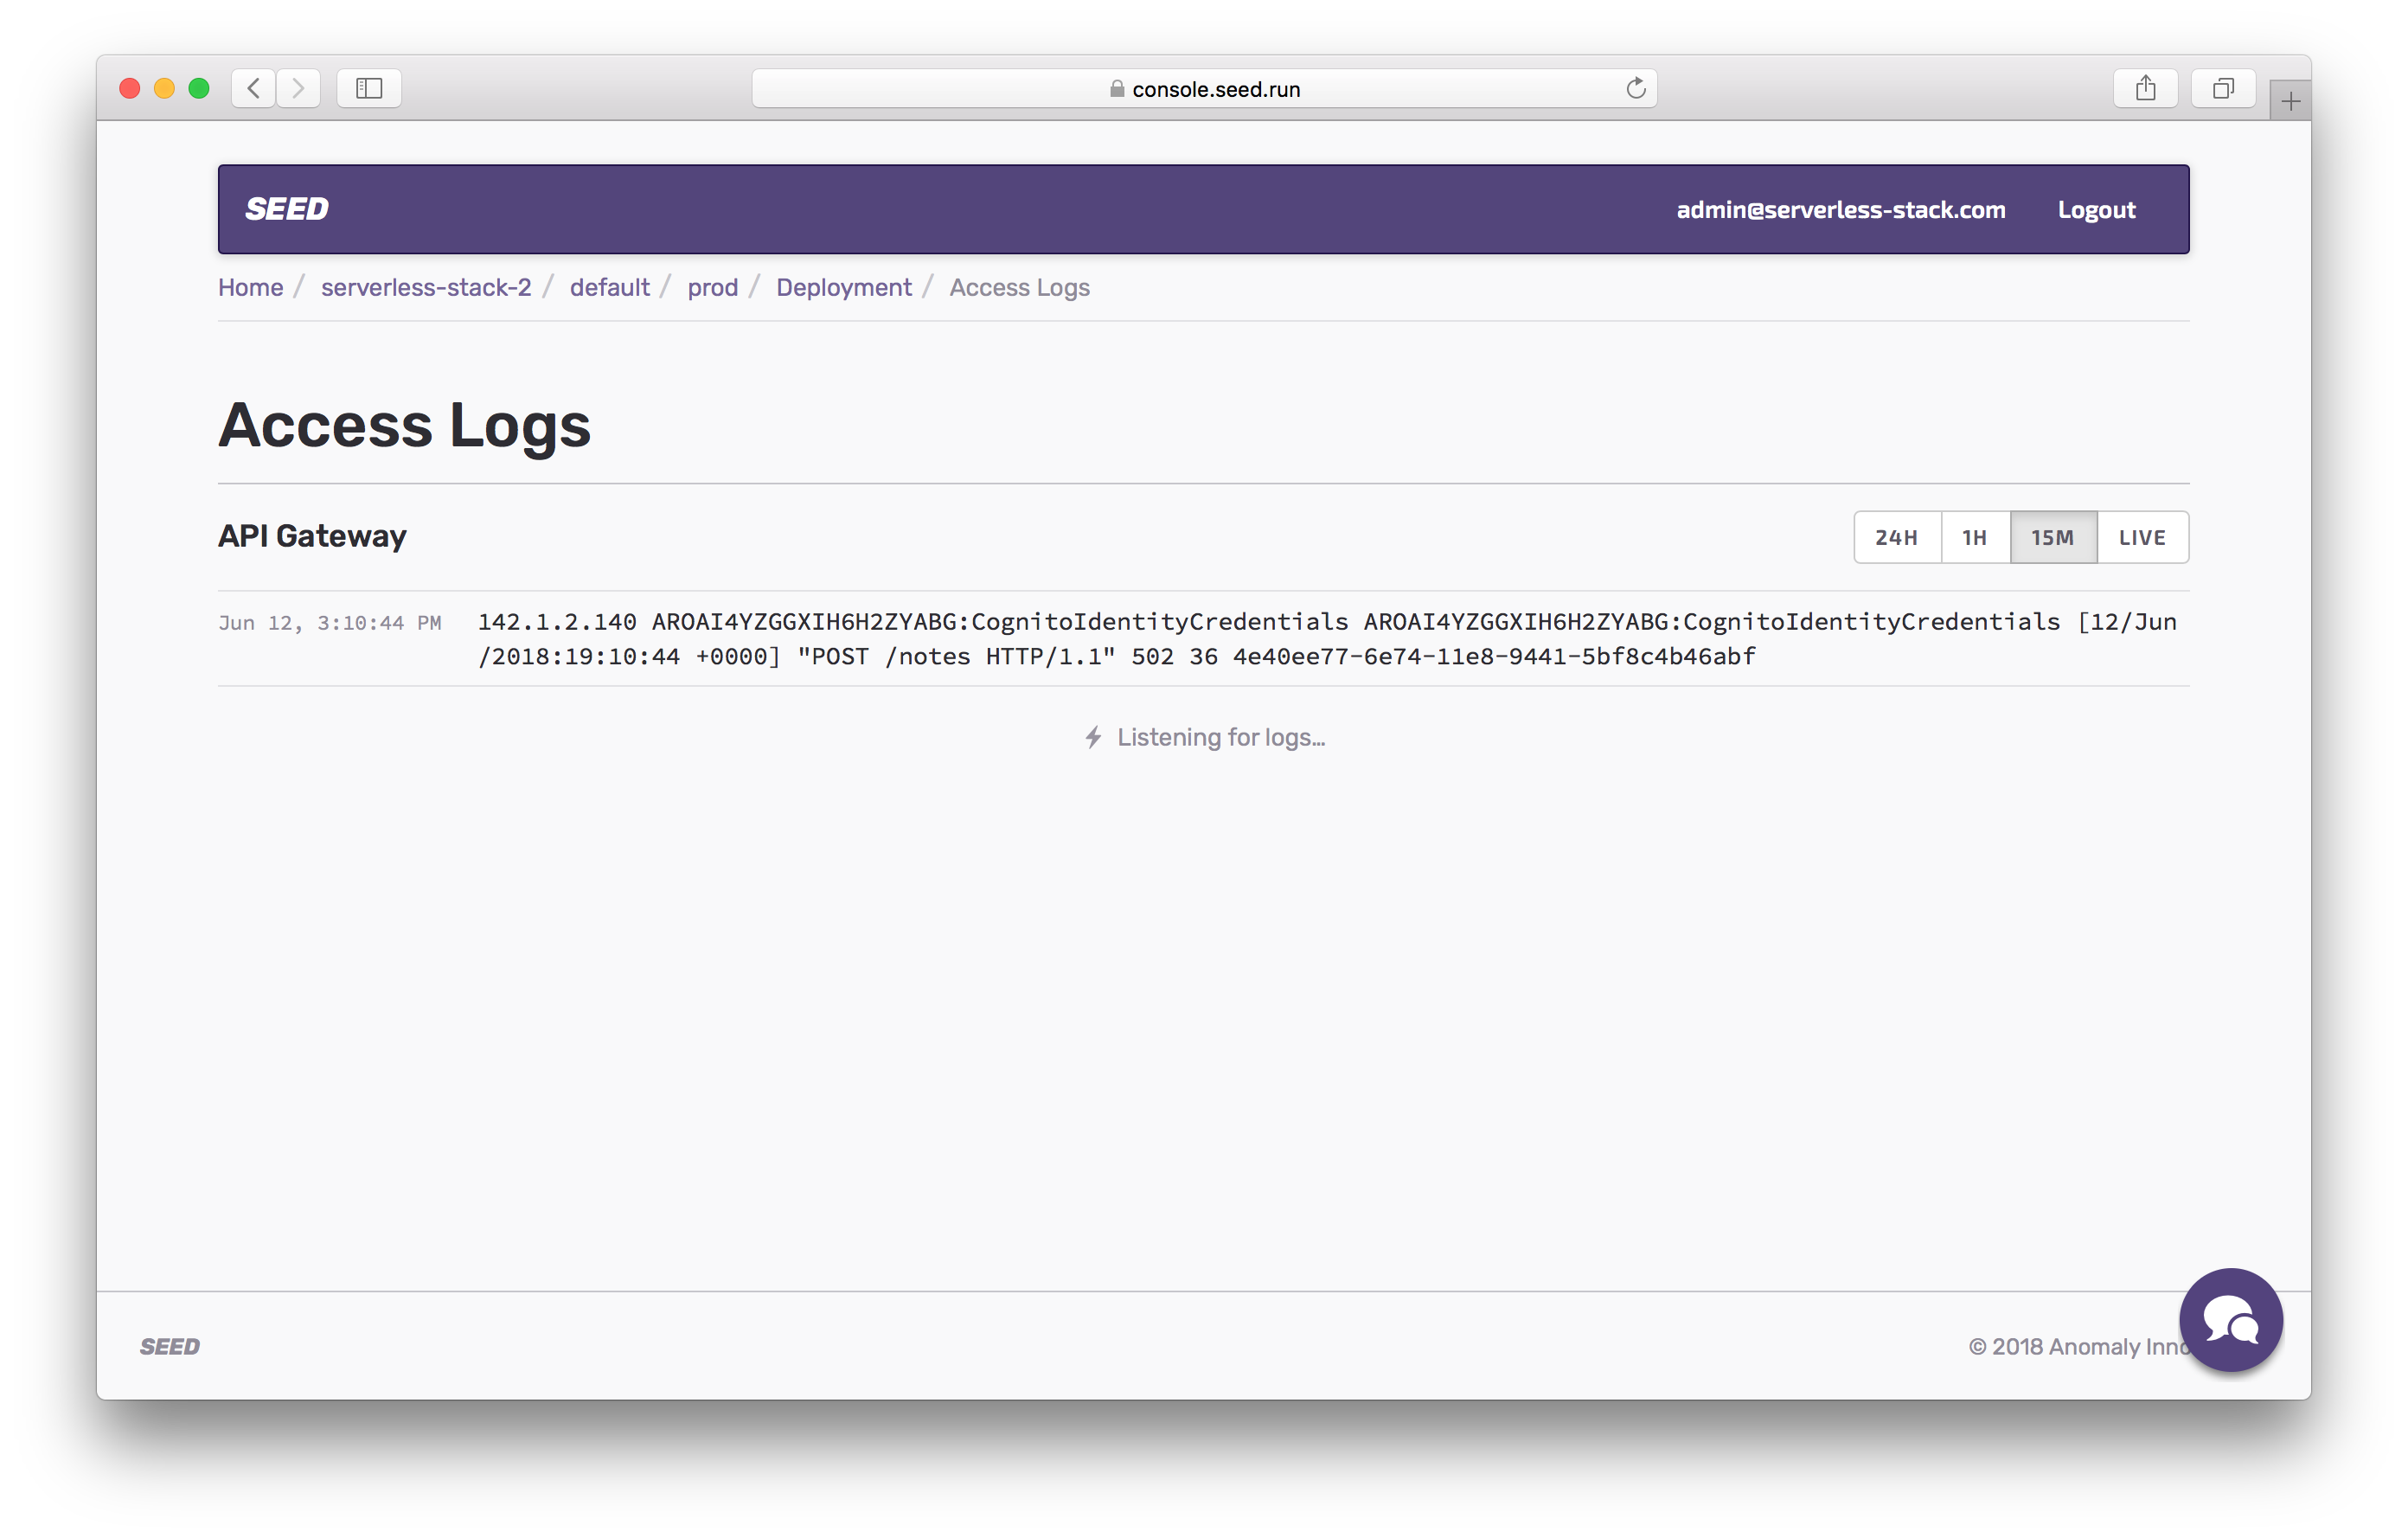
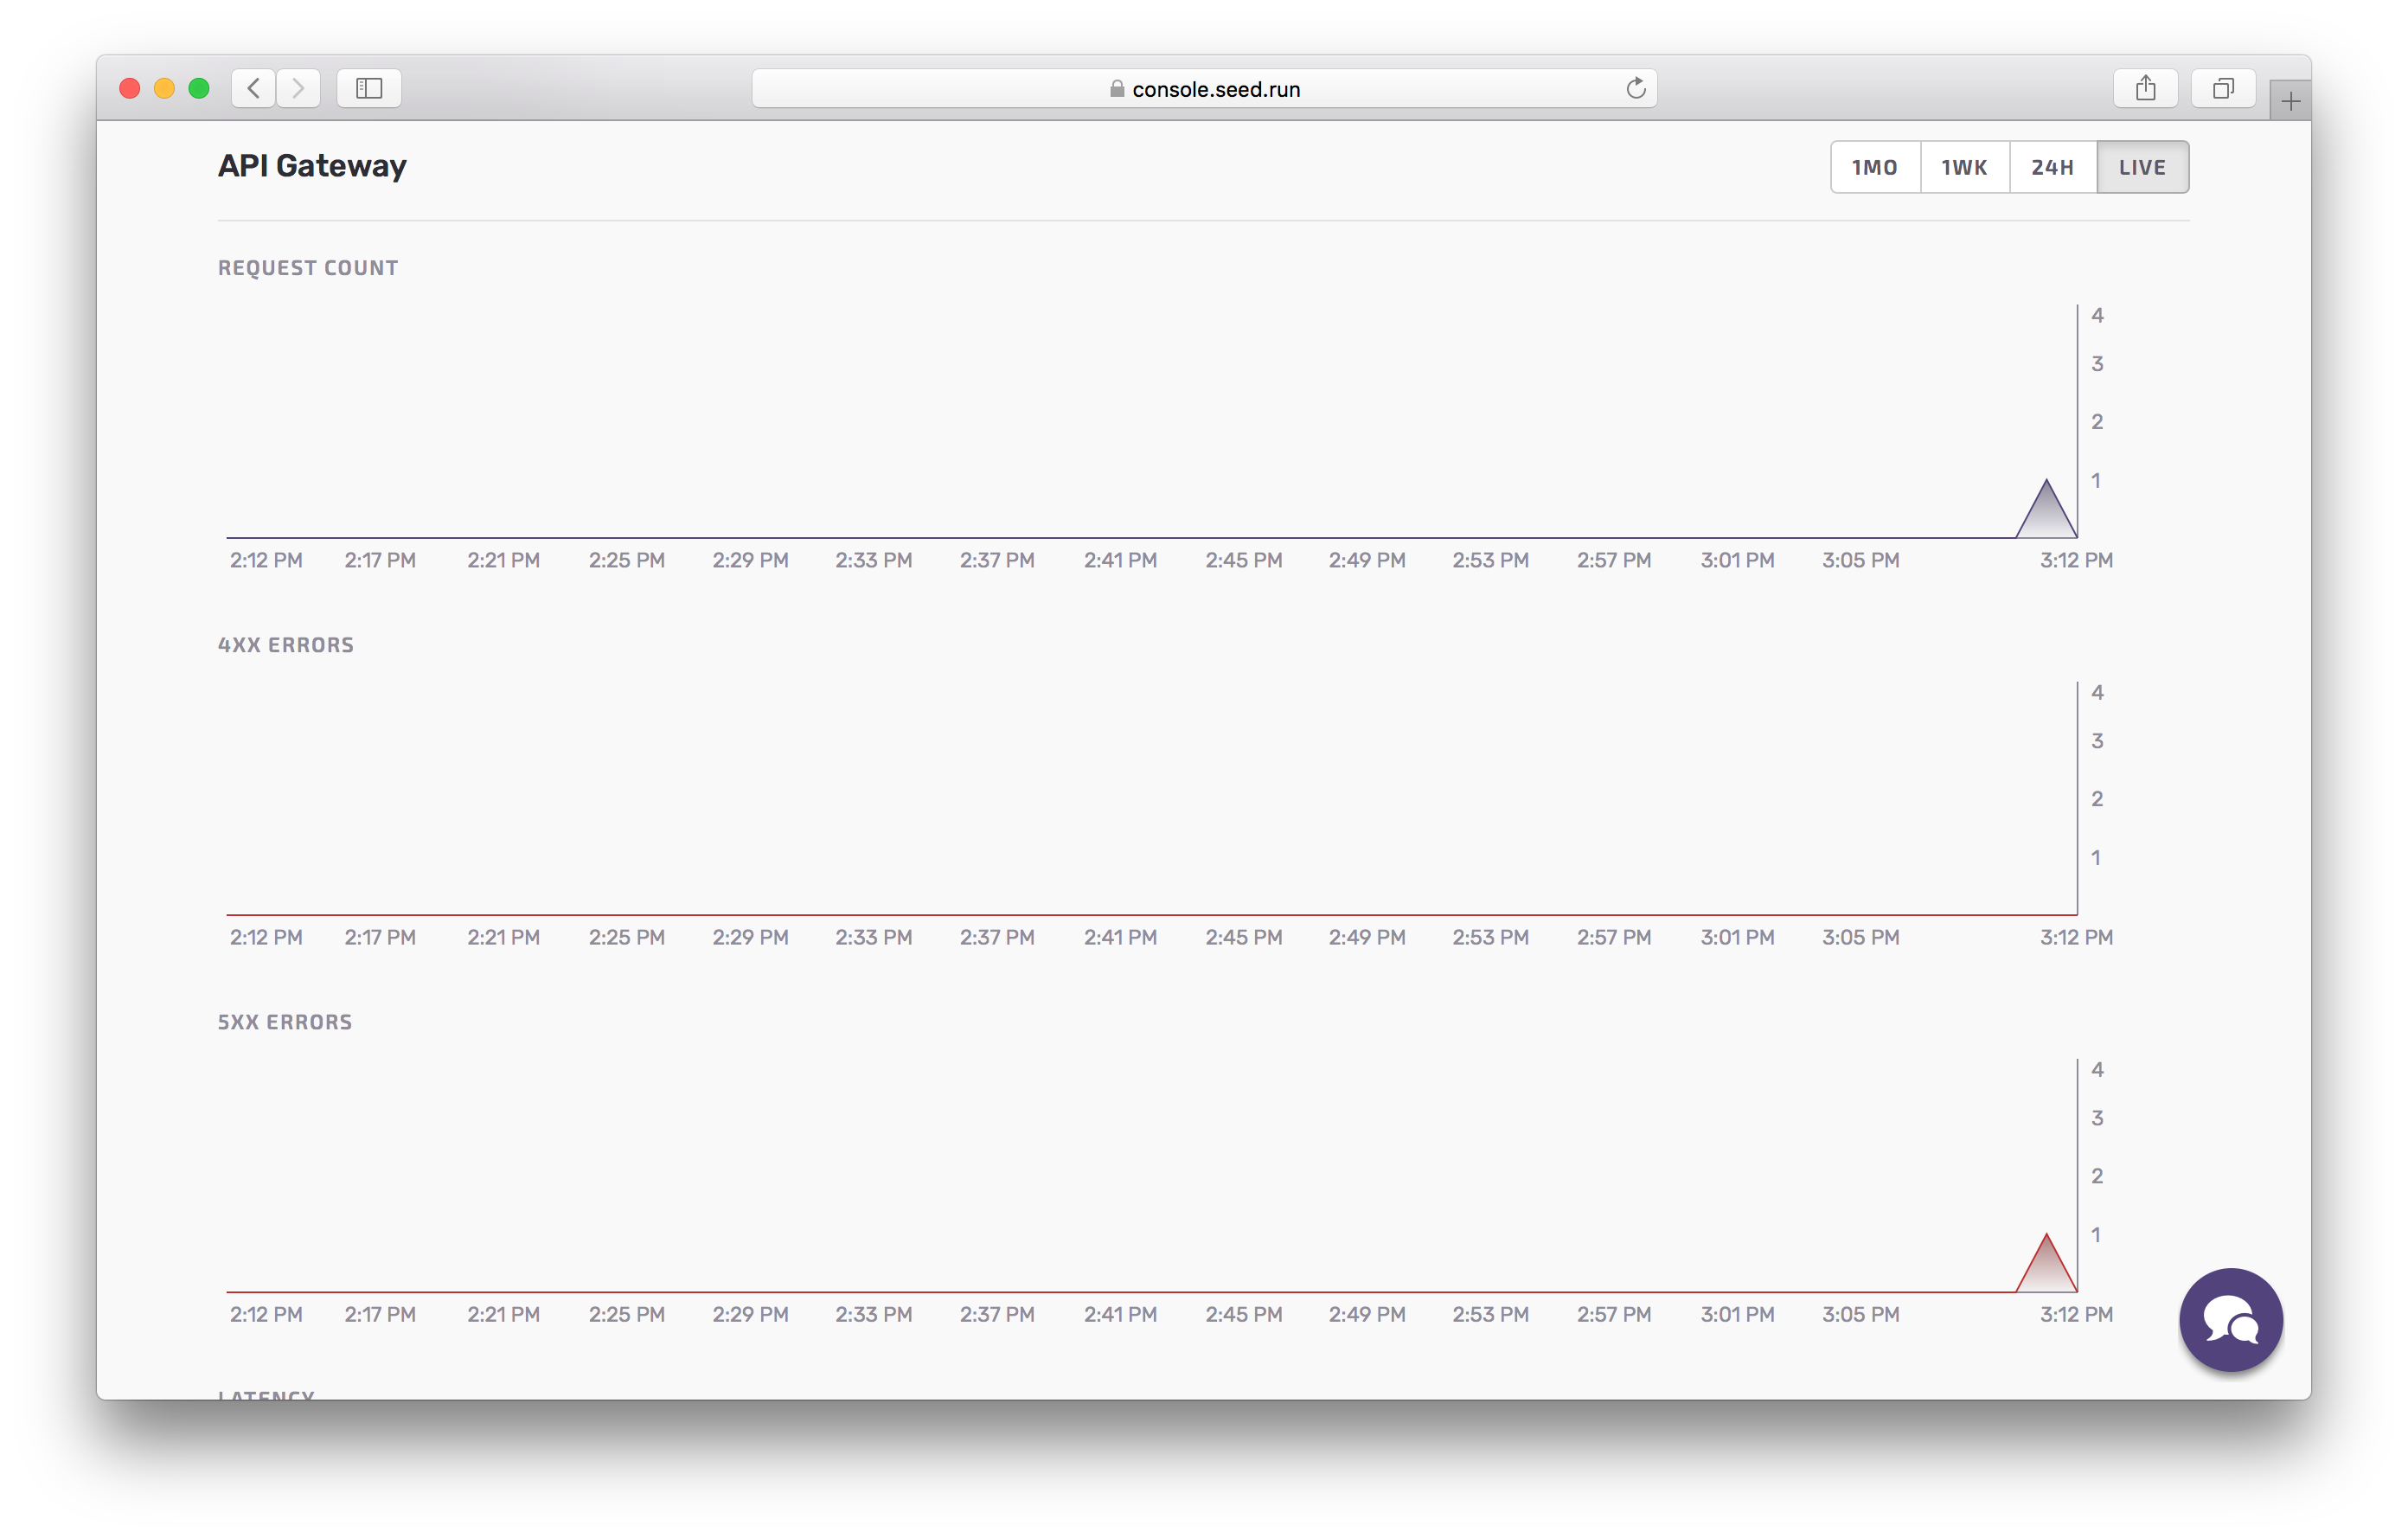
If you go back, you can click on Metrics to get a good overview of our requests.
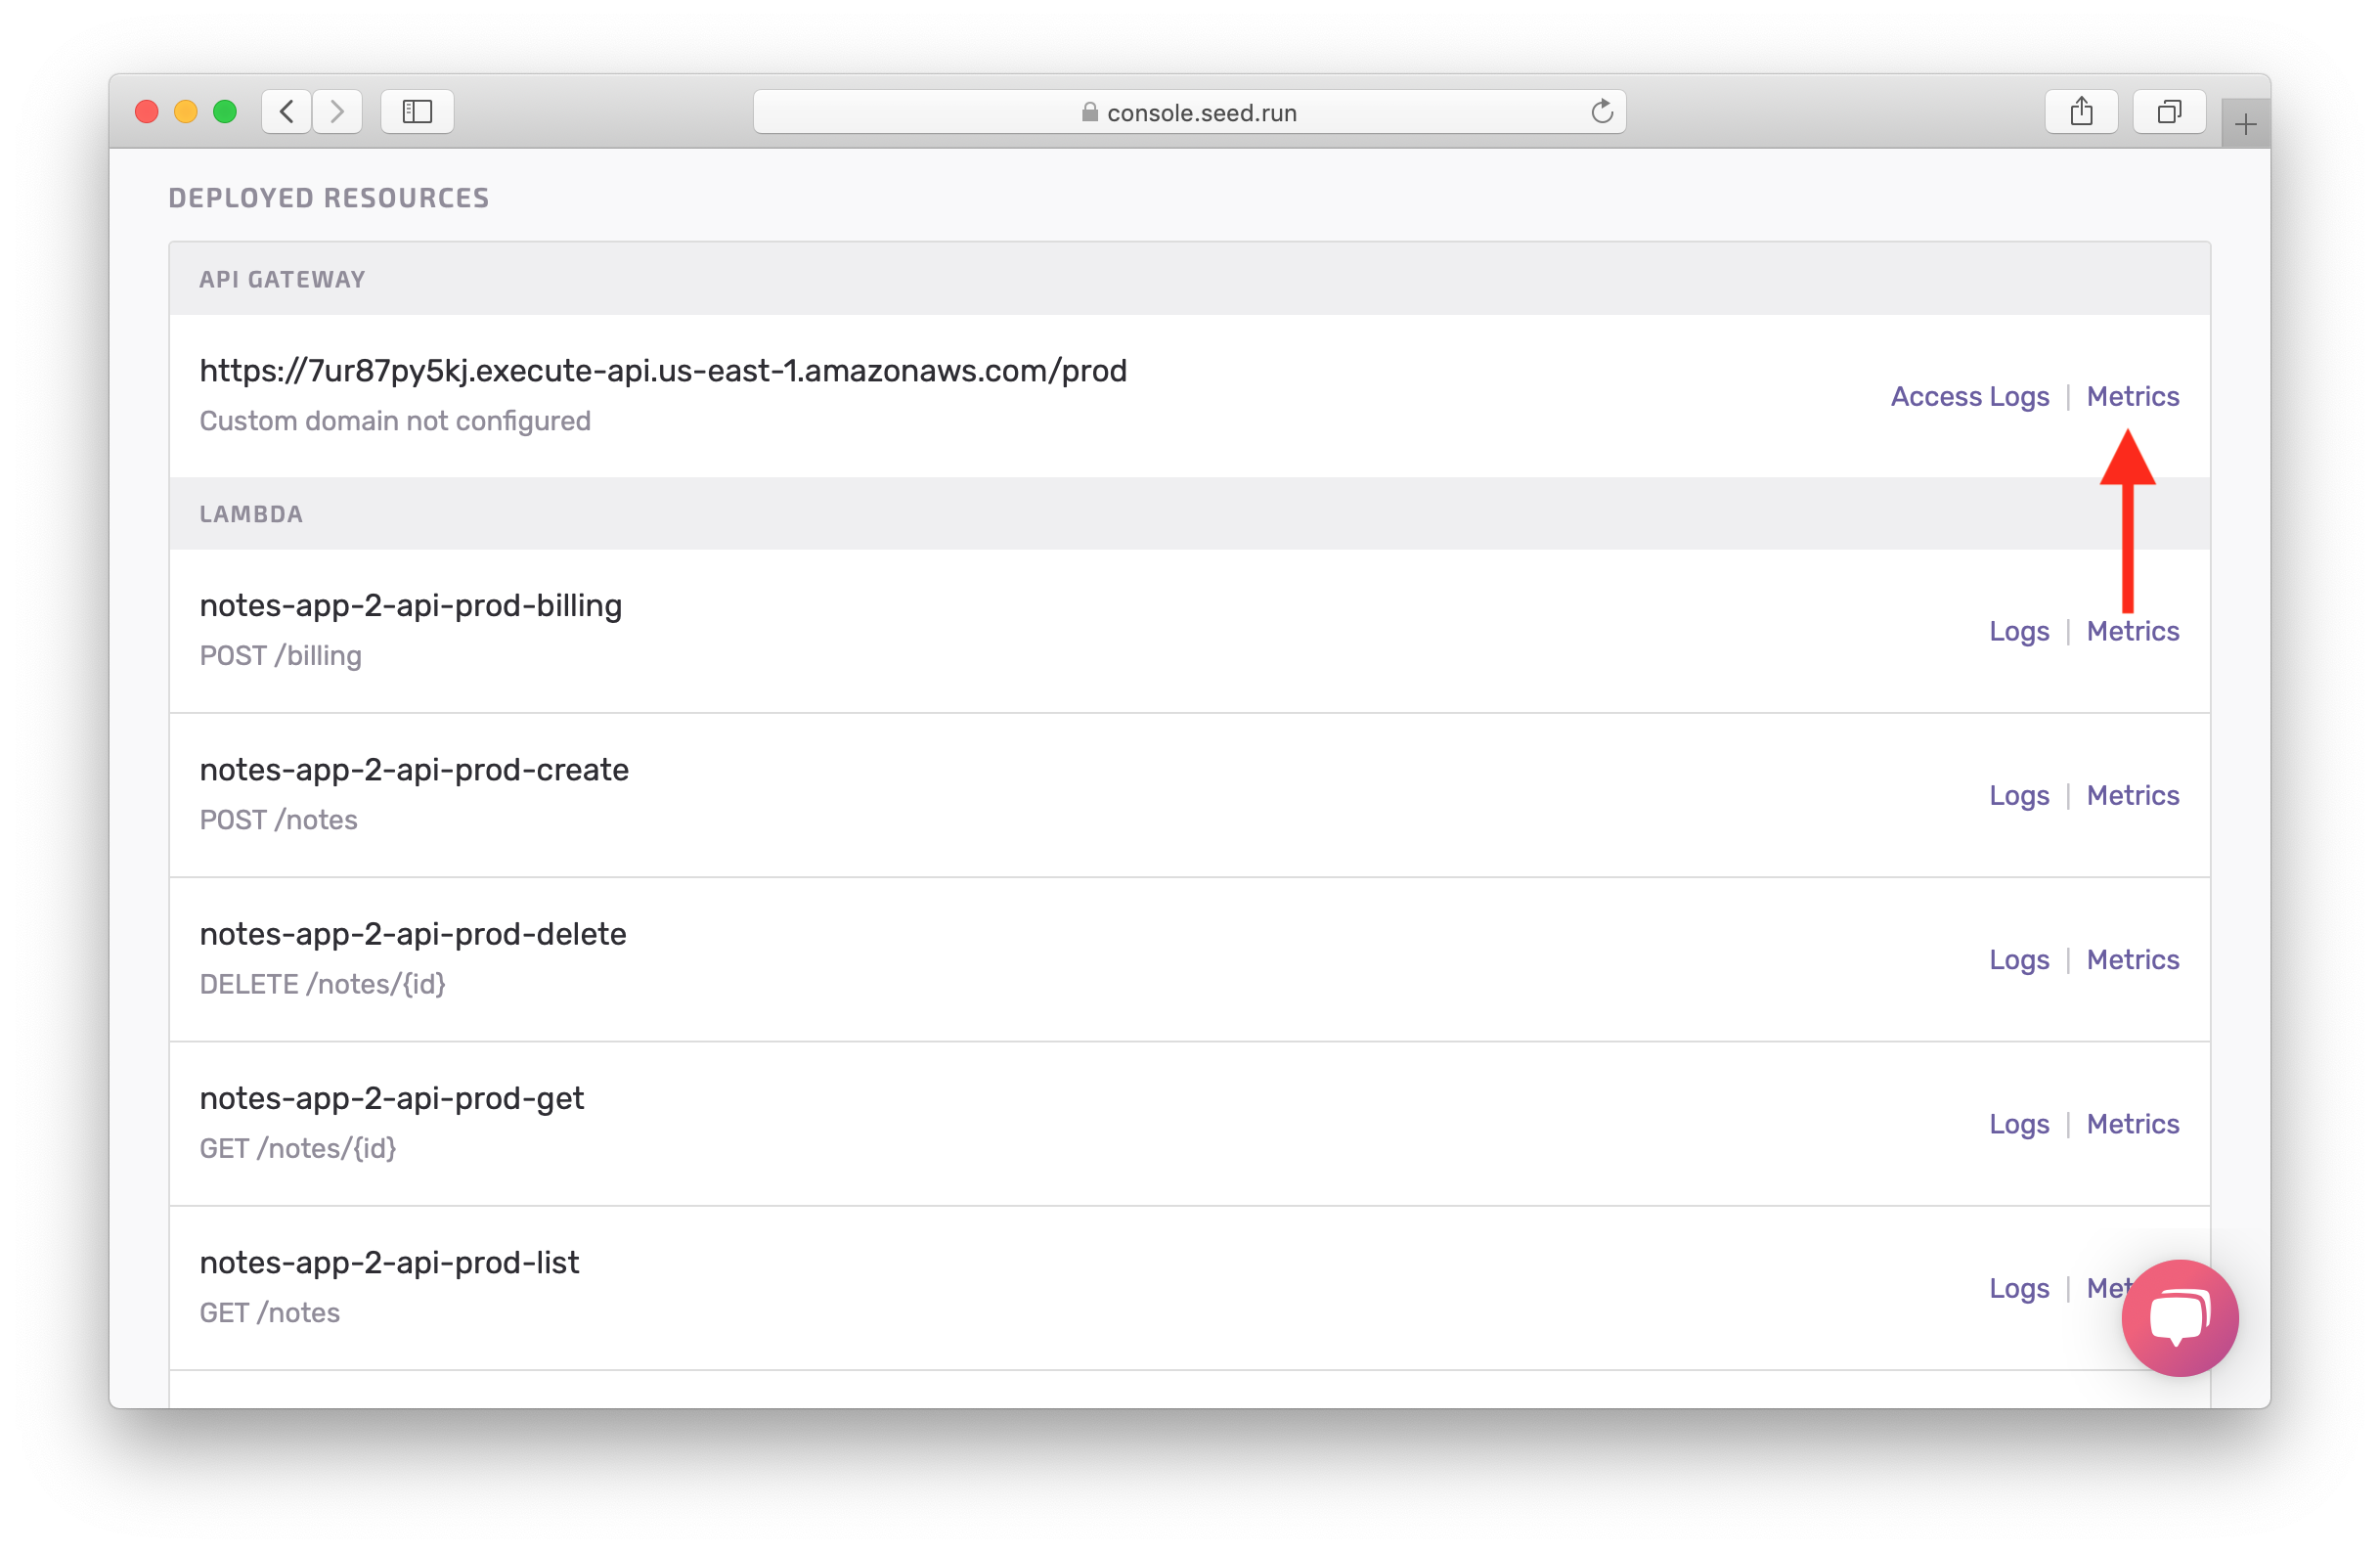
You’ll notice the number of requests that were made, 4xx errors, 5xx error, and latency for those requests.
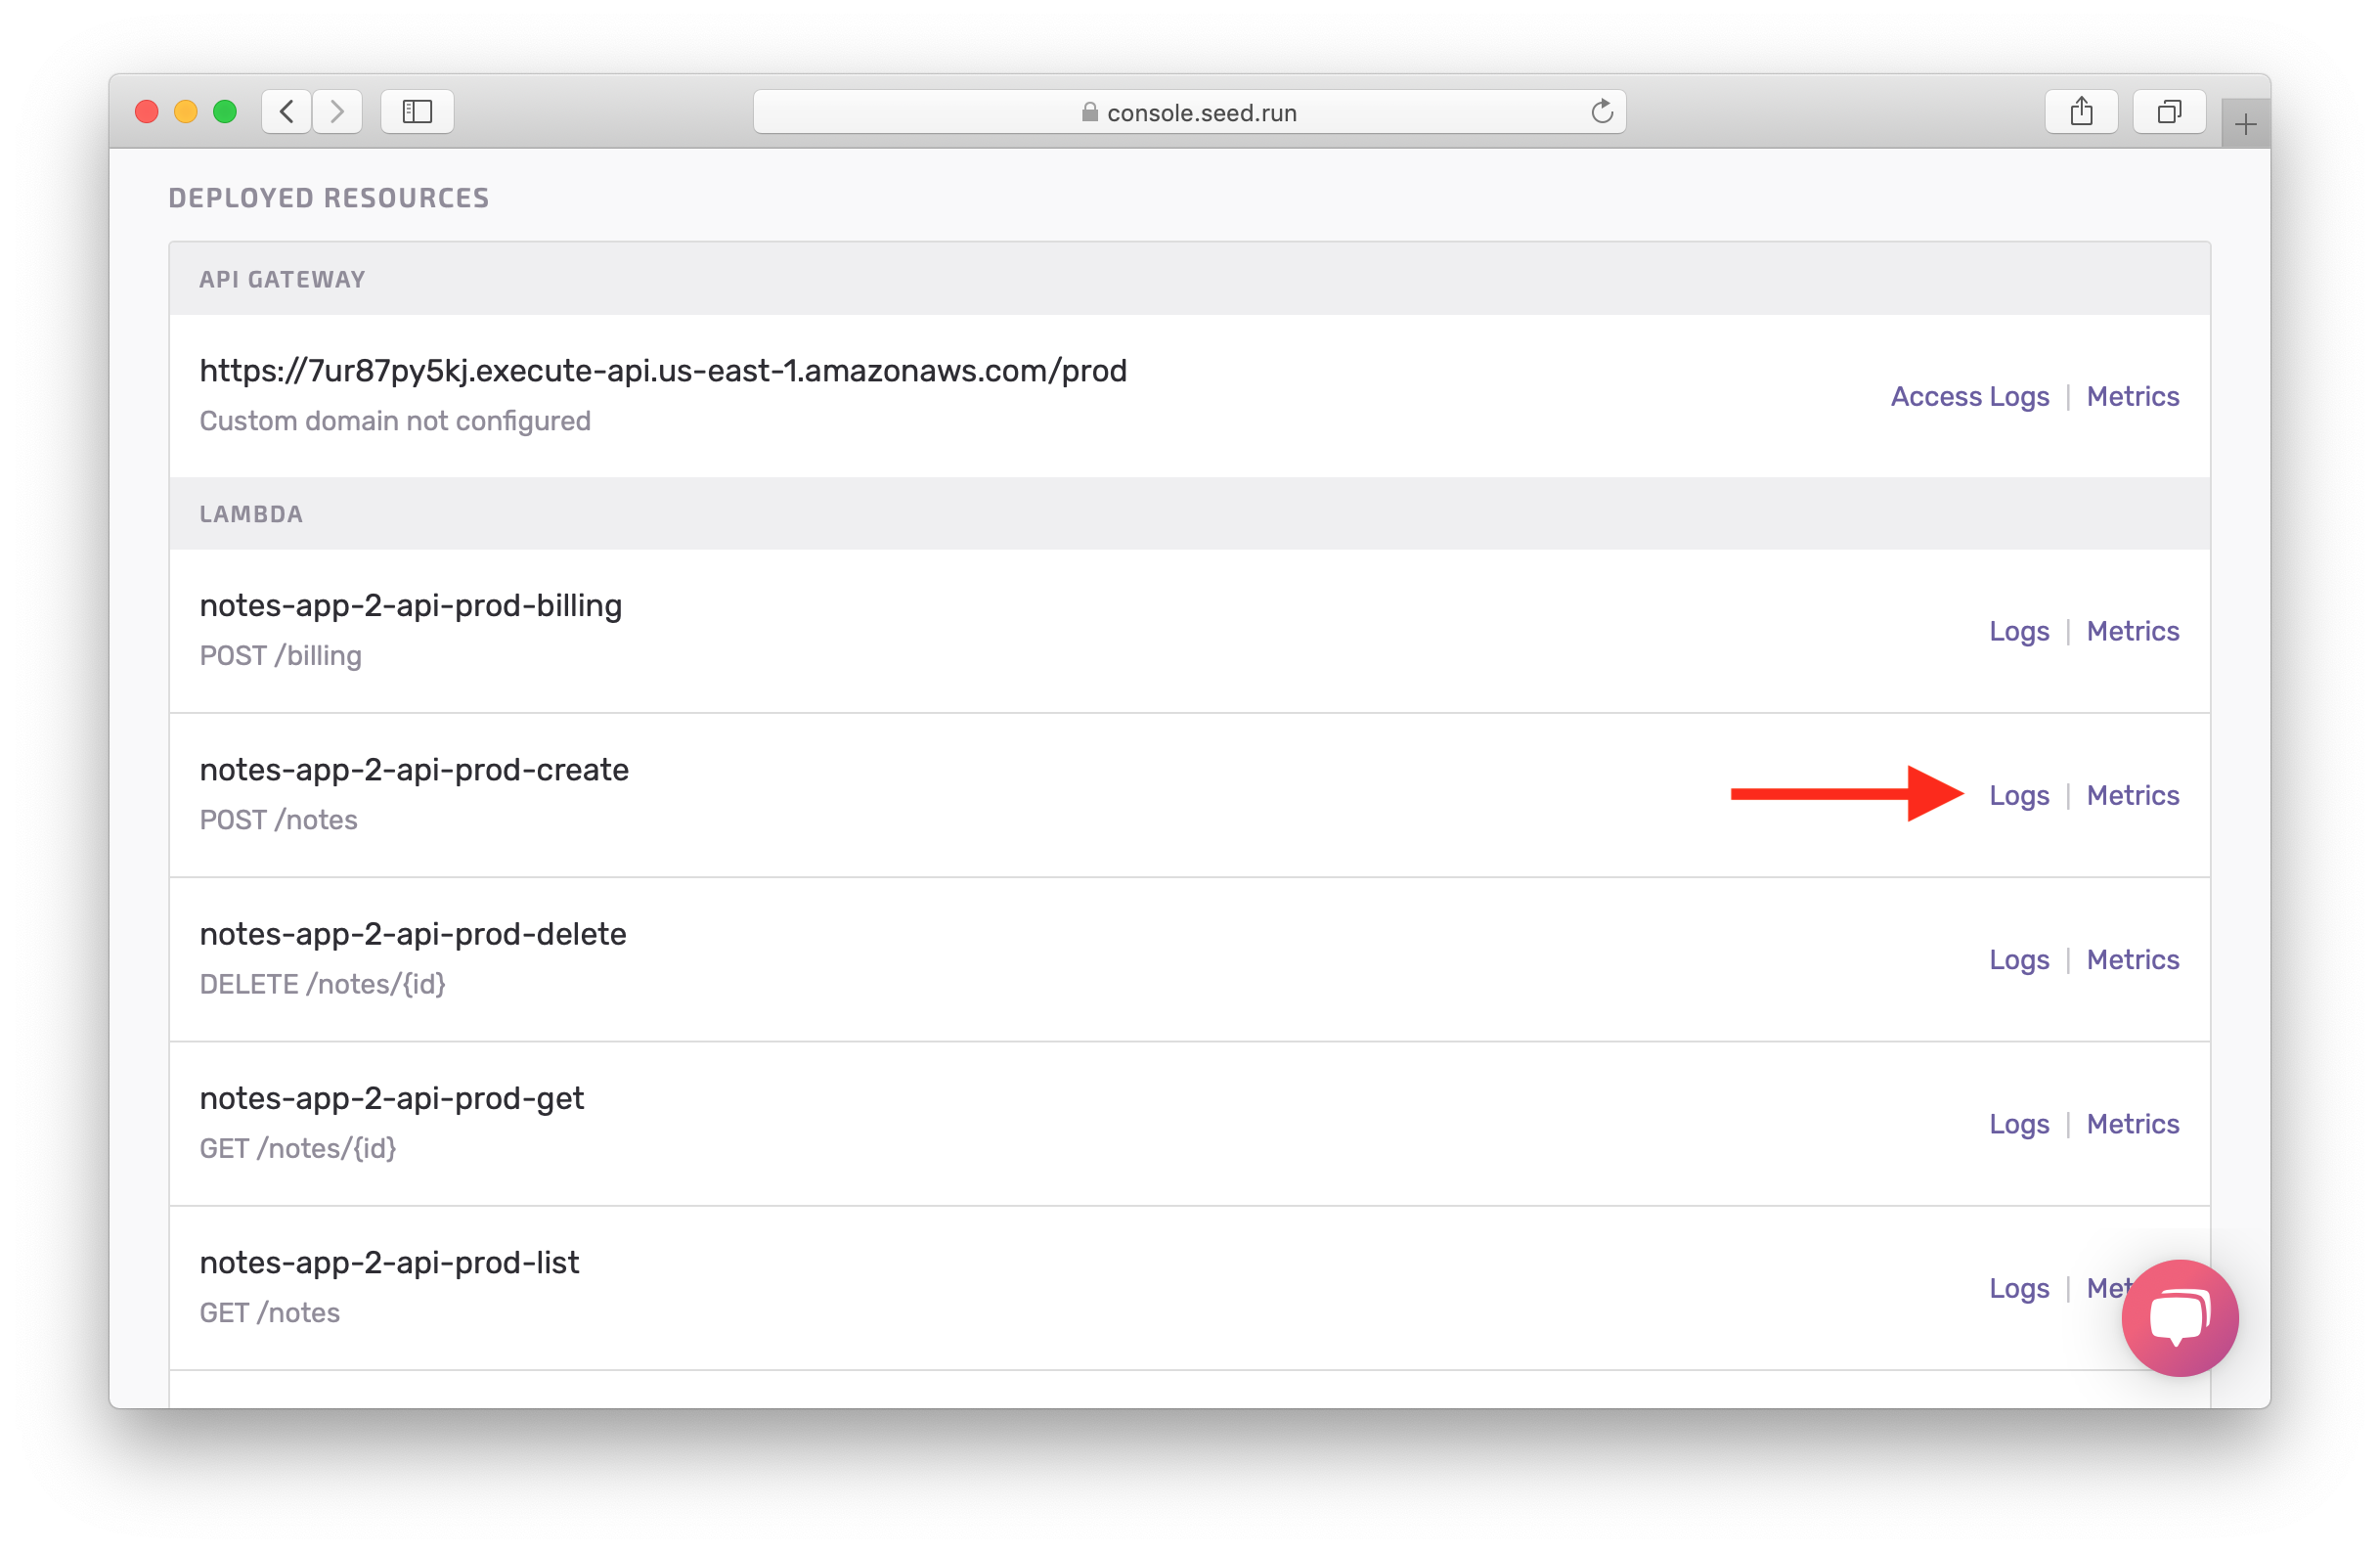
Now if we go back and click on the Logs for the create Lambda function.
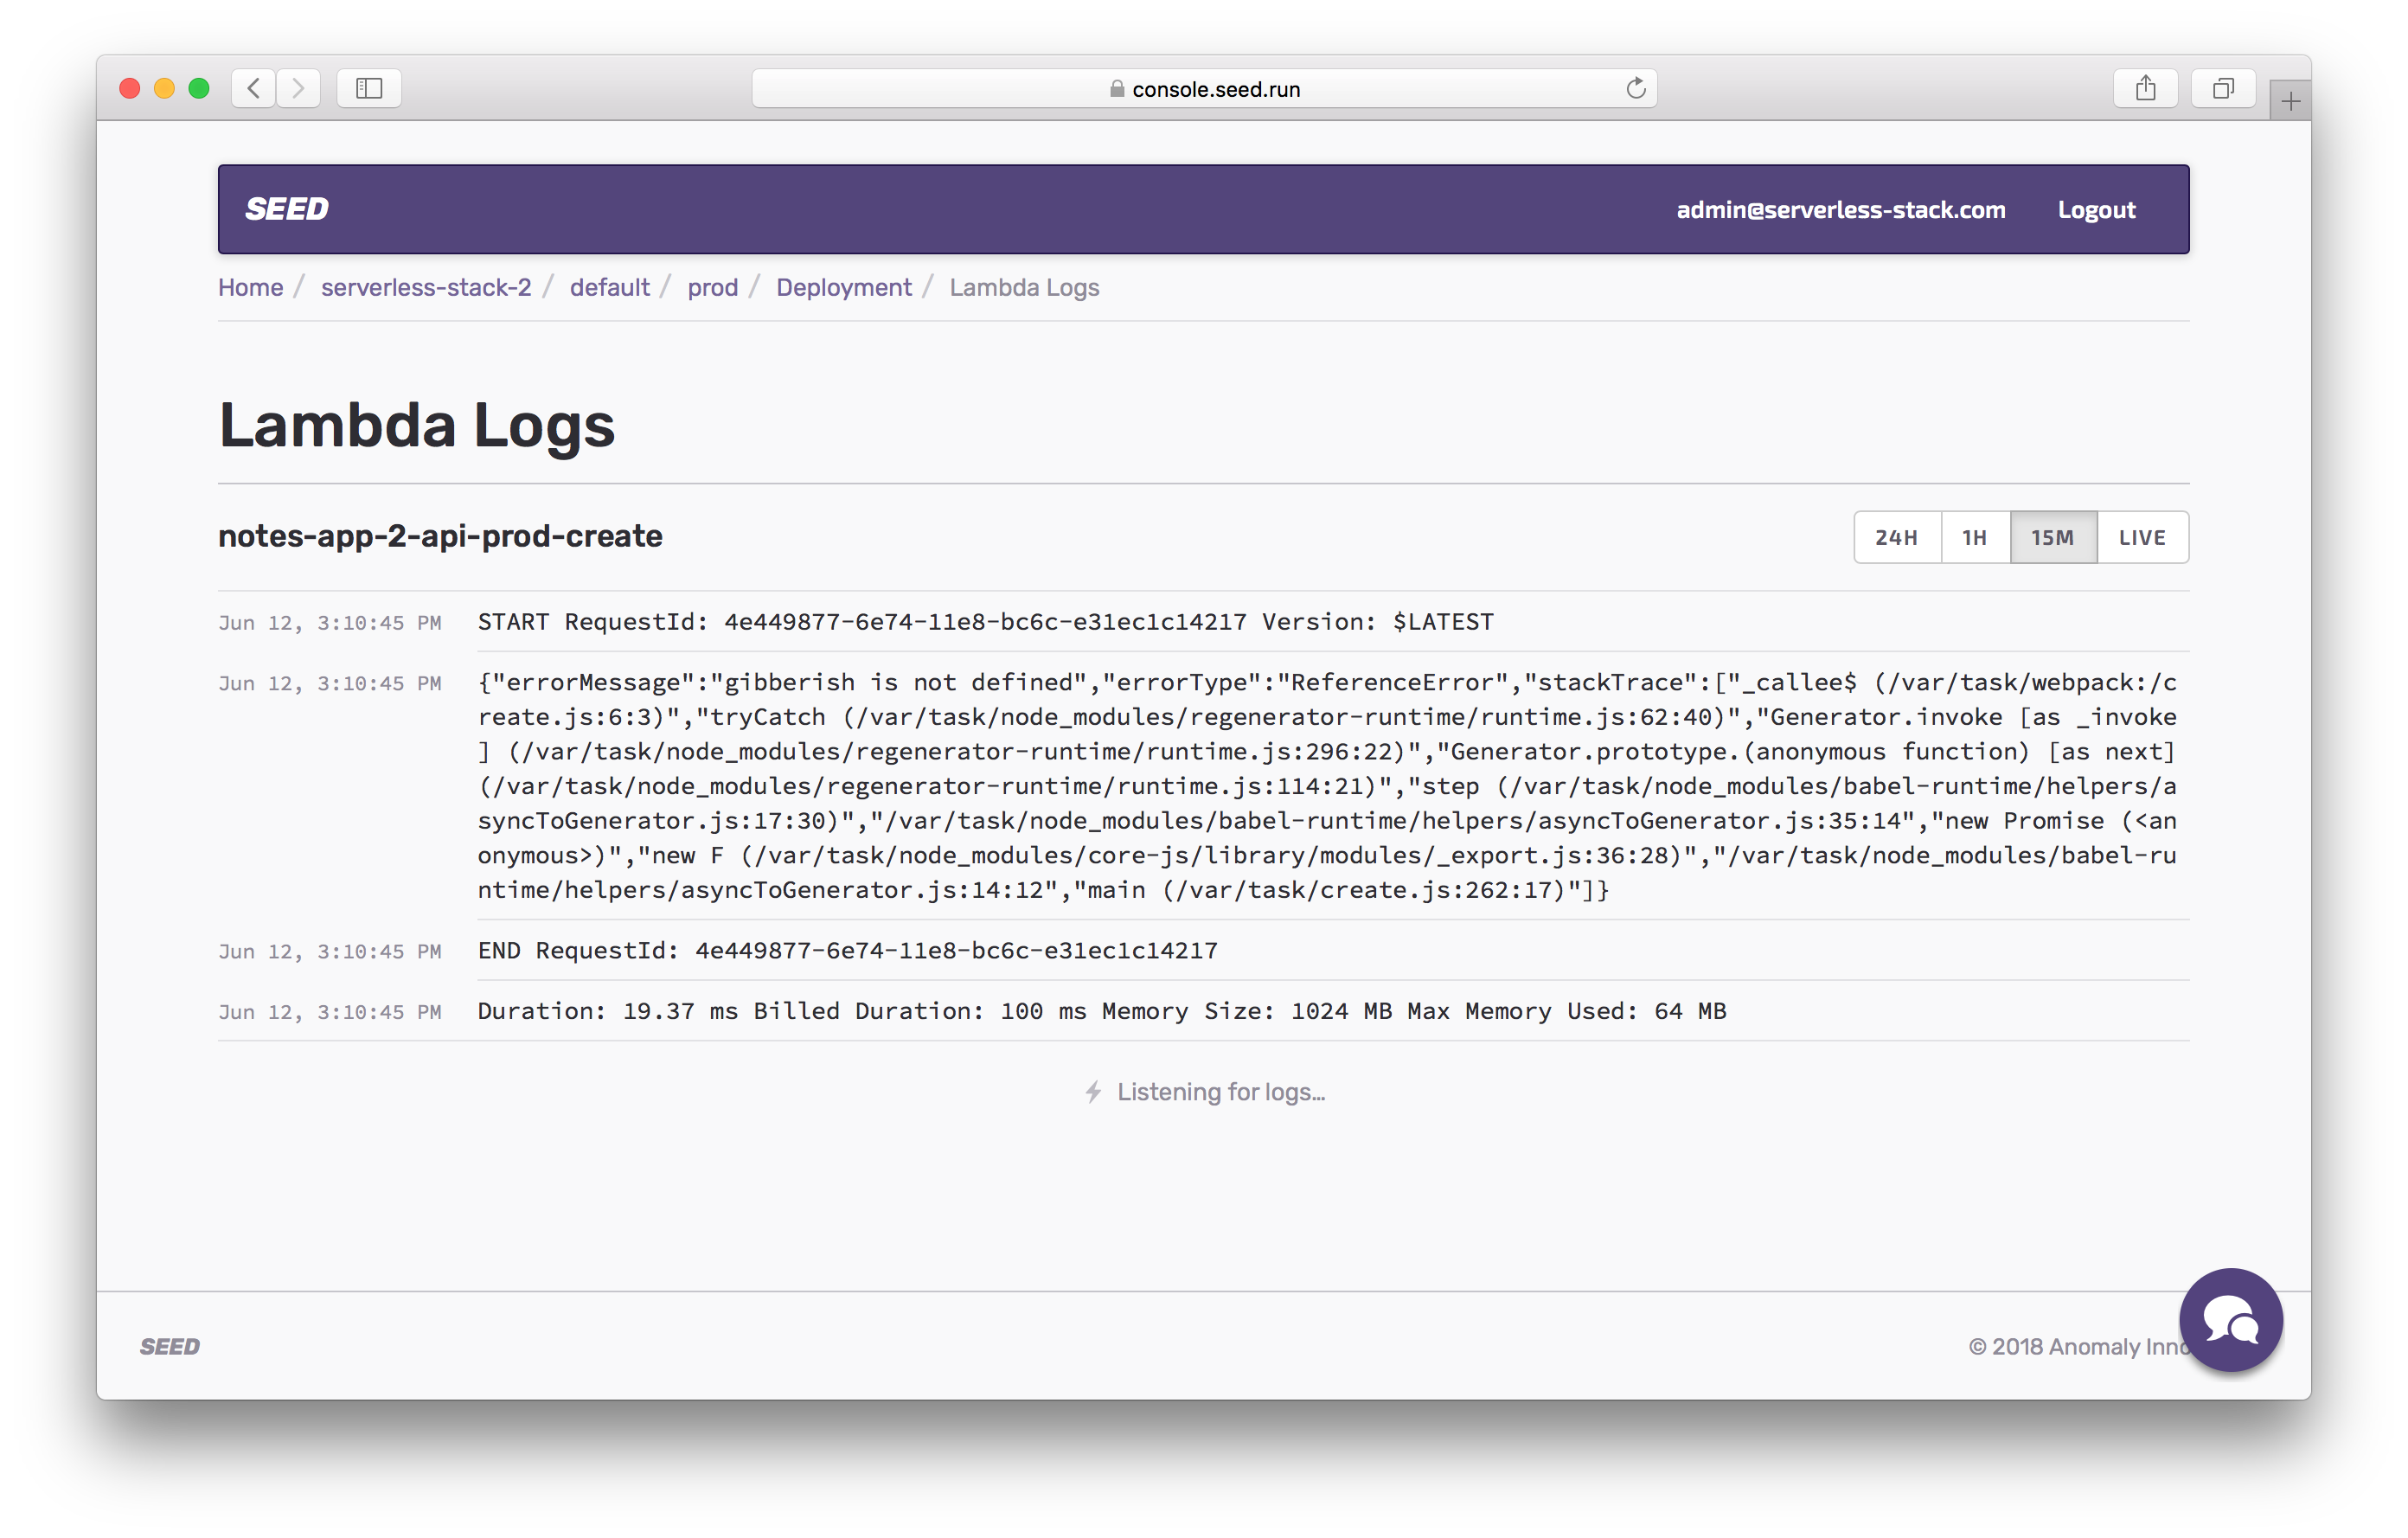
This should show you clearly that there was an error in our code. Notice, that it is complaining that gibberish is not defined.
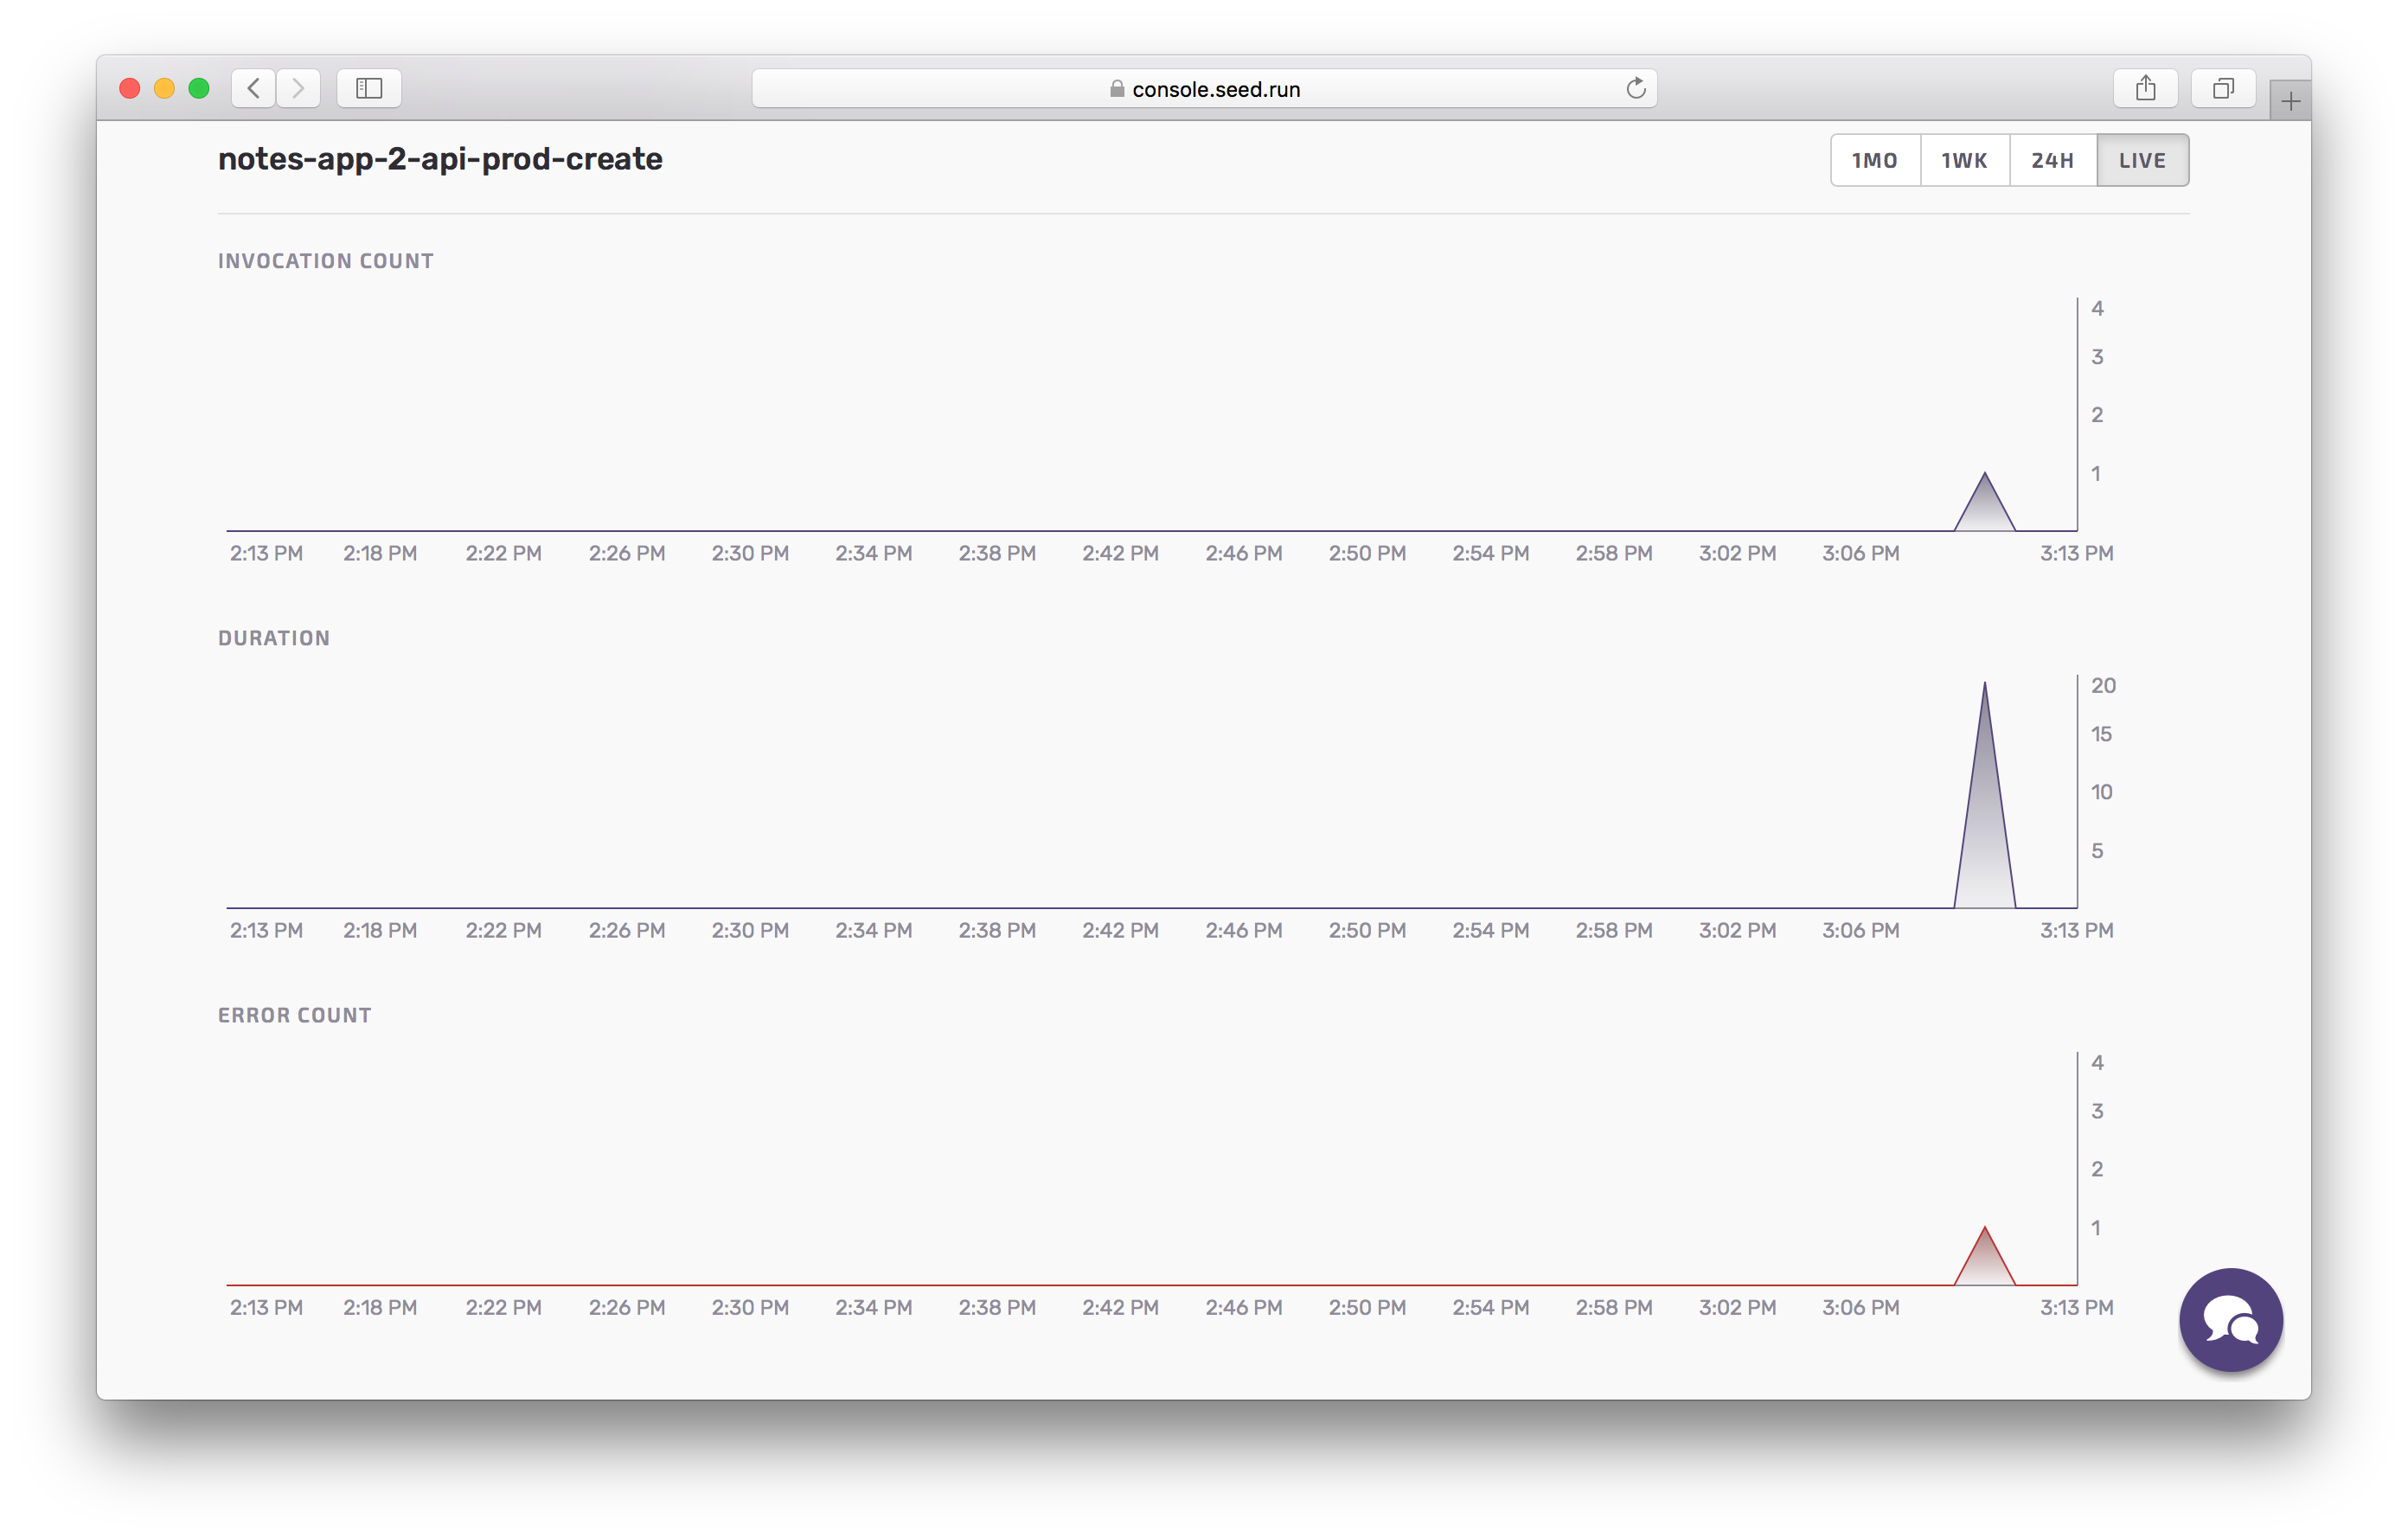
And just like the API metrics, the Lambda metrics will show you an overview of what is going on at a function level.
Rollback in Production
Now obviously, we have a problem. Usually you might be tempted to fix the code and push and promote the change. But since our users might be affected by faulty promotions to prod, we want to rollback our changes immediately.
To do this, head back to the prod stage. And hit the Rollback button on the previous build we had in production.
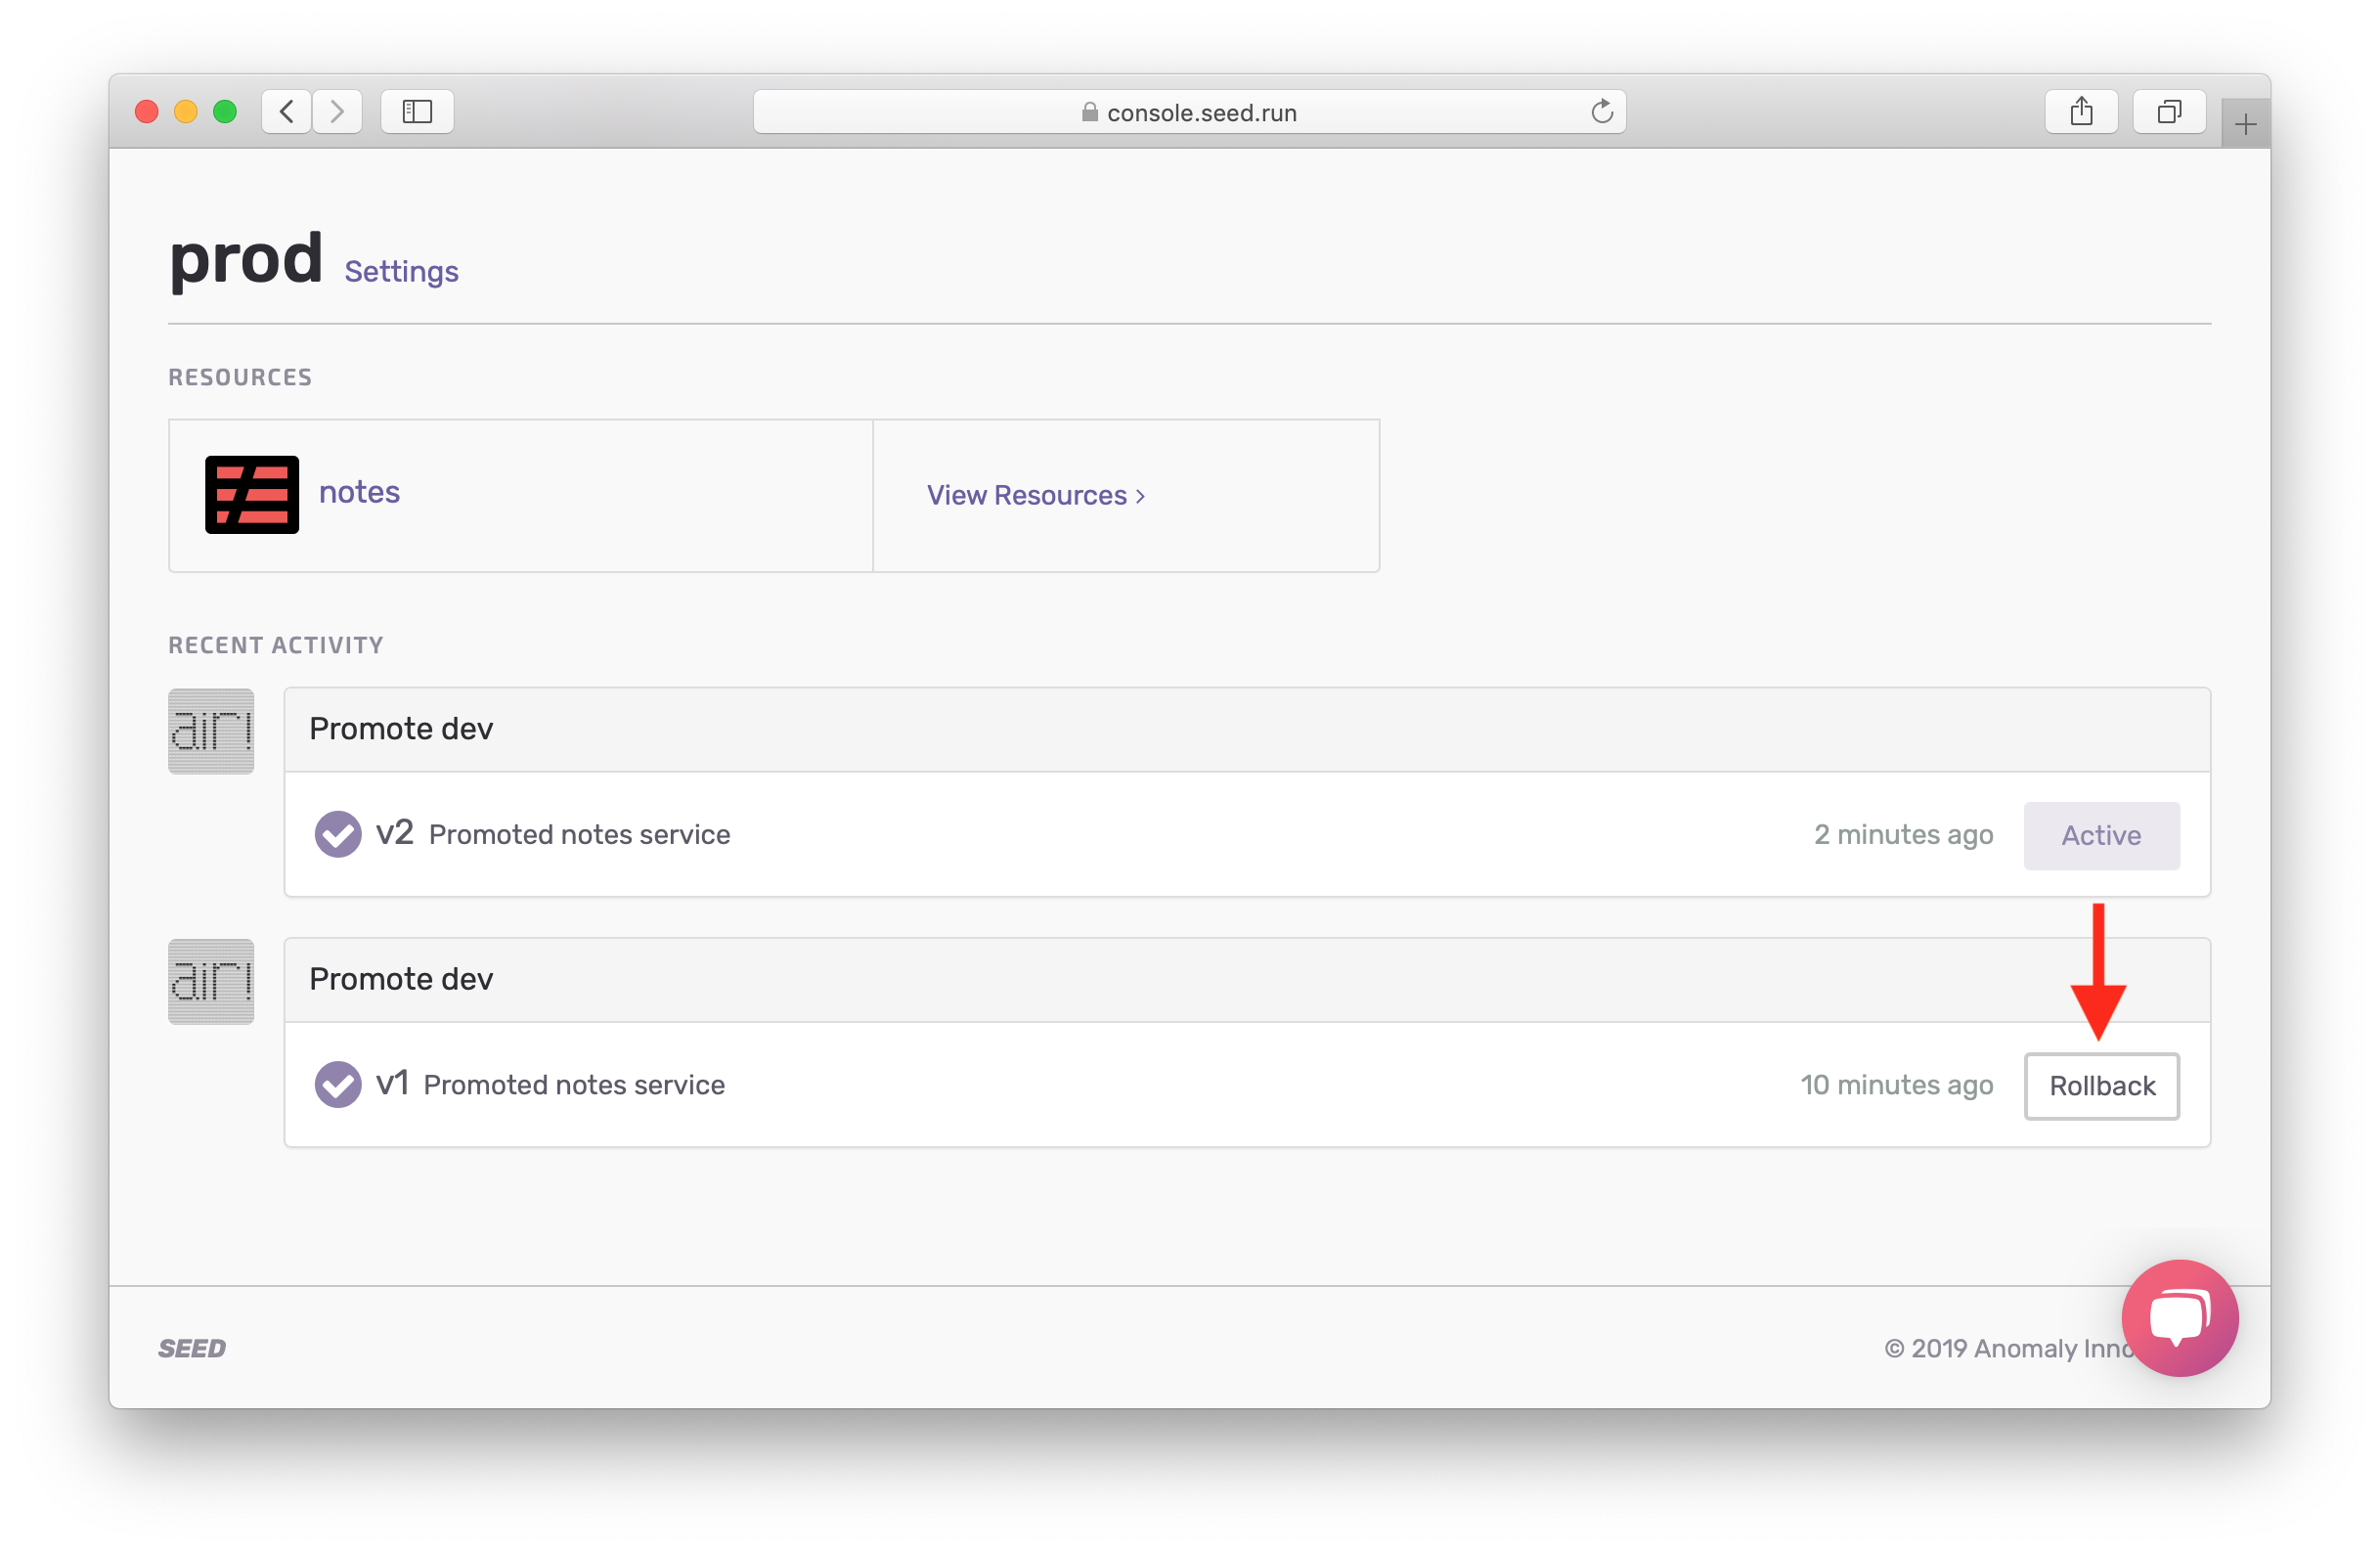
Seed keeps track of your past builds and simply uses the previously built package to deploy it again.
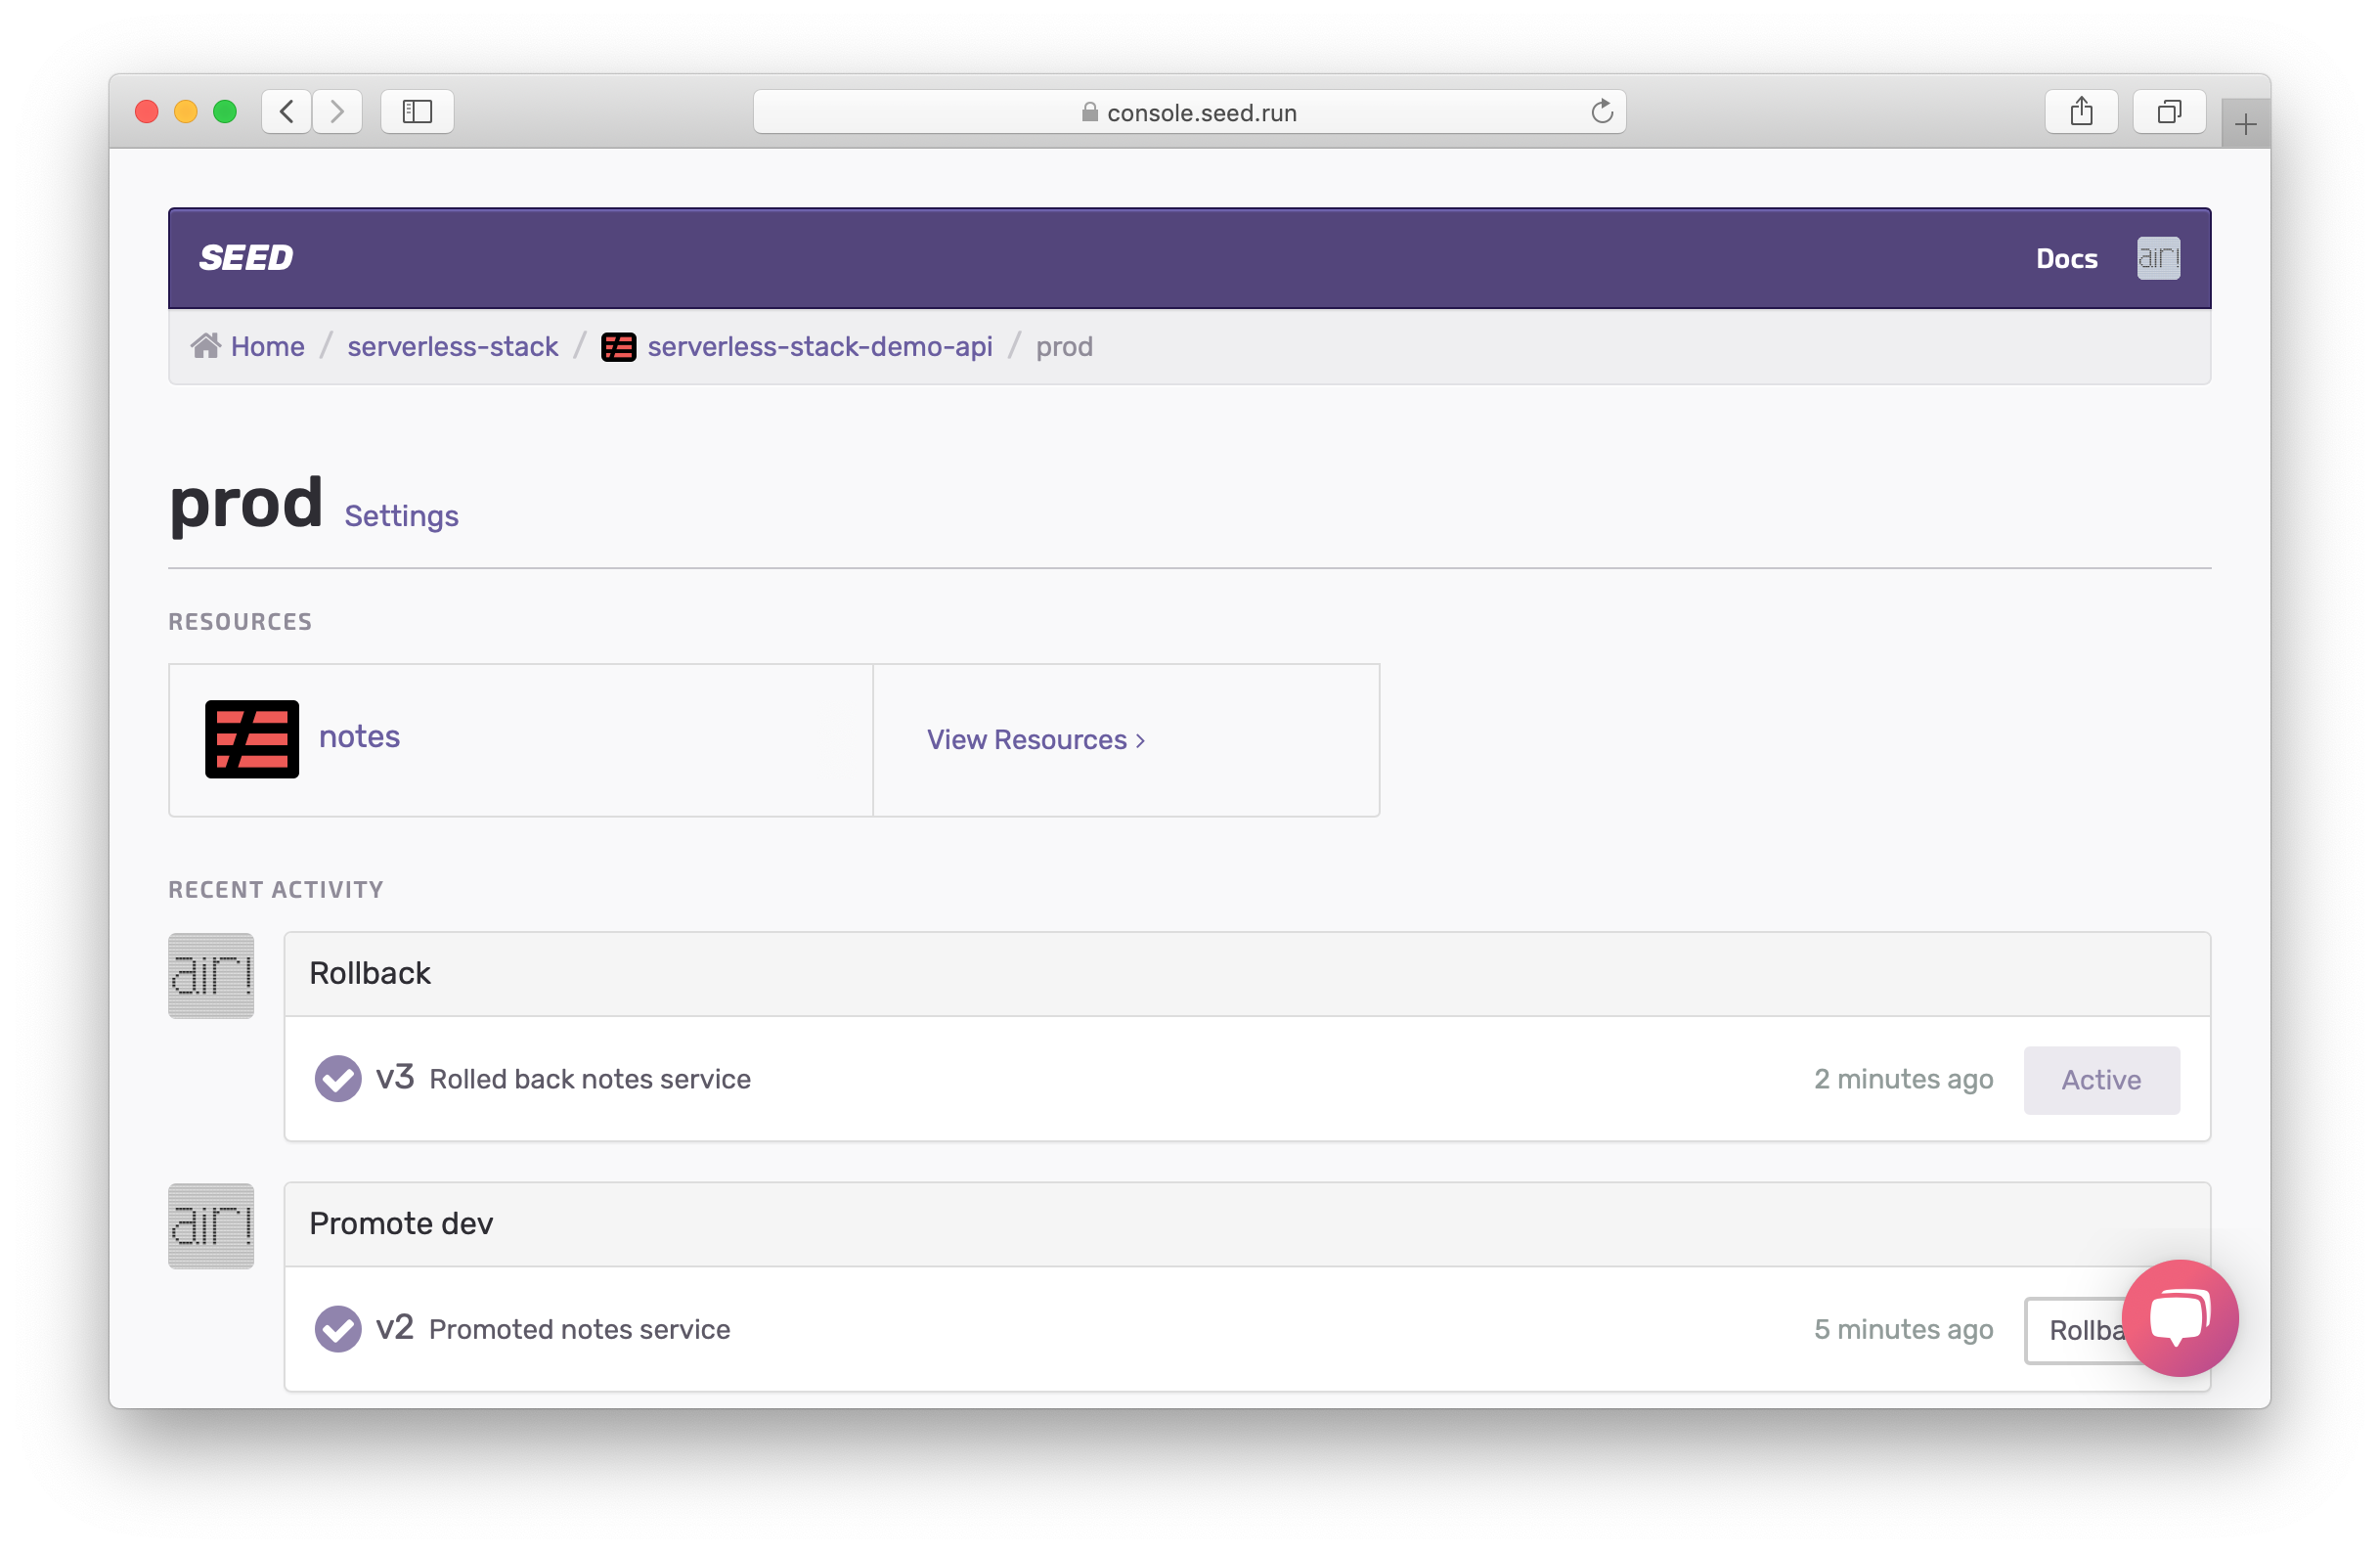
And now if you run your test command from before.
$ npx aws-api-gateway-cli-test \
--username='admin@example.com' \
--password='Passw0rd!' \
--user-pool-id='YOUR_PROD_COGNITO_USER_POOL_ID' \
--app-client-id='YOUR_PROD_COGNITO_APP_CLIENT_ID' \
--cognito-region='YOUR_PROD_COGNITO_REGION' \
--identity-pool-id='YOUR_PROD_IDENTITY_POOL_ID' \
--invoke-url='YOUR_PROD_API_GATEWAY_URL' \
--api-gateway-region='YOUR_PROD_API_GATEWAY_REGION' \
--path-template='/notes' \
--method='POST' \
--body='{"content":"hello world","attachment":"hello.jpg"}'
You should see it succeed this time.
Authenticating with User Pool
Getting temporary credentials
Making API request
{ status: 200,
  statusText: 'OK',
  data:
   { userId: 'us-east-1:9bdc031d-ee9e-4ffa-9a2d-123456789',
     noteId: '8f7da030-650b-11e7-a661-123456789',
     content: 'hello world',
     attachment: 'hello.jpg',
     createdAt: 1499648598452 } }
Revert the Code
 Finally, don’t forget to revert your code in
 functions/create.js.
gibberish.what;
 And commit and push the changes.
$ git add .
$ git commit -m "Fixing the mistake"
$ git push
And that’s it! We are now ready to plug this into our frontend.
For help and discussion
Comments on this chapterFor reference, here is the code for Part II
Backend Part II SourceIf you liked this post, please subscribe to our newsletter, give us a star on GitHub, and follow us on Twitter.
